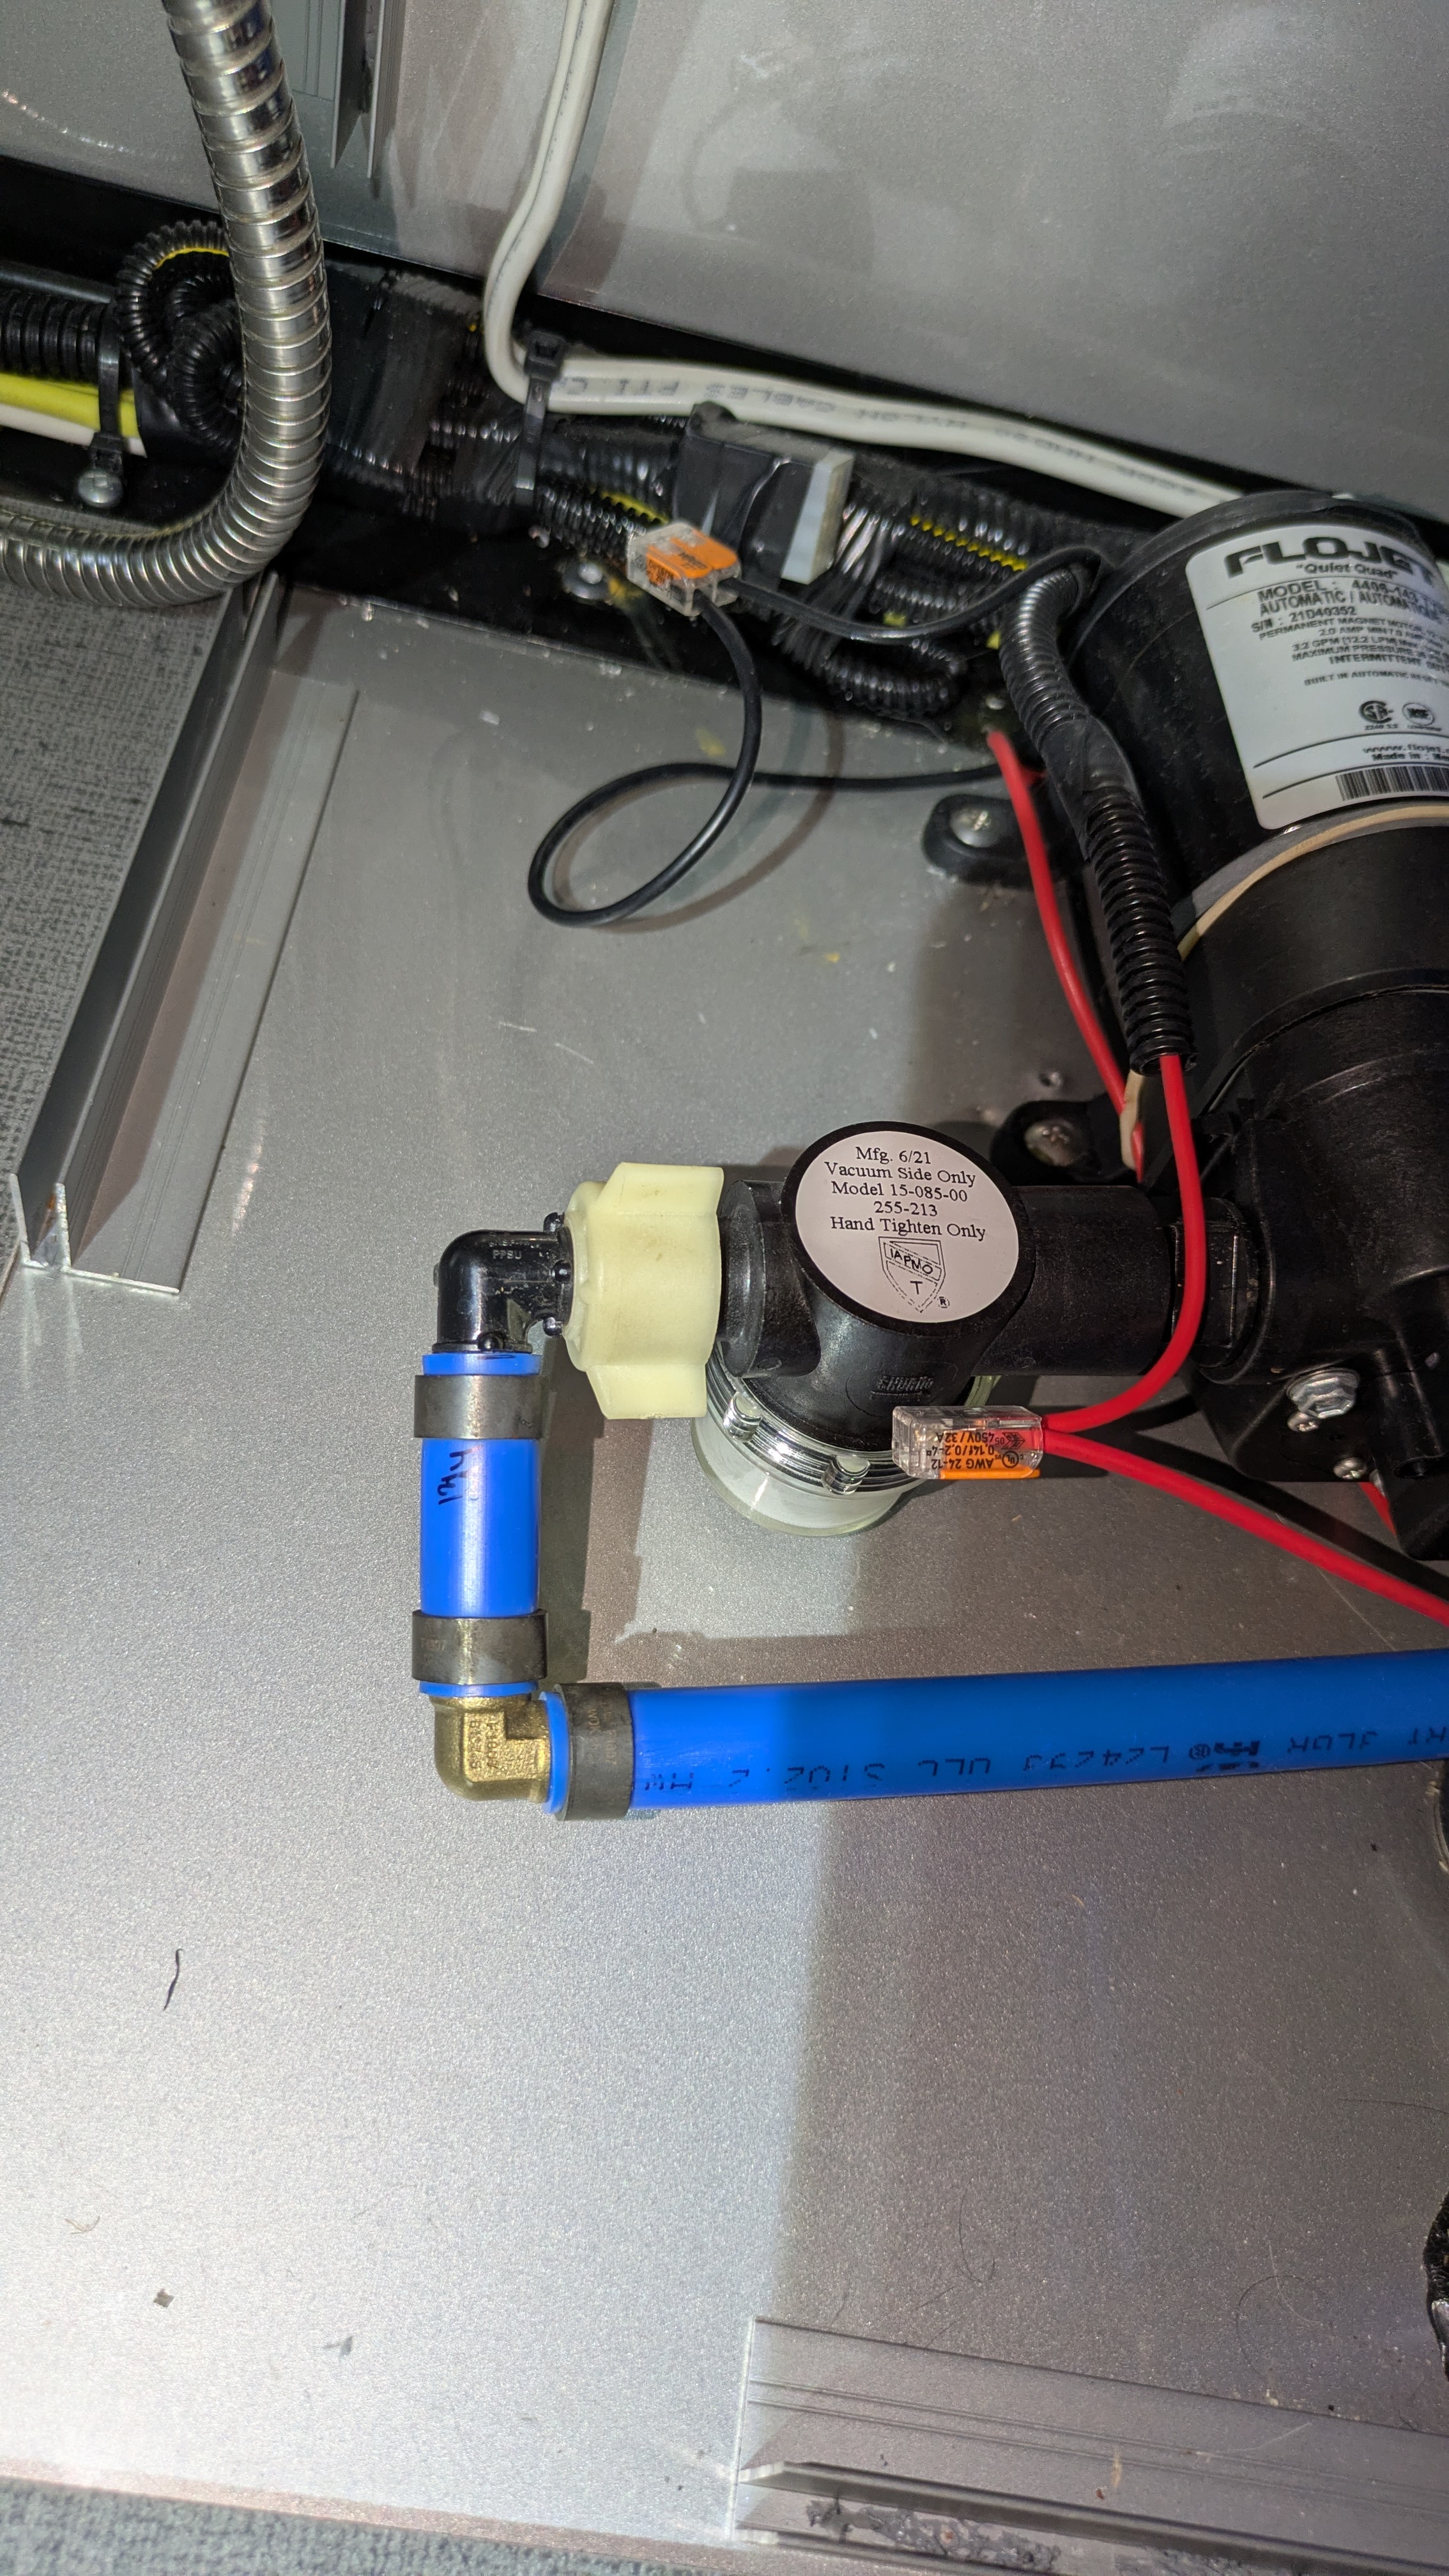
On the last day of a monthlong trip our water pump stopped pumping water. It sputtered with mostly air and the pump never shut off. Root cause was straightforward: I tightened the white PEX connector at the pump intake and the pump was back to normal. I also found some gunk in the threads and cleaned it out with compressed air, not sure if that contributed to the problem. This connector is meant to be hand-tightened, don’t use a wrench.
In the course of diagnosing the first problem I futzed with the check valve. Herein lies the story of problem #2. For reference all the action happened with a 2023 Safari Condo (SC) Alto F1743, YMMV.
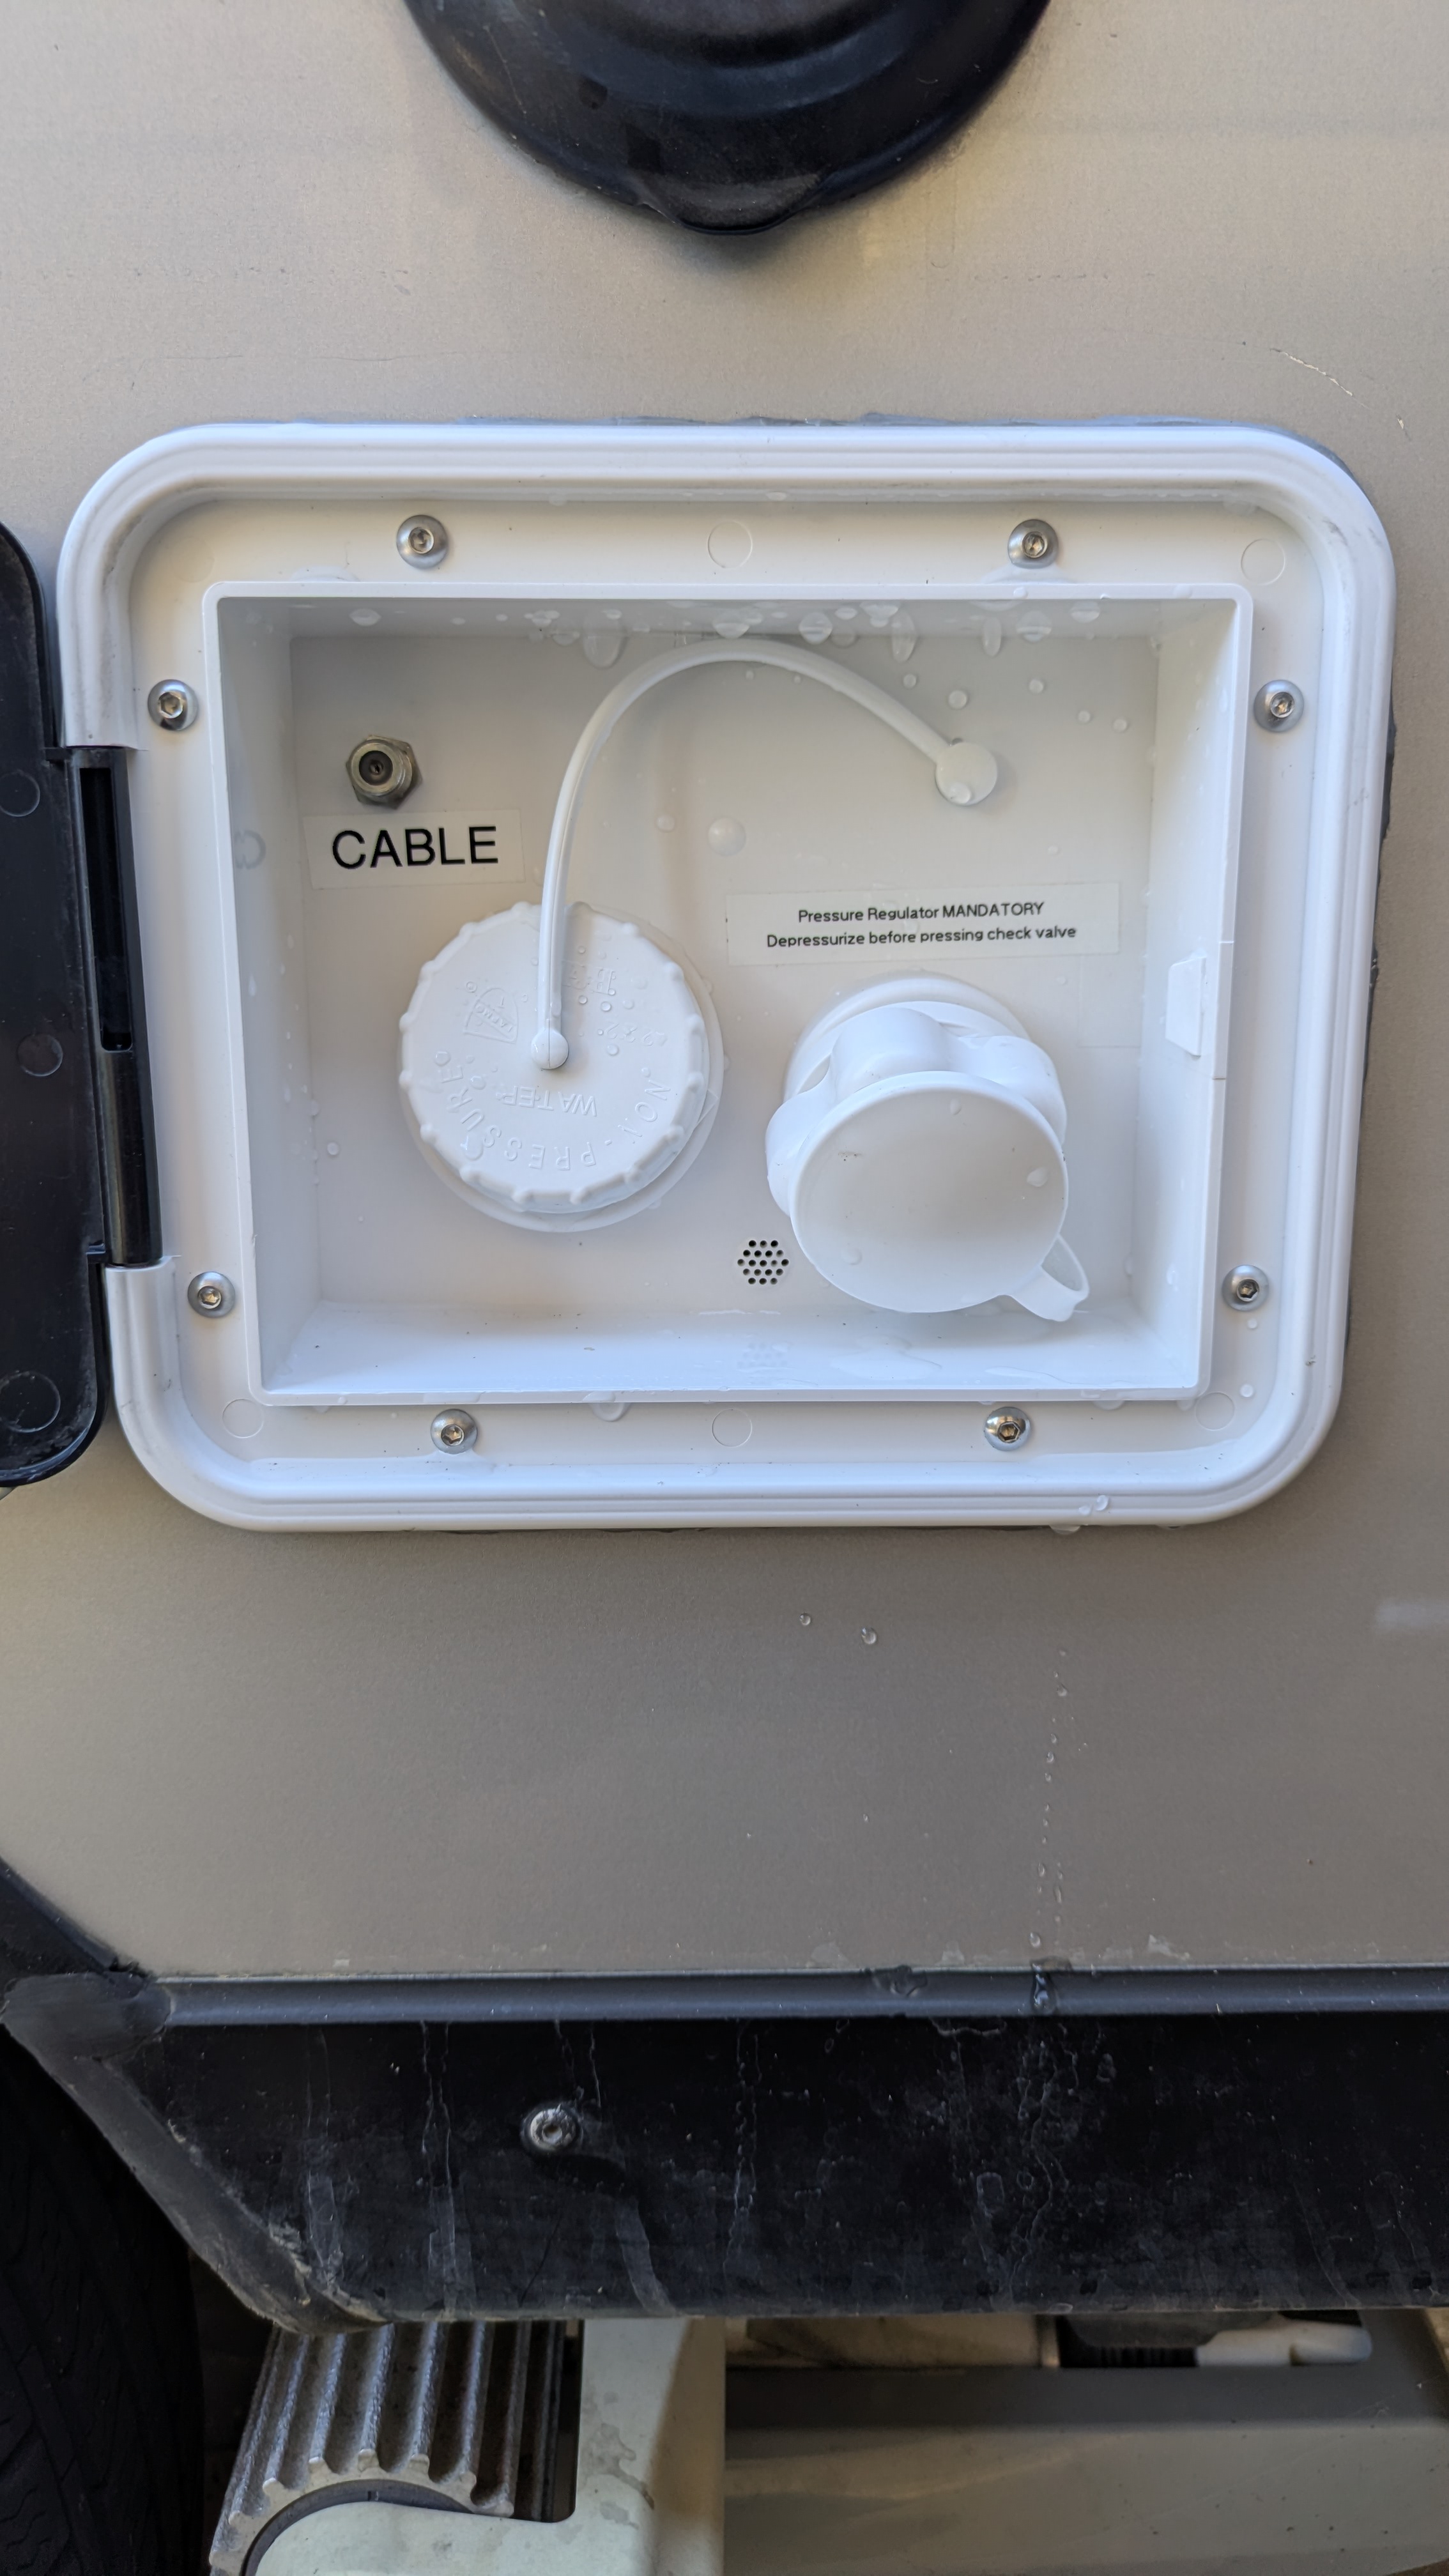
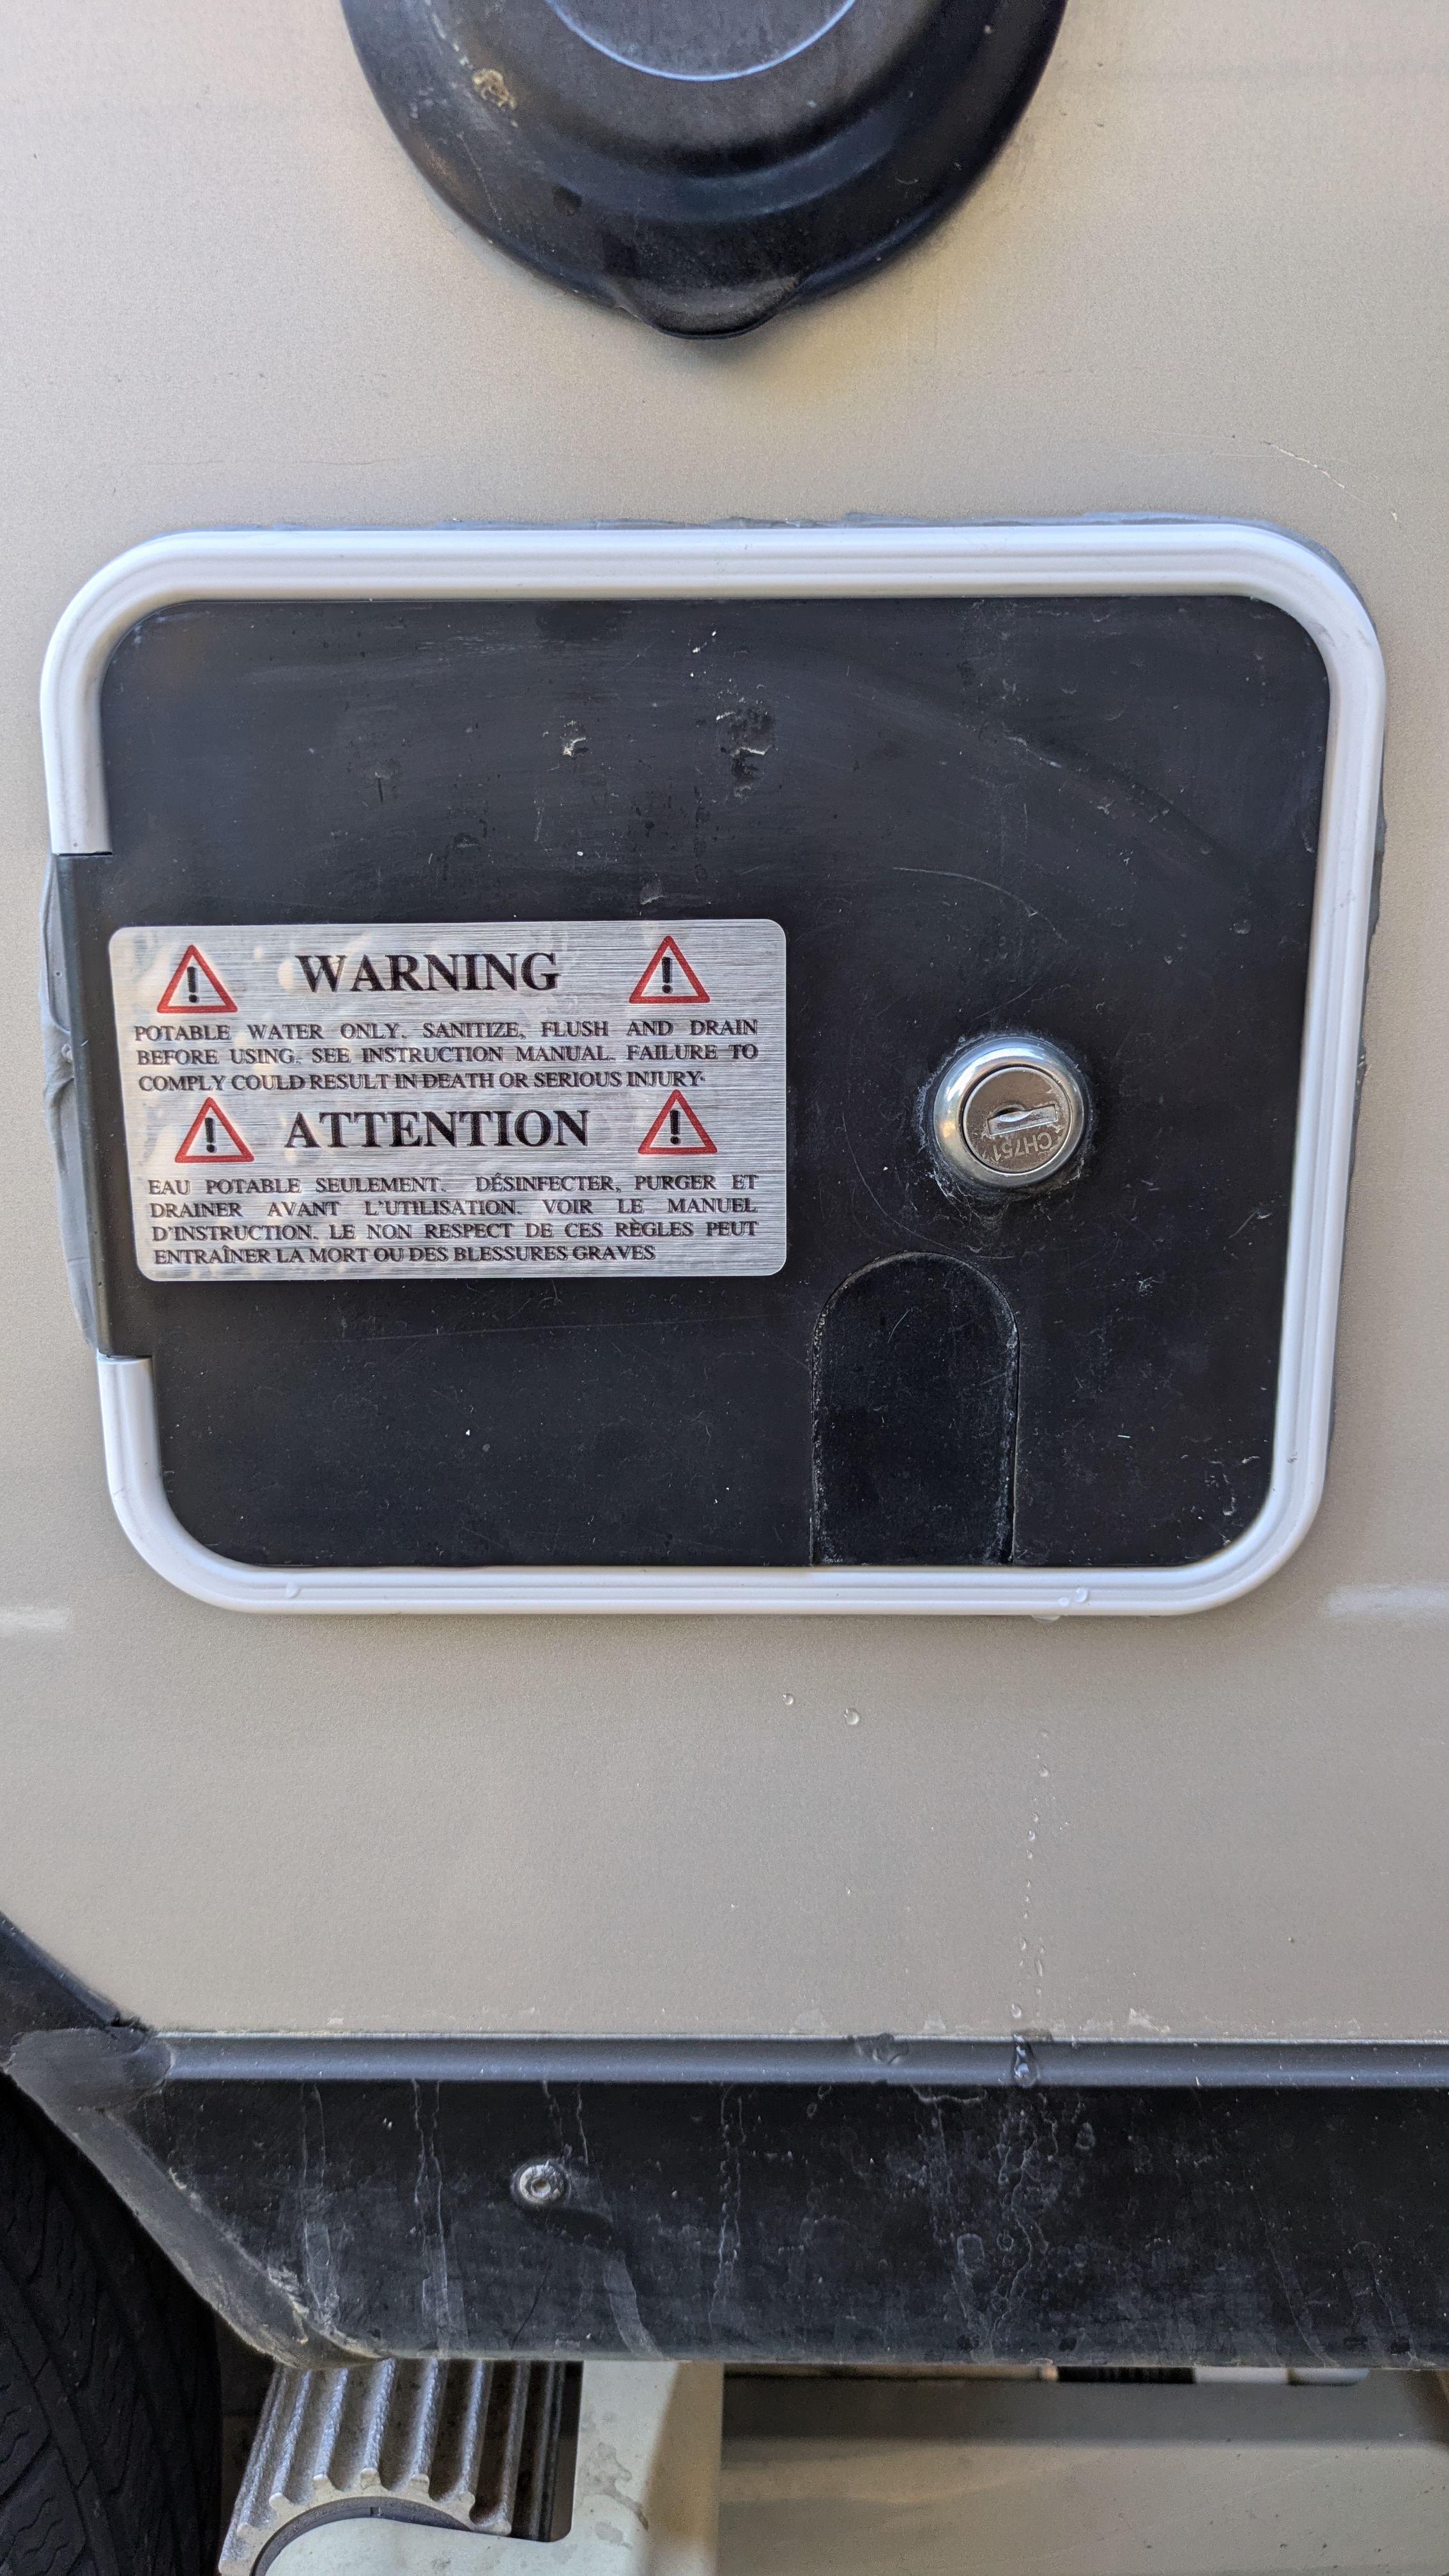
What? Where?
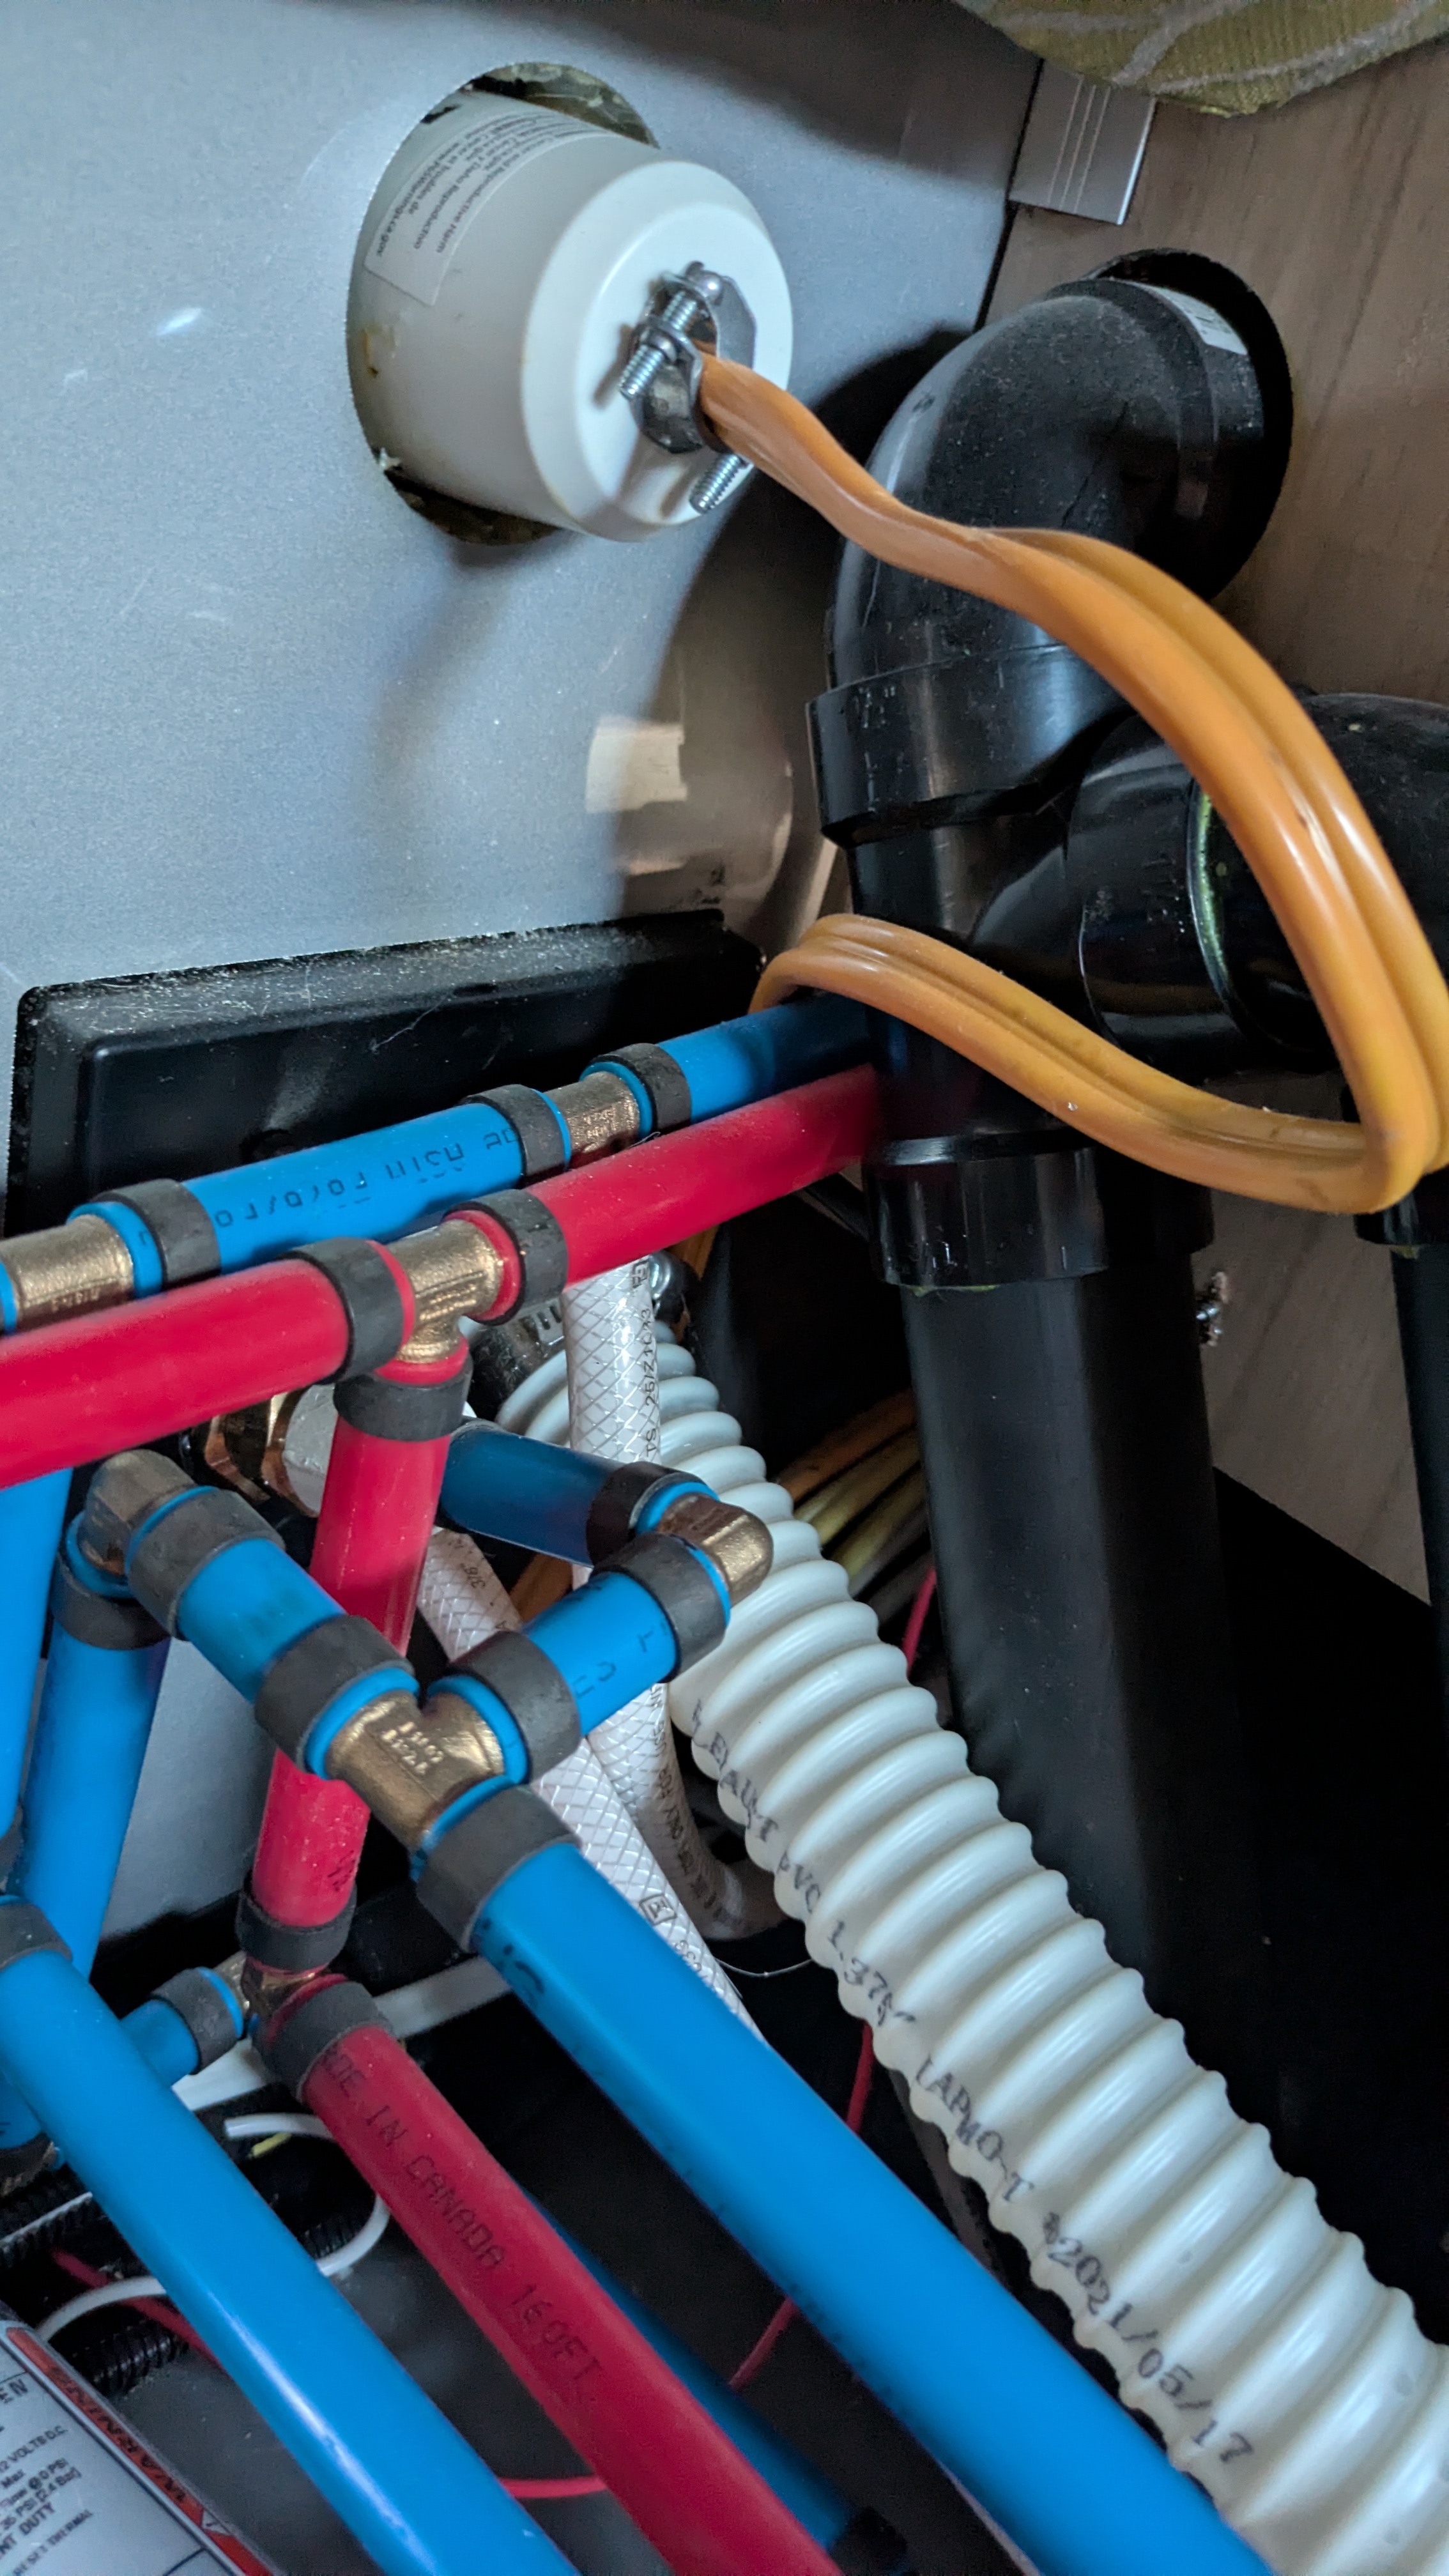
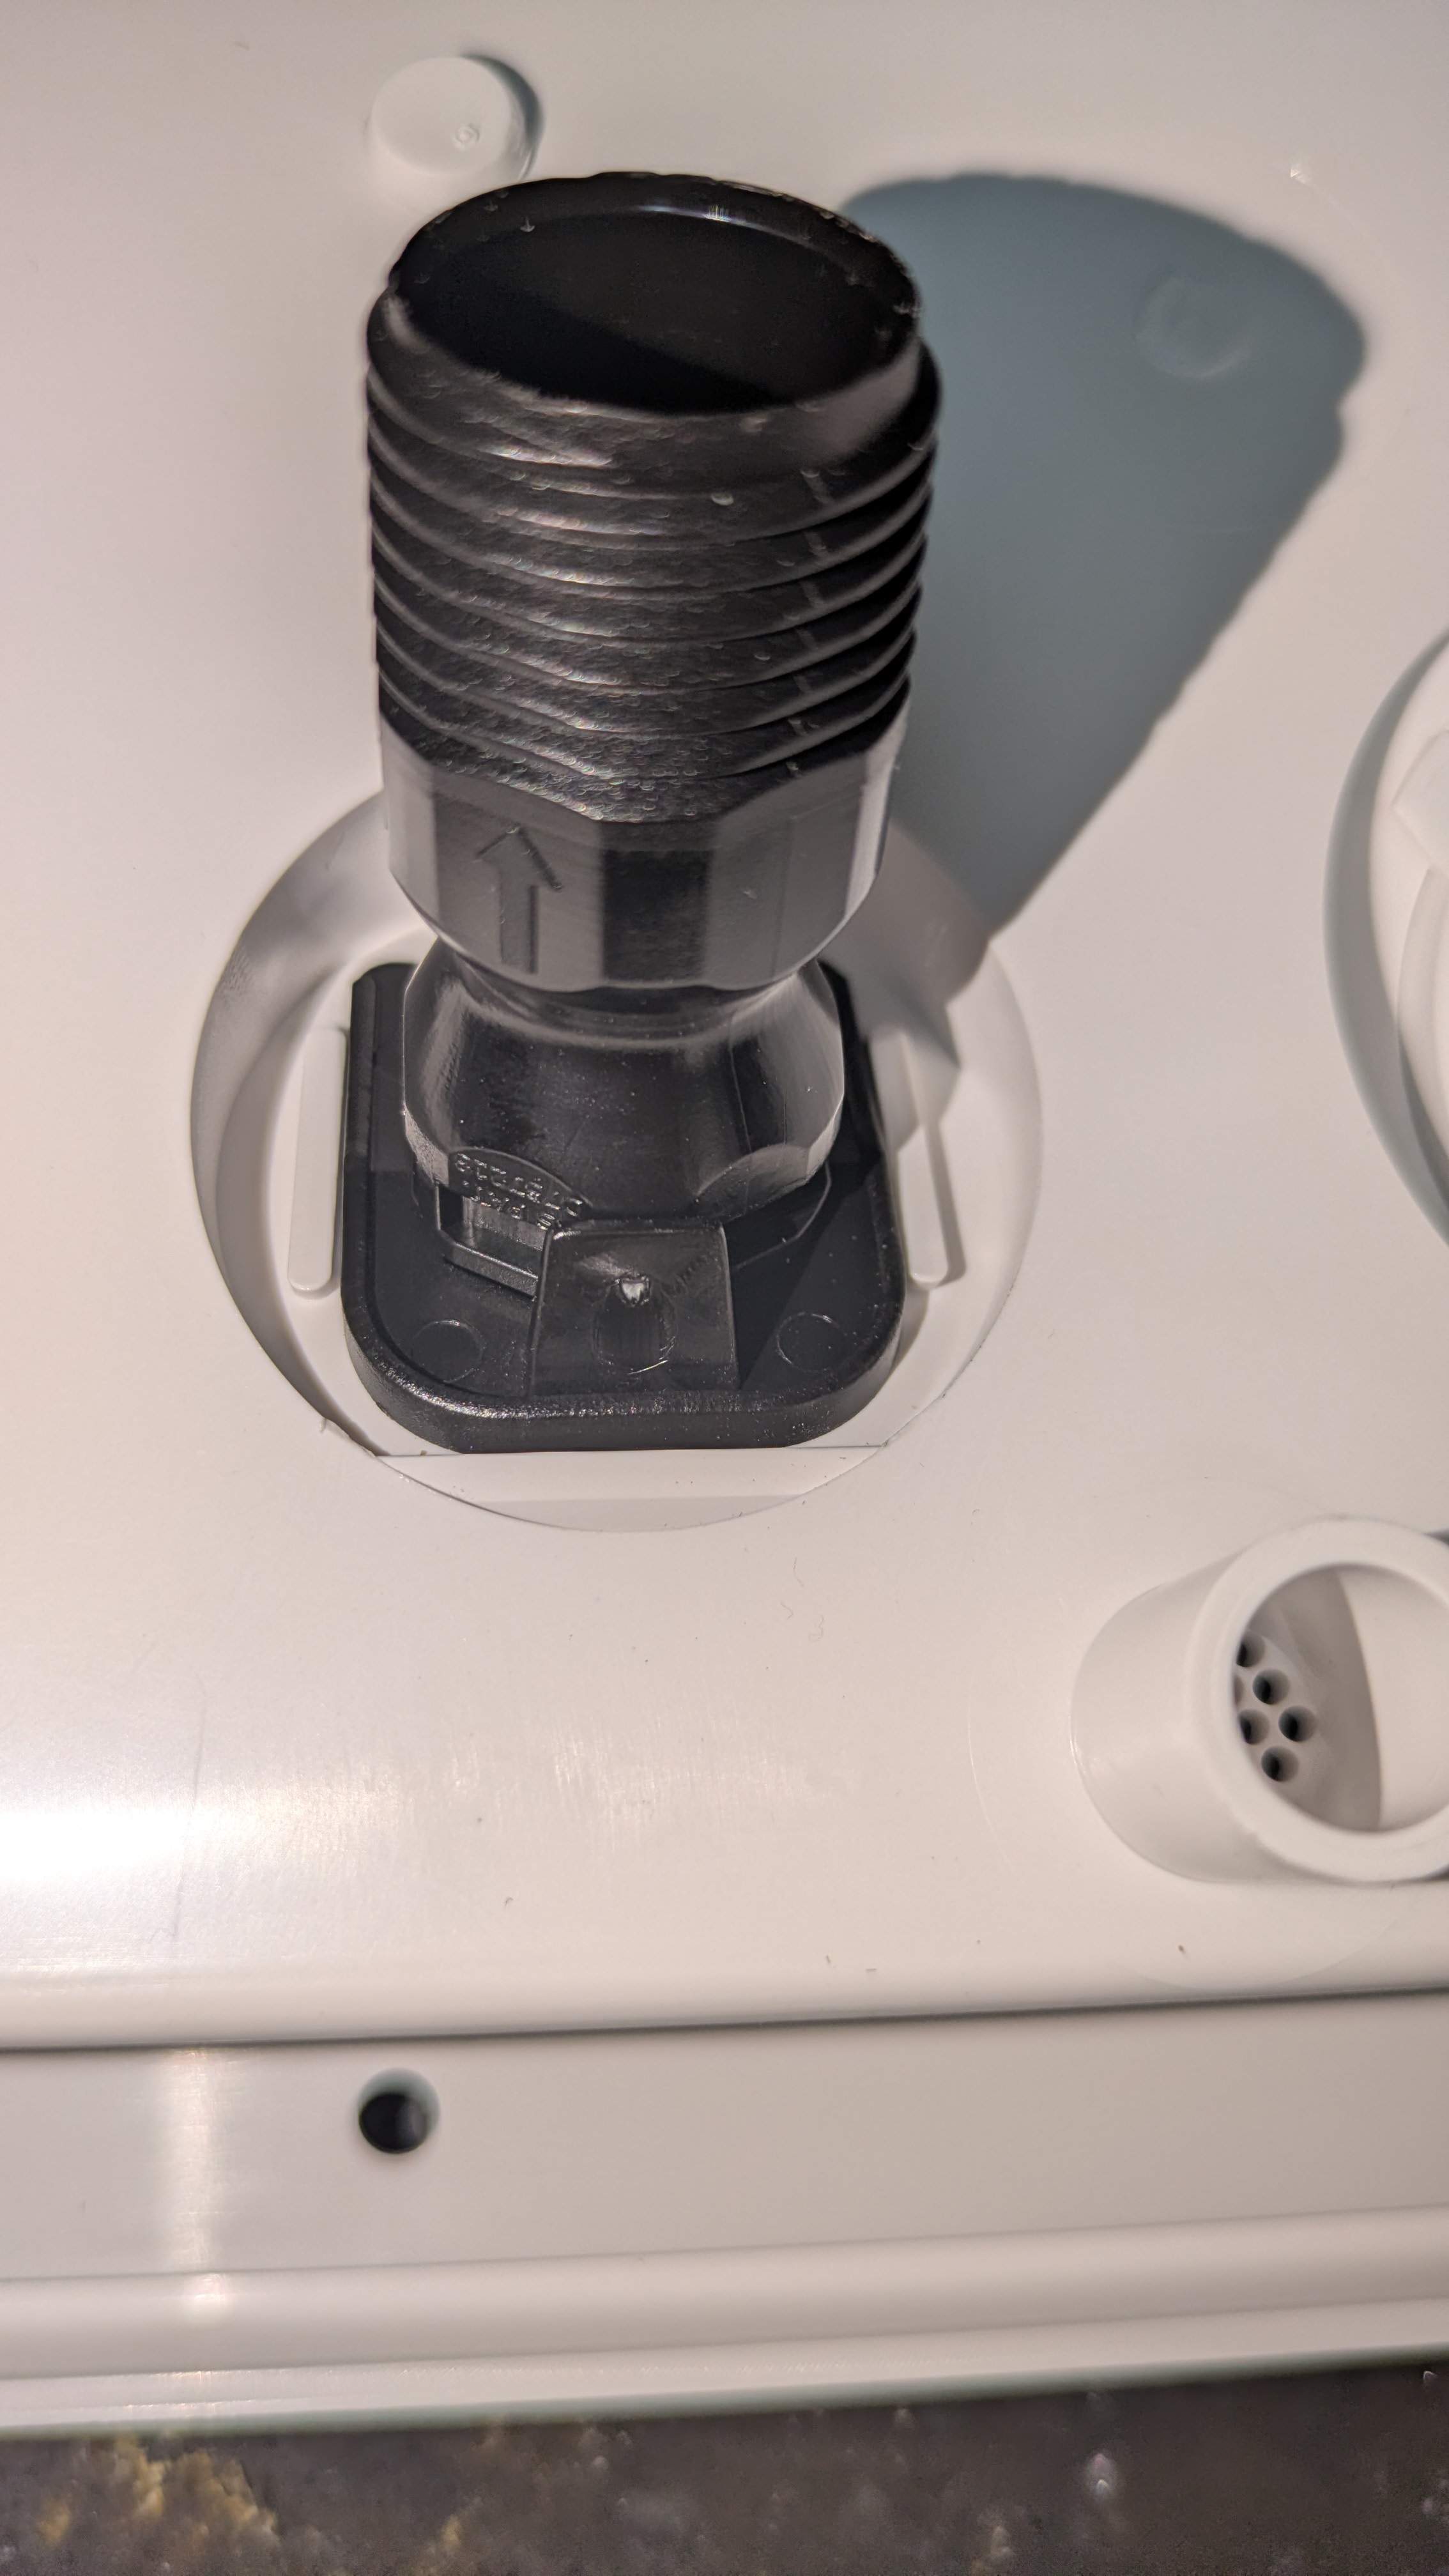
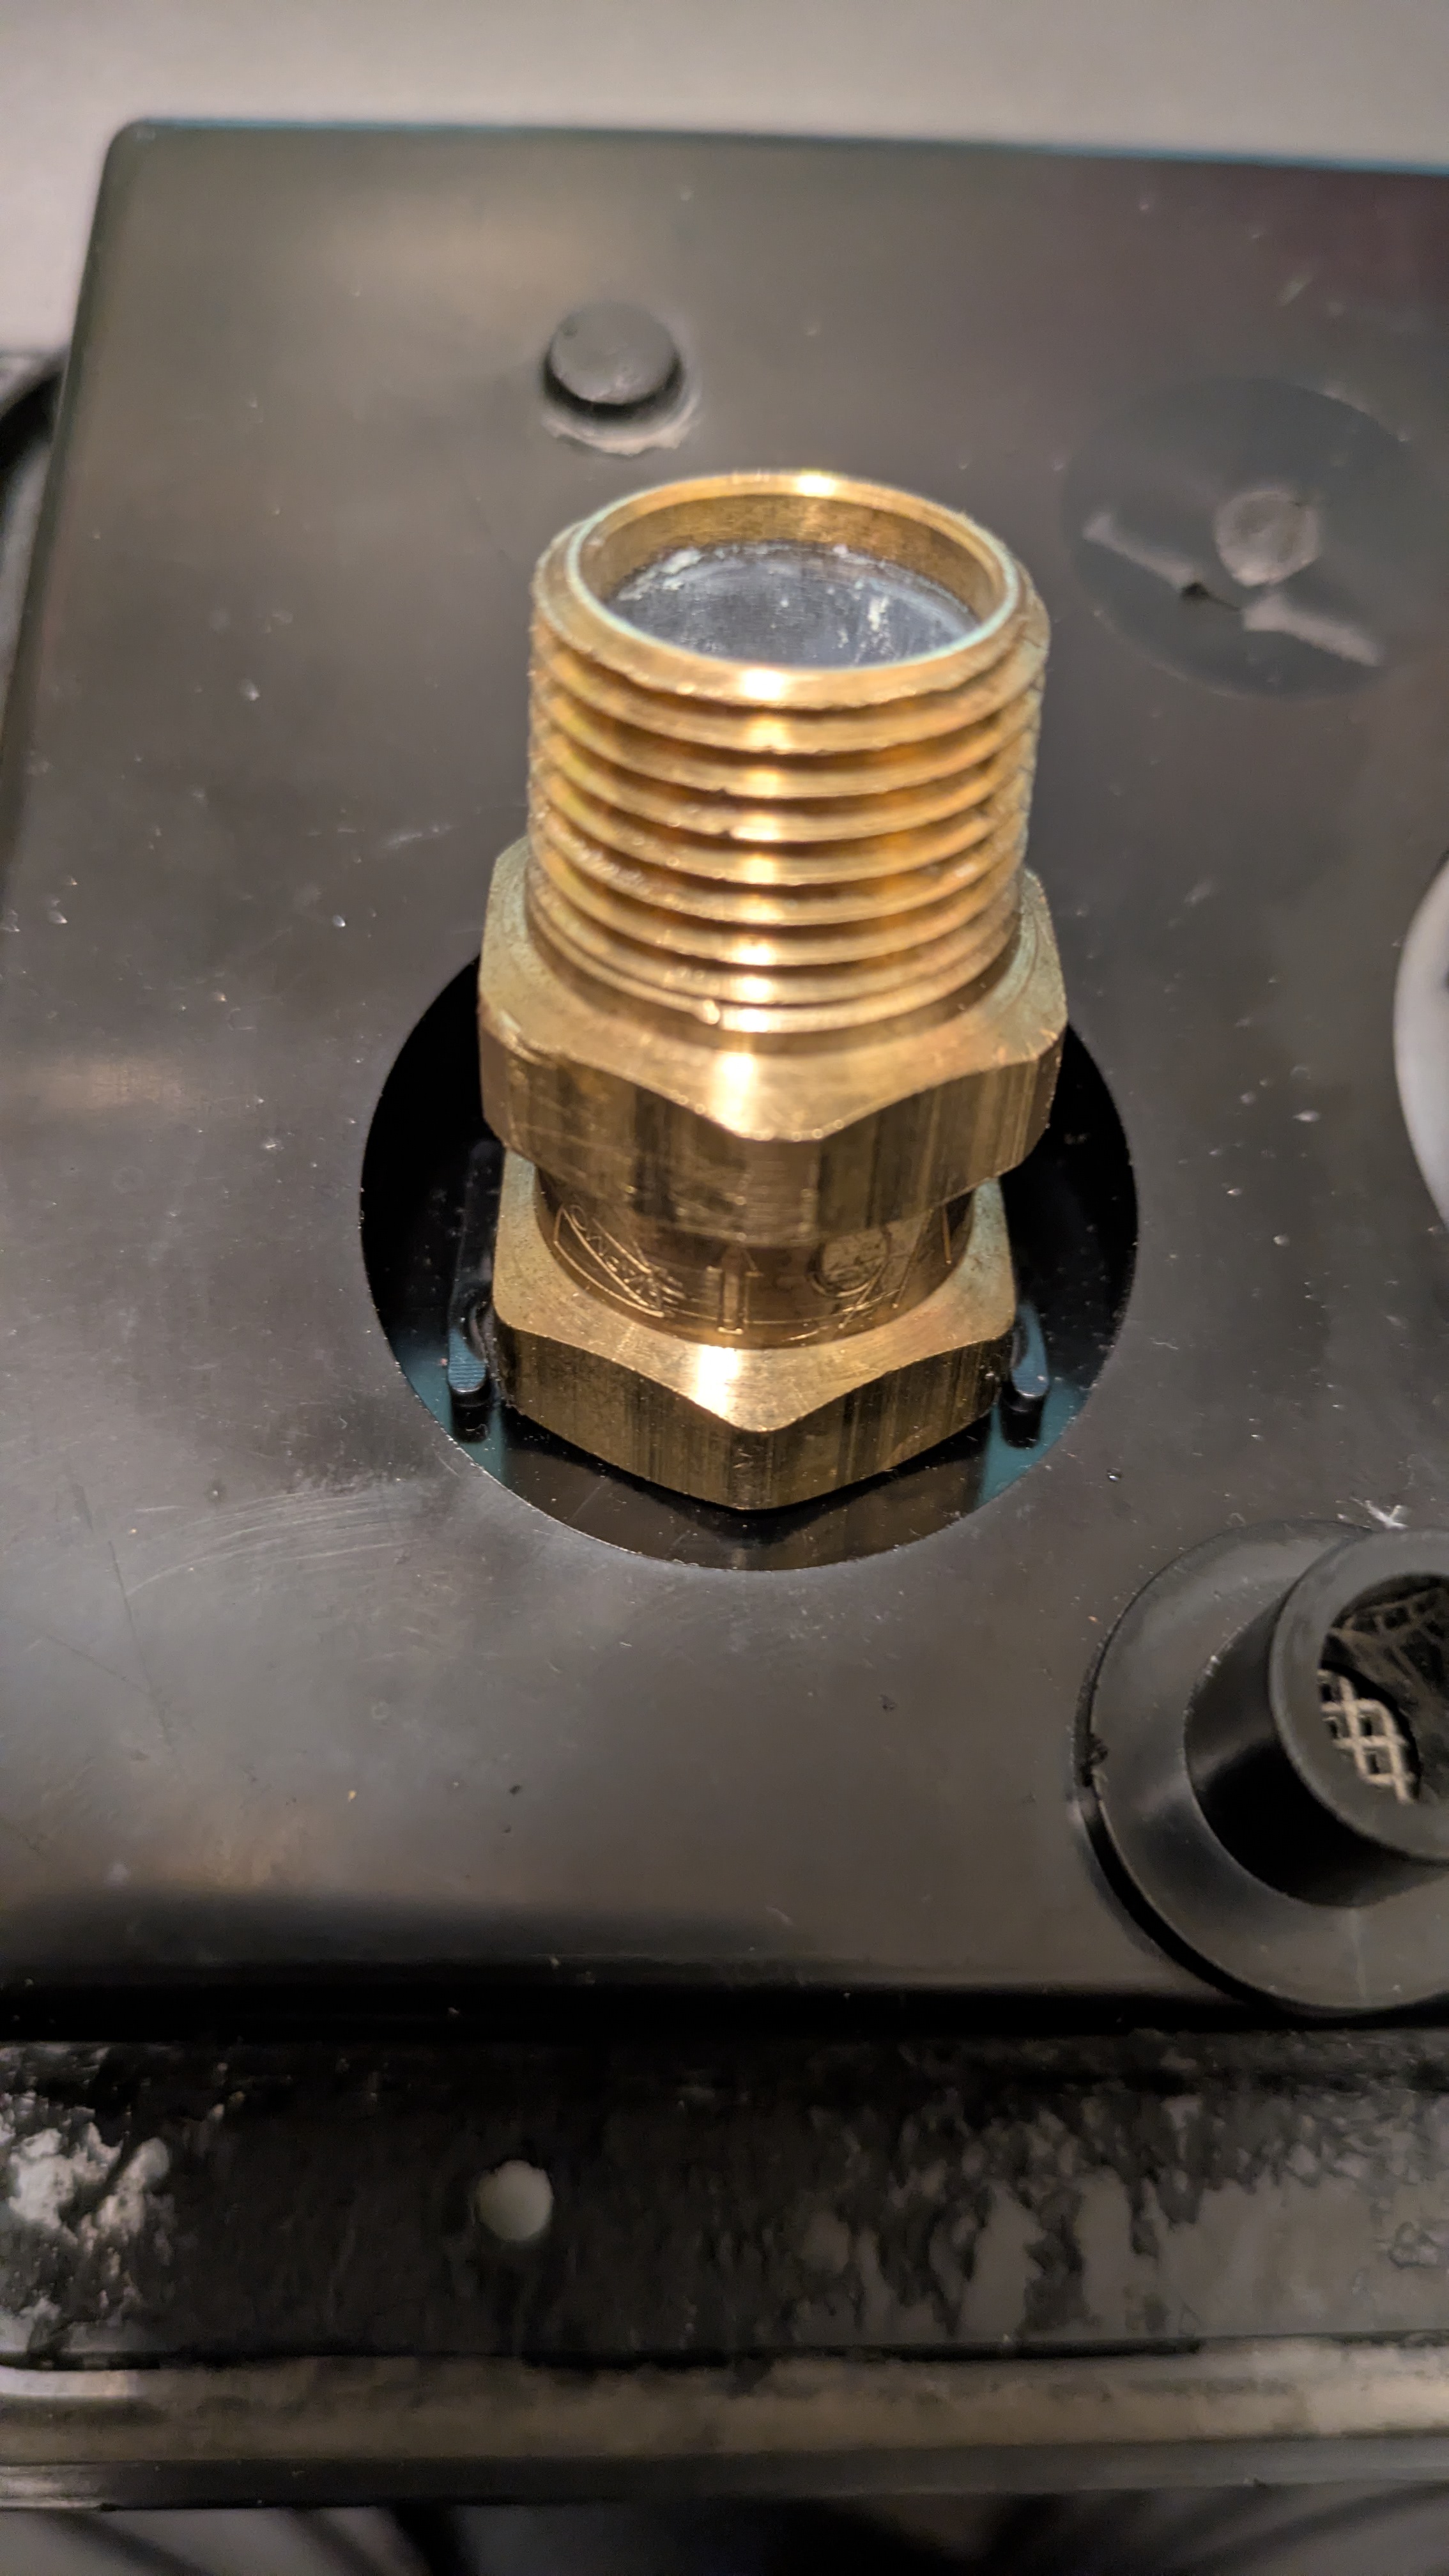
A check valve is a small mechanical device that allows water to flow in only one direction, preventing fresh water pressurized by the pump from spewing out the city water intake. It’s integrated with the hose bib for shore water, found inside the gravity/city water center. SC ships with the version of water center with a brass check valve, B&B Molding part number 94255. The check valve cannot be replaced stand-alone because the hose bib/check valve assembly is embedded in the housing with a crimp or swage that can’t be removed without destroying it or the plastic around it. The entire water center is readily available and costs around $60.
Symptoms
After I got the pump working again I noticed water dripping out of the city water intake. Even after depressurizing the system by turning off the pump and running water through the taps, the drip persisted. It wasn’t leaking a large amount of water– the pump had no problem pressurizing the water– but every few minutes the pump would turn on briefly. Normally I can leave the pump switch on indefinitely and the pump never starts unless a tap is opened. So the leak was slowly depressurizing the lines. Aside from the leak and pump behavior, the trailer was perfectly functional…
Diagnosis
… until I started diagnosing the problem. To get at the check valve you have to remove the metal screen inside the hose bib. It pops off easily with some mild prying. Looking behind the screen it was clear there was a problem with the black o-ring: It had been displaced, stretched, or torn. Comparing mine with a friend’s Alto solidified this conclusion. It looked like the o-ring was tangled up with the spring so I tried to push it back into place with a small screwdriver and the small end of chopstick. And I pushed the little white button on the check valve which gives your face a nice power wash if ever in need. The small leak was now a large leak. Conclusion: the check valve would have to be replaced.


Root cause
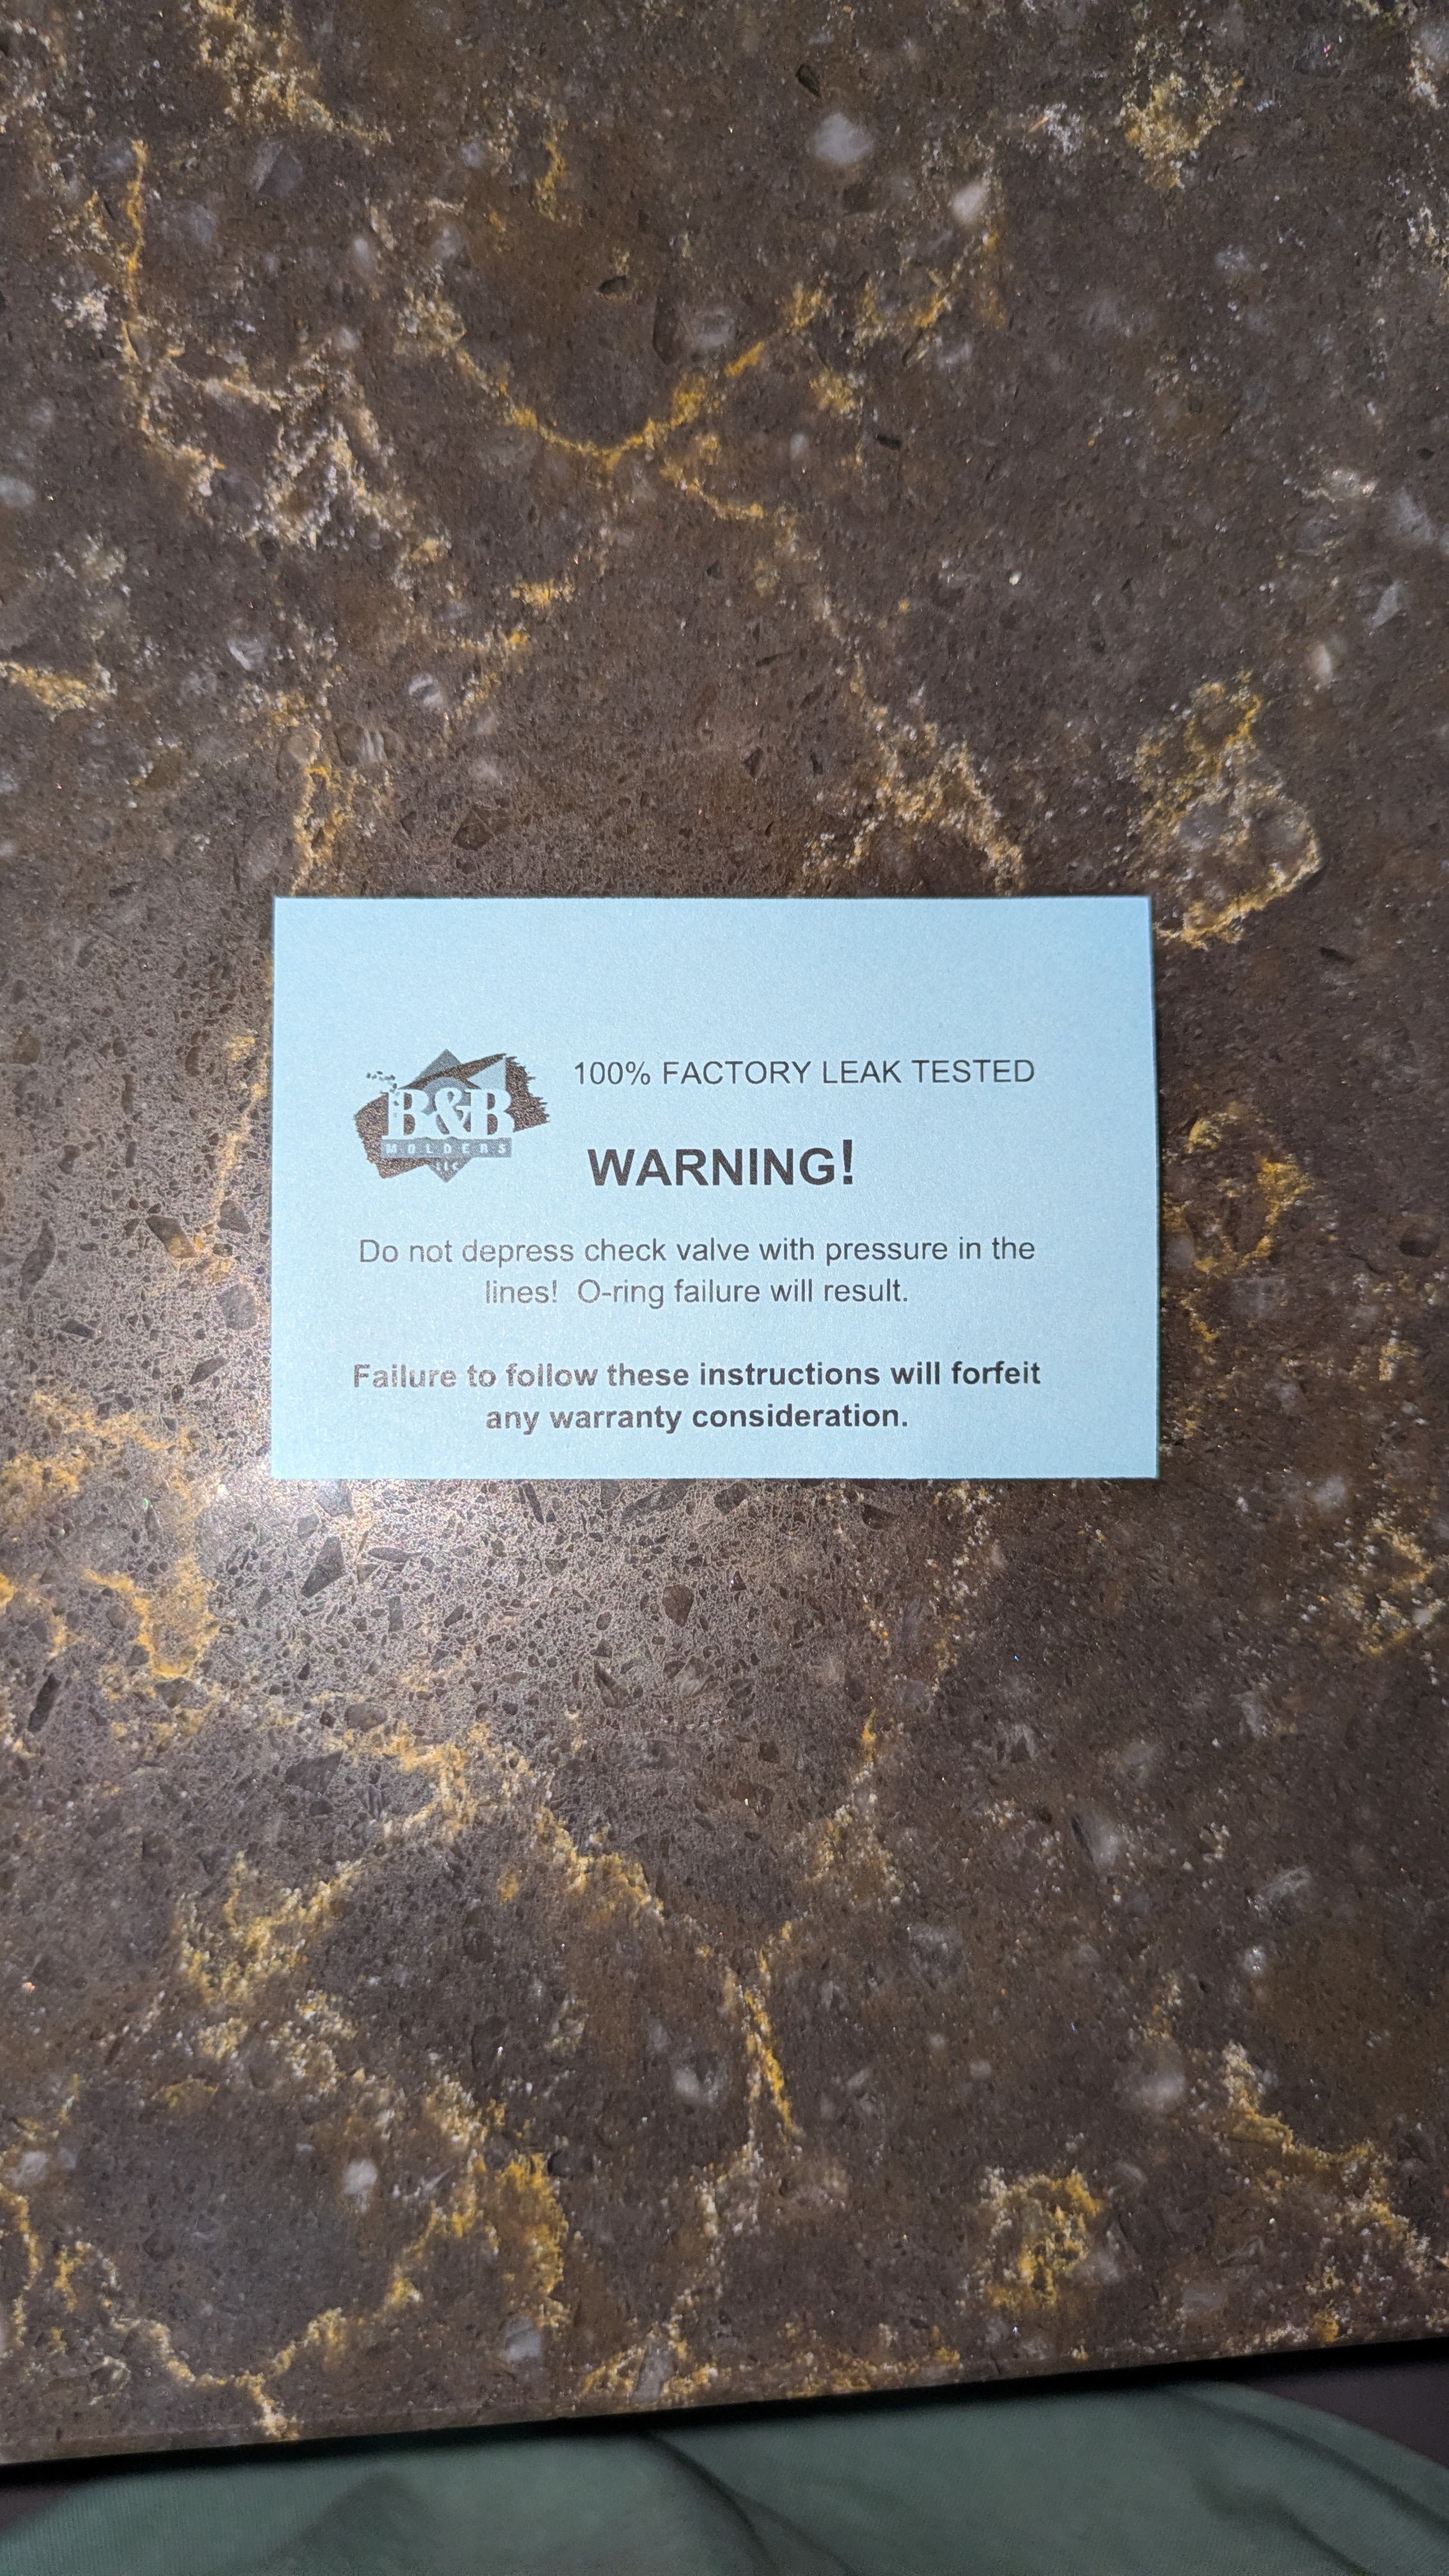
In my diagnostics for the original pump problem I had fiddled with that check valve, including one big mistake: I had pressed that little white button on the check valve while the fresh water was under pressure. There are better ways to wash your face. I’m not aware of any leaks in the system before this maneuver. Not to spoil the ending, but the new part came with the following warning: “Do not depress the check valve with pressure in the lines! O-ring failure will result.” Apparently this is a known failure mode for this design, who knew.
Removal
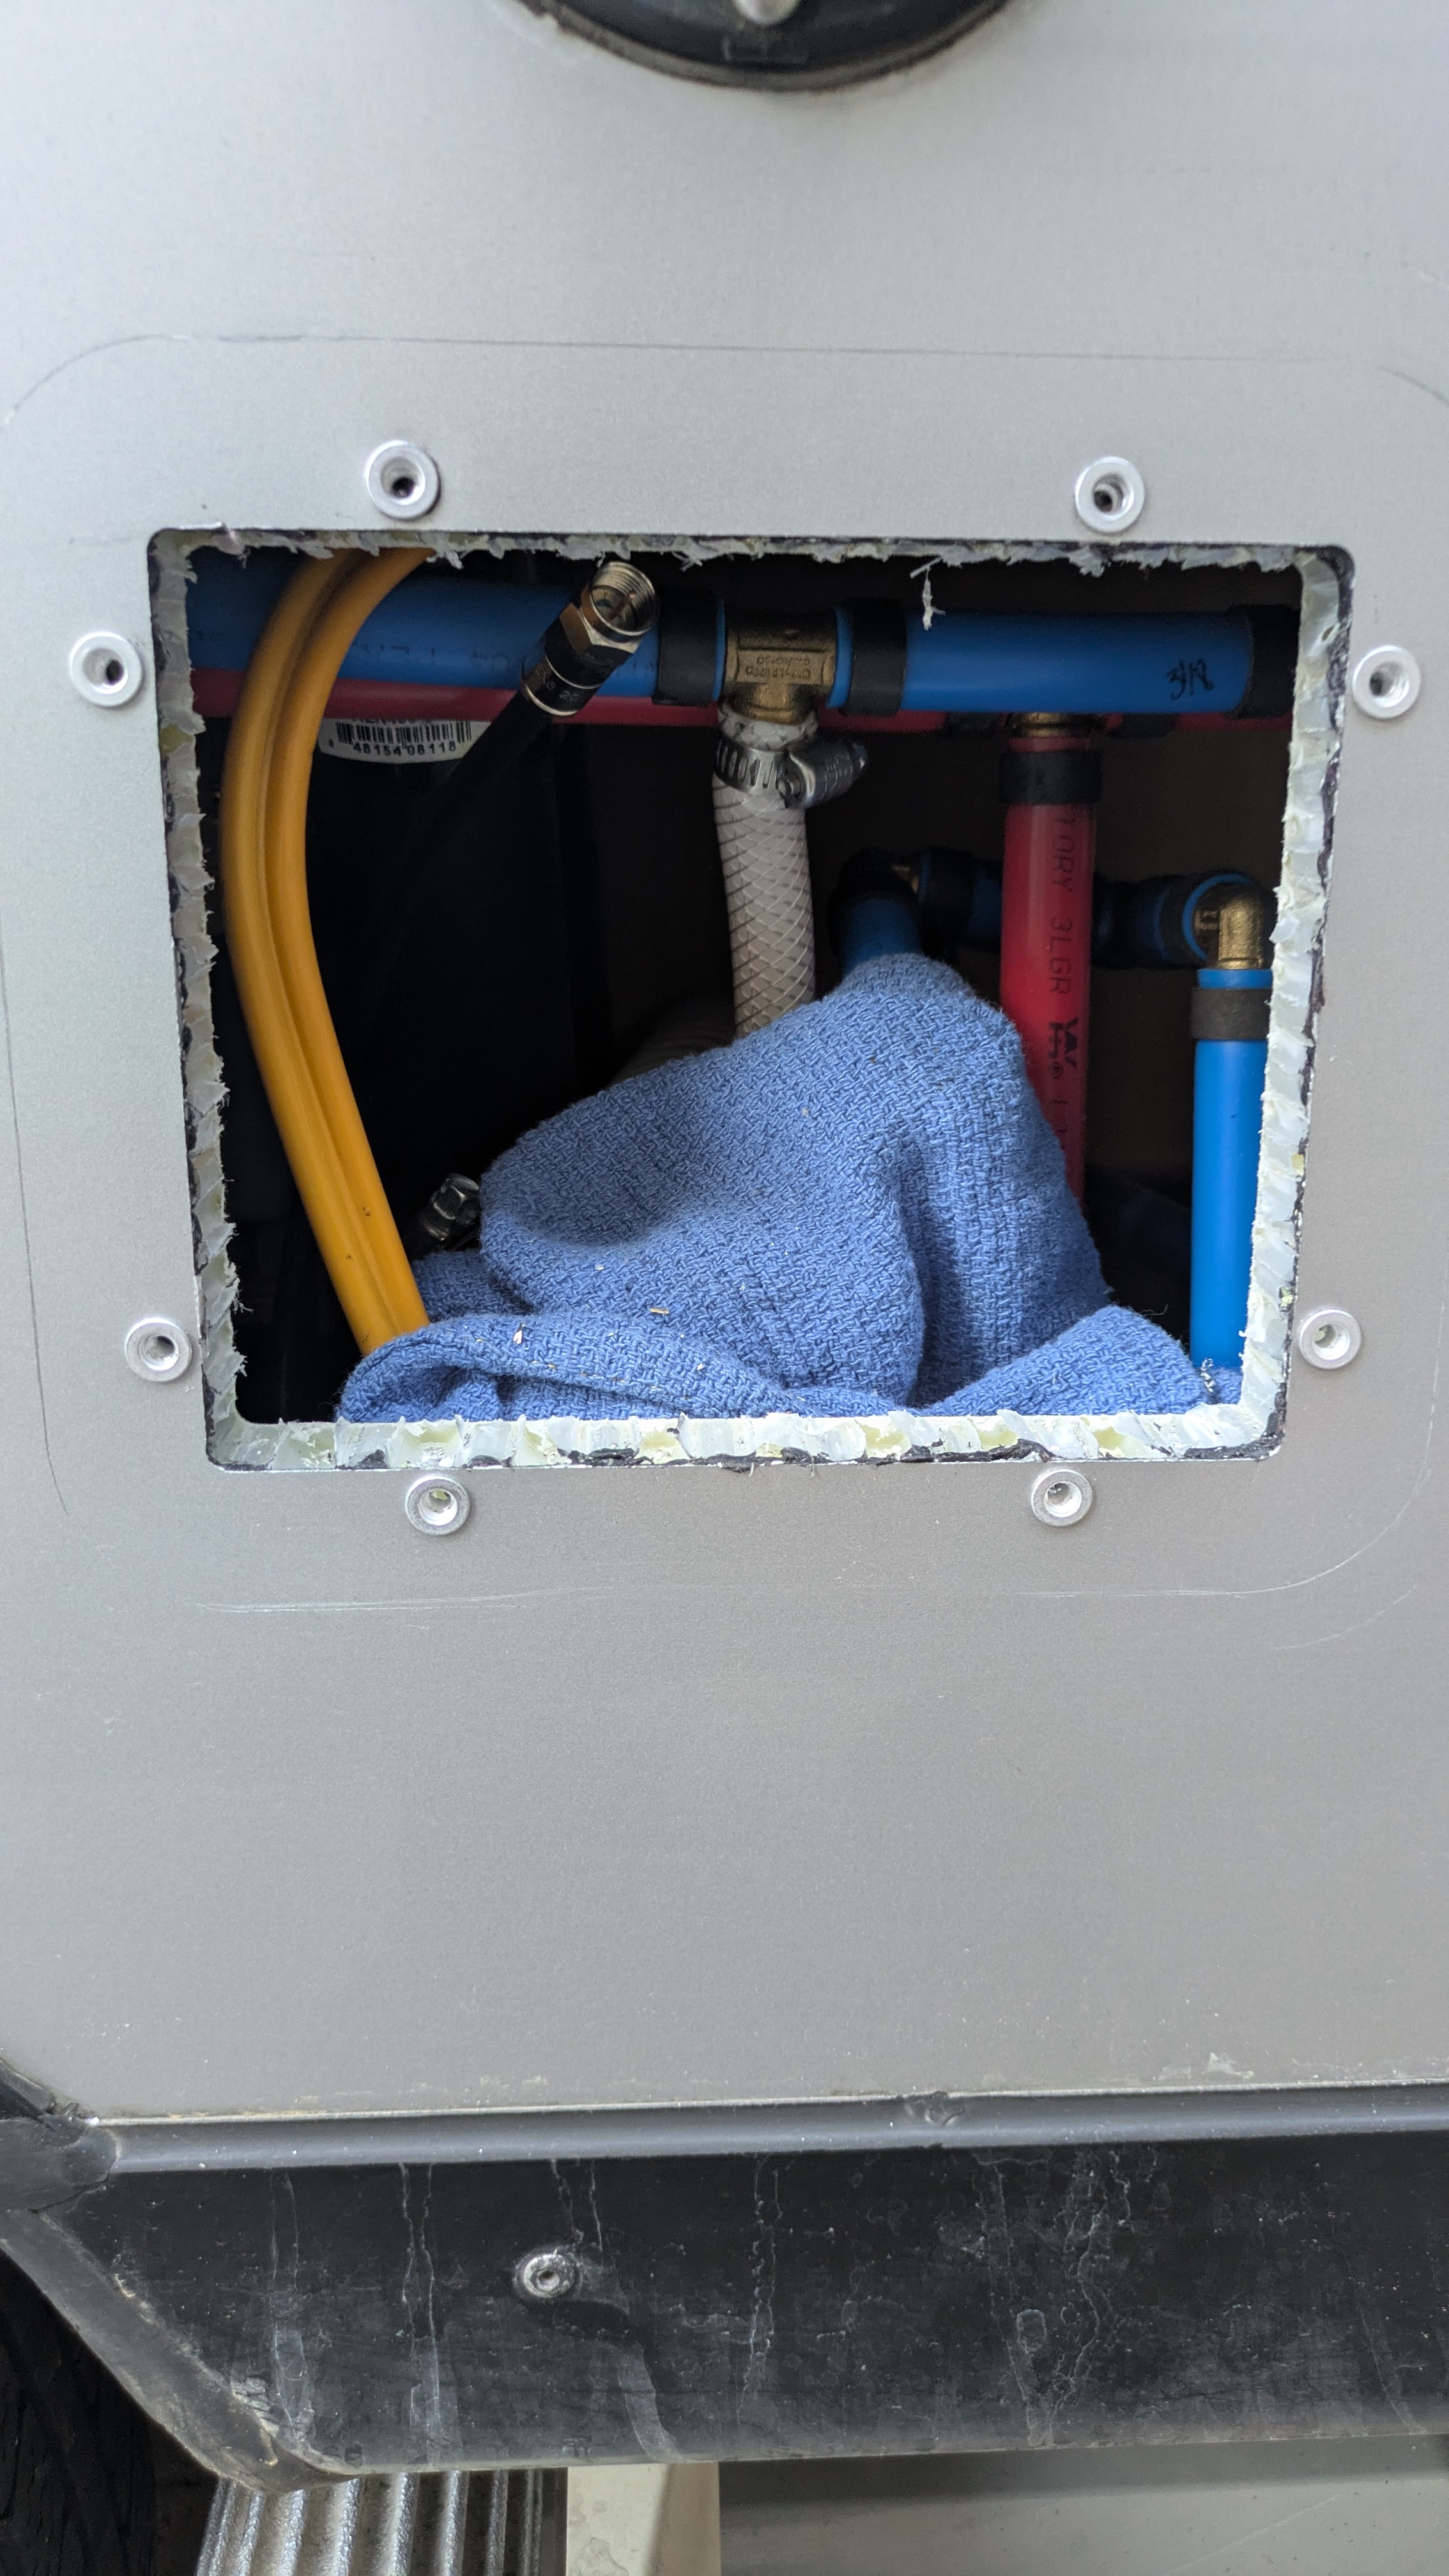
So I turned a simple fix for the original problem into a replacement of the entire water center. Good job. In the back I disconnected the two water hoses and air hoses. From the front I disconnected the cable TV connector, drilled out 8 rivets, and cut away the perimeter silicone bead with an Exacto knife. Next time I’ll use a plastic razor blade, it’s easy to mar the aluminum wall with a metal knife.
This left butyl tape as the final barrier to removal. I used a plastic automotive trim removal tool to slowly work the water center away from the trailer wall. Mineral spirits easily removed the remaining butyl compound from the wall. The silicone was much more difficult to remove. Goo Gone helped (there is a formulation specifically for silicone adhesive but I didn’t have any on hand) and I did a lot of scraping with a plastic scraper. And fingernail.

Choices
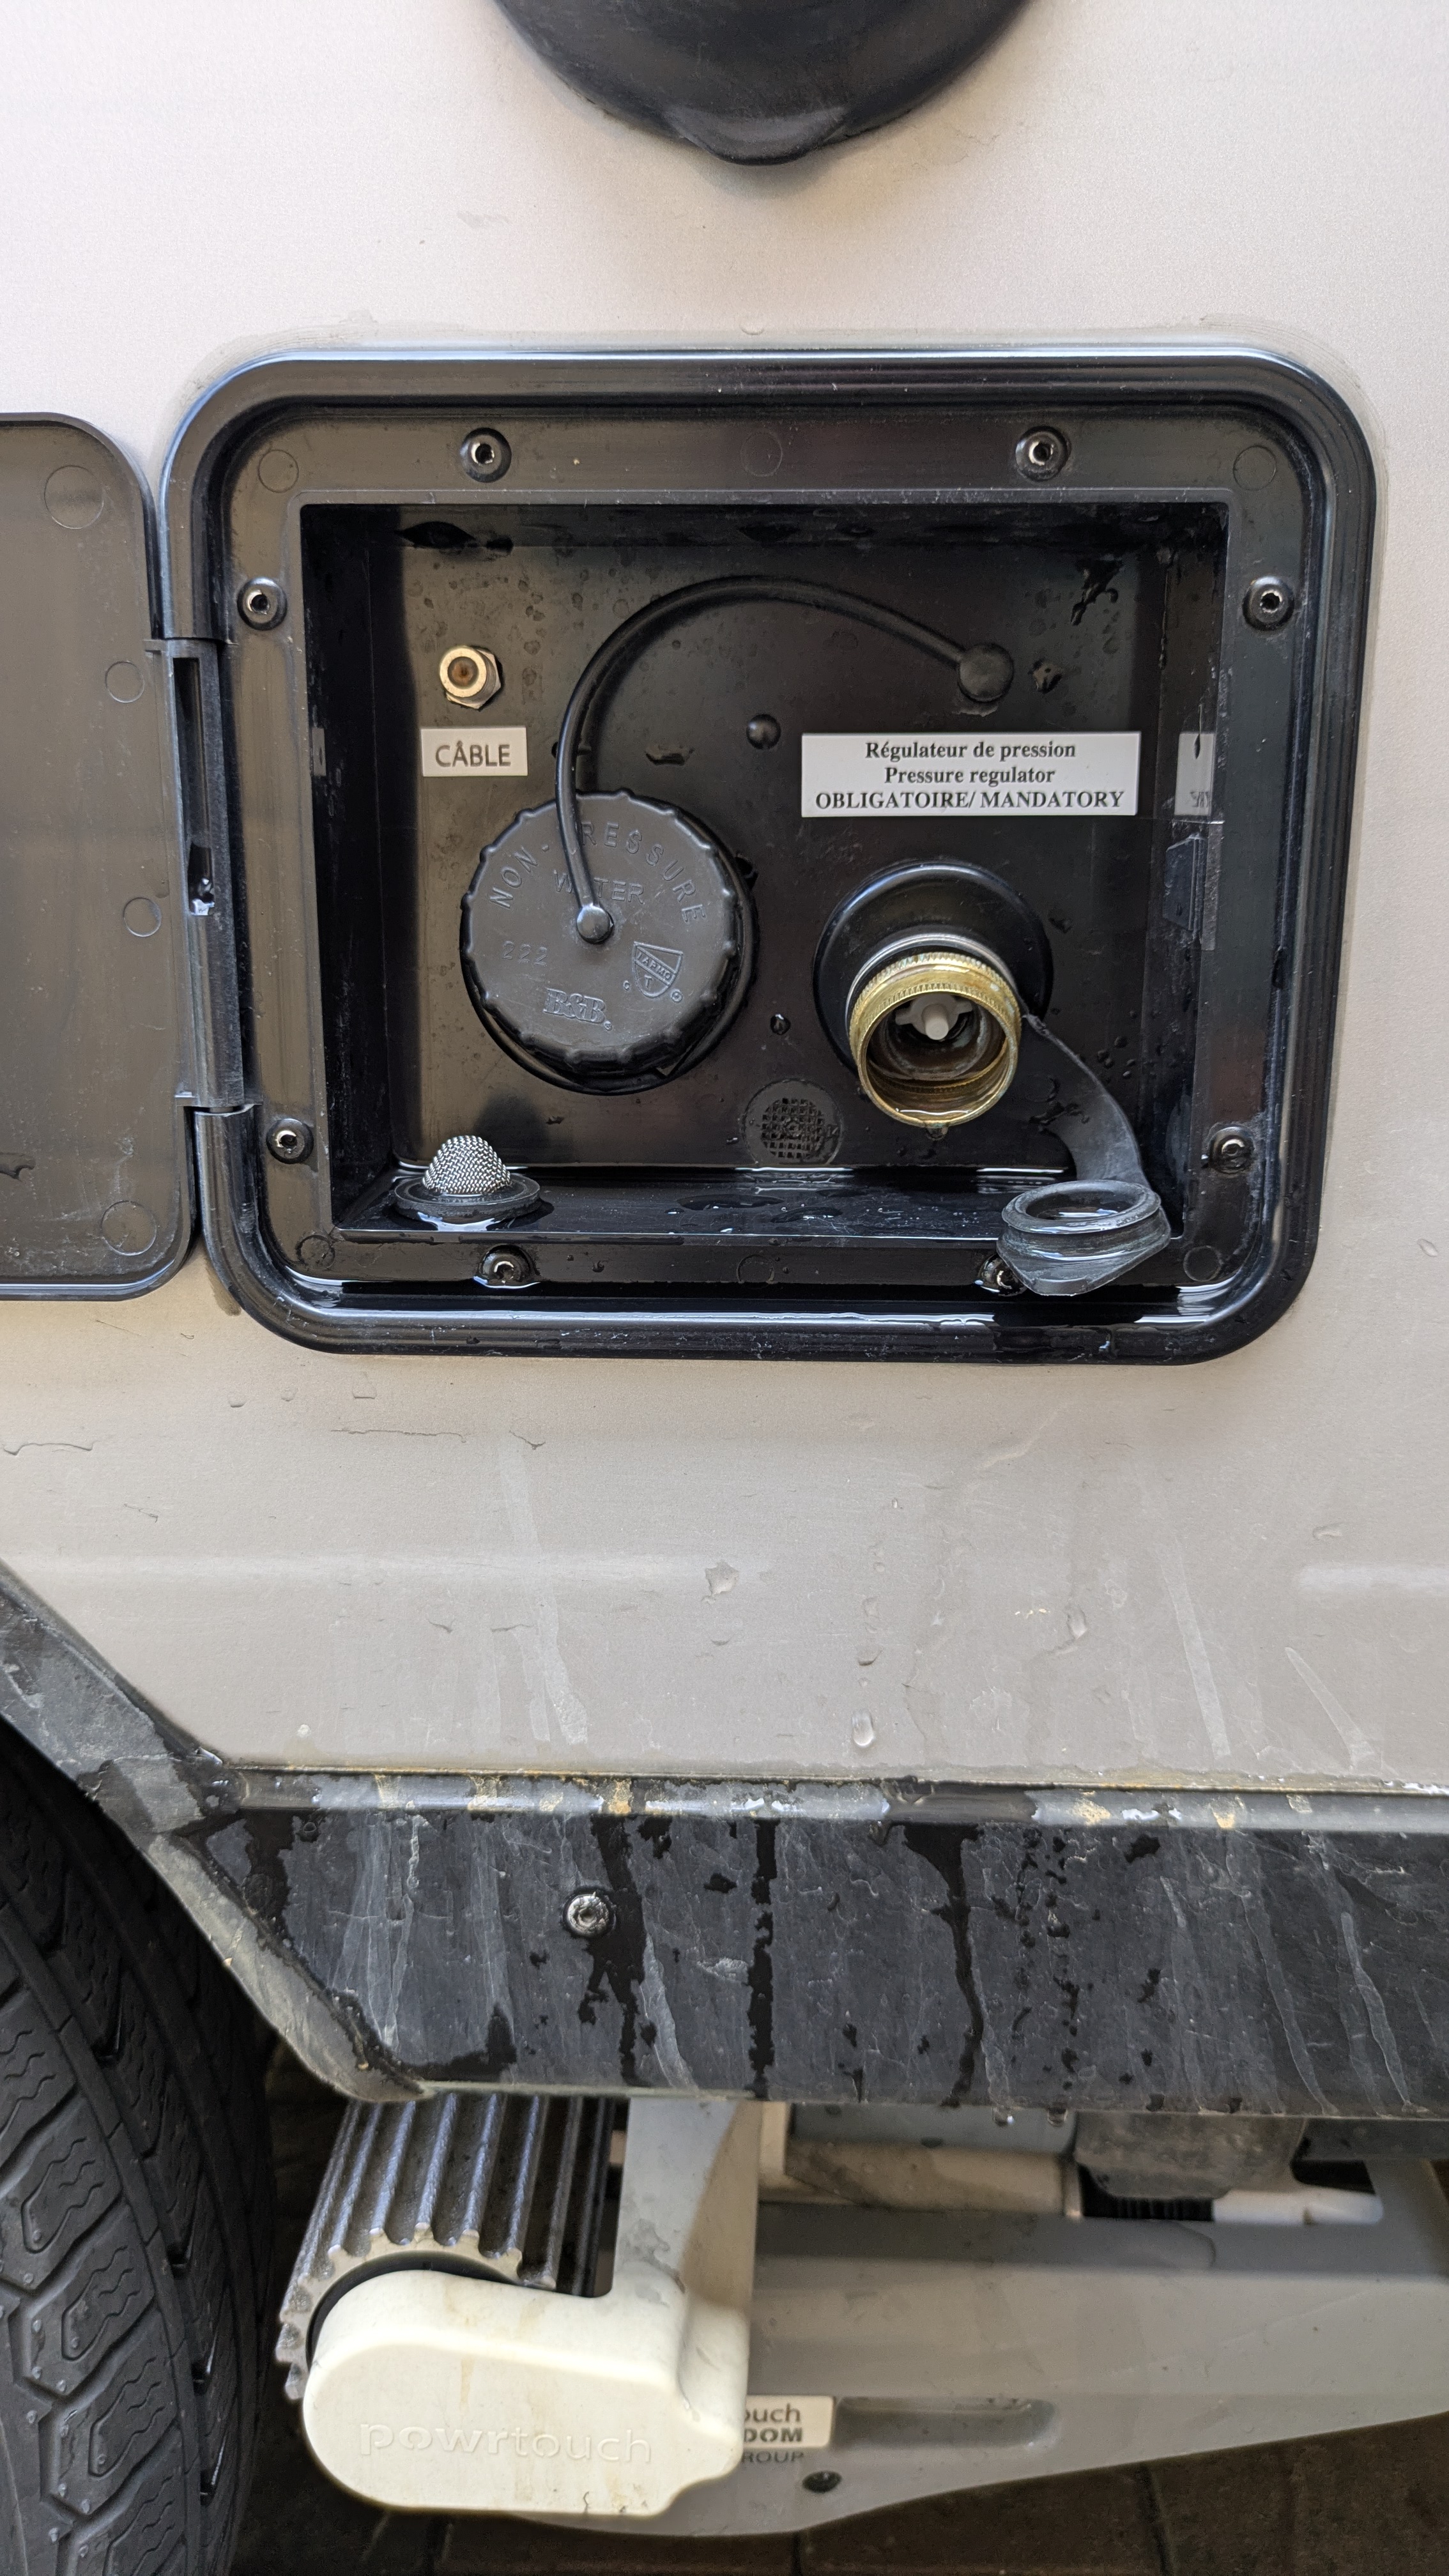
I could have replaced the water center with the original OEM part. Instead I opted to replace it with a different version from the same manufacturer, B&B Molding part number 94254. Differences:
- The check valve is replaceable without replacing the entire unit ($20 on Amazon)
- The big plastic knob on the city hose connection is easier to use than the tiny brass ring
- It is less expensive (about $35 on Amazon, $45 elsewhere)
- It is 100% drop-in compatible with the original
- The door is easily swapped out with the original (no change in keys)
- It only comes in white
The hose threads and check valve are plastic in this version. I consider ease of use worth a potential tradeoff in longevity. I don’t care about the color.

The only difference in the plastic housing I could find between the brass and plastic versions is the way the check valve is retained– the molding is slightly different in this area. The plastic check valve is removed by pulling the black plastic retaining clip in the back. I didn’t try this but it doesn’t look like it would be easy to do while mounted in the trailer.
Installation
Mounting an electrical connector inside a housing that is regularly exposed to water seems like a bad idea but I get it, I probably prefer that over yet another hole taken out of the wall for a single cable TV connector. In fact the original connector already had some rust on the white dielectric, maybe from a rusting inner cable or a rusted mating connector. Apparently B&B Molding agrees with me, this wasn’t their doing. SC drilled that hole and I followed suit. This is probably academic, I doubt we’ll ever plug in to cable TV.
I’m not a fan of rivets holding what should be a serviceable component. Stainless M4 button-head bolts fit nicely through the water center mounting holes so I drilled out all the rivet holes for M4 rivet nuts. The new part comes with butyl tape, I applied it to the inside rim of the part, over the mounting holes, and stuck it back into the wall. I pushed the bolt heads through the panel and butyl and tightened them incrementally in a cross pattern. It took a few rounds of tightening as the butyl was slowly squeezed out. I’ll check this a couple more times and tighten again if necessary. Future removal is now just eight machine screws instead of drilling out eight rivets.
I think a perimeter bead of silicone is overkill– I don’t think water will get through the butyl– and it makes future removal a PITA. I didn’t apply any. At some point I’ll trim off the excess butyl around the edges with a plastic scraper or knife. The new water center came with only one key, and anyway I didn’t want to change keys. It was easy to swap the old door onto the new unit.
Reattaching the hoses in the back was probably the hardest part of the whole job. SC provided zero service loop for the plumbing which didn’t help. I did most of this work by crawling through the optional driver’s side rear storage hatch, it would have been harder still if I had to do it all from inside the trailer. SC had applied some sort of sealant between the gravity water tube and the mating connection. I see why they did it– that hose is very stiff and fits loosely over the barbs– but I don’t think it was helping much. The hose popped off easily during removal. I didn’t add any sealant and cinched the hose clamp tightly, I’ll monitor for a while to make sure it doesn’t come loose.
Conclusion
I found several sources for these parts: etrailer, CPM Brands, and Amazon. I try to source parts locally or closer to the source when possible, but the first two had the part on back order. Amazon had it in stock for about $10 cheaper.
We’re back on the road. After the pain subsides, I think the improved usability and serviceability will make this a worthwhile blunder.