We tow a 2023 Safari Condo Alto F1743 with a 2023 Tesla Model Y Long Range. My wife and I each ride a tadpole recumbent trike, hers electric. Space and load capacity are pretty limited with this setup, figuring out how to transport the trikes has been a challenge.
The finished rack weighs 10.6 lb, carries my 40 lb folded trike securely, doesn’t measurably affect towing range, and survived initial interstate testing at 65 mph without movement. We may have nailed it.
The Trikes
- 2009 ICE Sprint, 20″ wheels, no motor. Frame 40 lbs with seat removed.
- ICE Adventure “frankentrike”, 20″ wheels, hub motor. Frame 56 lbs with seat removed.
The seat adds another 5 or 6 lbs to each trike. The Sprint folds into a fairly compact package without removing the rear wheel. The Adventure folds somewhat after removing the rear wheel.
Approaches Considered
I want to keep weight within the 350 lb tongue weight limit specified by Tesla. After upgrading to composite propane tanks, the tongue weight at full load measures about 286 lb. This leaves 64 lb to work with, far less than both trike frames would require. But one of the frames, especially the Sprint, is within limits. My original hope was to somehow mount both trikes over the tongue but the weight ruled this out early on. This approach also had other issues.
| Approach | Pros | Cons |
| Trikes at rear of trailer | • May destabilize trailer • Bumper can’t hold the weight • Trikes can’t be seen while towing • Increased aerodynamic drag | |
| Unfolded trikes over tongue, | • Trikes visible while towing | • Exceeds tongue weight limit • Difficult to load and unload • Increased aerodynamic drag • Complicated rack design |
| Both trikes in Tesla, folded | • No increase in aerodynamic drag | • Difficult to load and unload • Uses most available cargo space • No room for dogs in Tesla |
| Folded Adventure in Tesla, unfolded Sprint inside trailer on front bed | • Sprint does fit through trailer door, barely • Room for dogs in Tesla • No aerodynamic drag | • Difficult to load and unload • Sprint interferes with trailer use • Difficult to restrain frame on bed • Uses a lot of available cargo space |
| One trike on Tesla roof, the other elsewhere | • Difficult to load and unload • Increased aerodynamic drag | |
| Folded Adventure in Tesla, unfolded Sprint over tongue | • Room for dogs in Tesla | • Difficult to load and unload • Increased aerodynamic drag • Complicated rack design • Difficult to tie down trike in Tesla |
| Folded Adventure in Tesla, folded Sprint over tongue | • Easier to load • Simpler rack design • Room for dogs in Tesla • Minimal aerodynamic drag | • Uses a lot of available cargo space • Difficult to tie down trike in Tesla • Can’t open Tesla hatch |
Prototyping
I quickly ruled out most of the approaches and began focusing on a rack that would hold both of the unfolded trikes over the trailer tongue. My initial thought was to hang them from the cross tube. I’ve seen commercial racks that do this. However most racks instead opt to carry the weight on the wheels which are designed for the load. There are also cables and other complications around the cross bar. In this configuration, the trikes would be oriented “sideways”, so that the wheel axles are aligned with the longitudinal axis of the trailer. The length of the trike and the overhang of the inside wheel require mounting the trikes very high, increasing aerodynamic drag, rack complexity, and mounting difficulty.

Once I decided that tongue weight limited me to a single trike, some of the constraints went away. Now I could fold the trike and orient it laterally. This kept the bulk of the trike much lower, out of the slipstream and easier to mount. It also simplified the rack design.
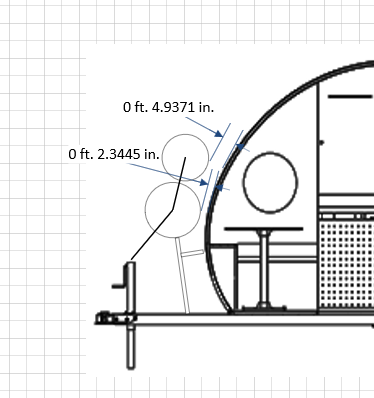
Working Prototype #1
With the trike folded, I can carry most of the weight on the wheels using wheel cradles common in roof bike racks. The remainder of the weight is carried by the pivot point of the folded frame, which conveniently comes close to the top of the trailer jack tube.
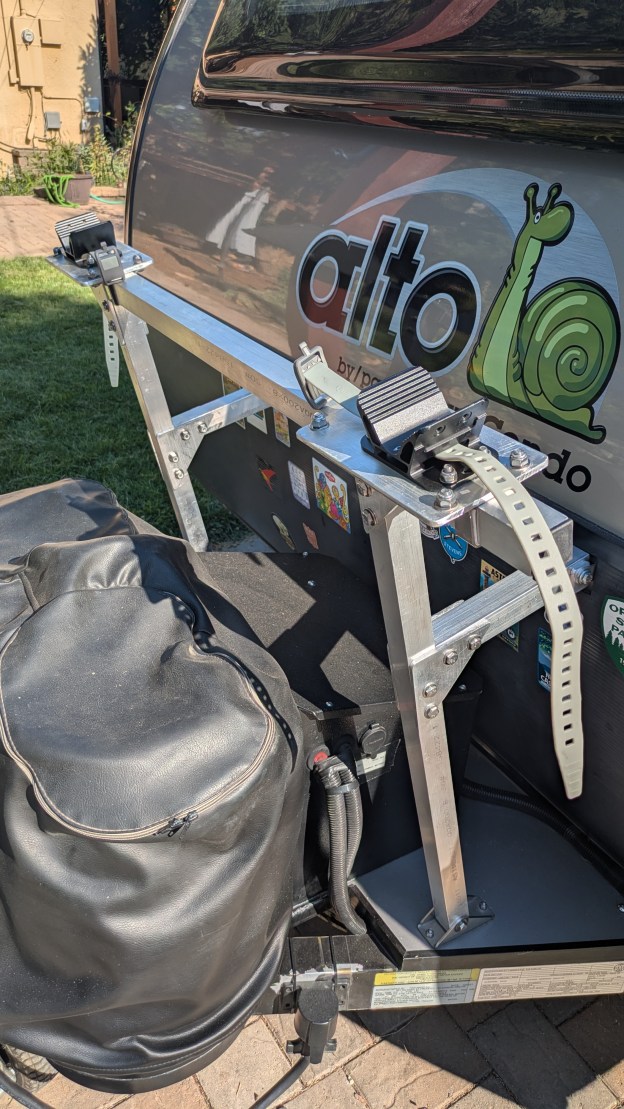
The rack then is very simple– it just has to hold the two wheels. I used 1 1/4″ square aluminum tubing, 1/8″ wall thickness. This fits perfectly in the lower rack brackets on the trailer a-frame, and requires two 3/16″ aluminum shims to remove slop in the upper rack brackets on the front of the trailer. The bottom and top brackets are perfectly aligned, so on each side I attached one long aluminum tube to the bottom bracket to support the wheels, and a short tube on the upper bracket. The short tube then attaches to the long tube at a right angle, fixing the angle of the long tube. I hacked up some old tubing and wood to determine the tube lengths and angle required to get the wheel cradles where I needed them. I then connected the tube ends on either side with a lateral piece of tubing.

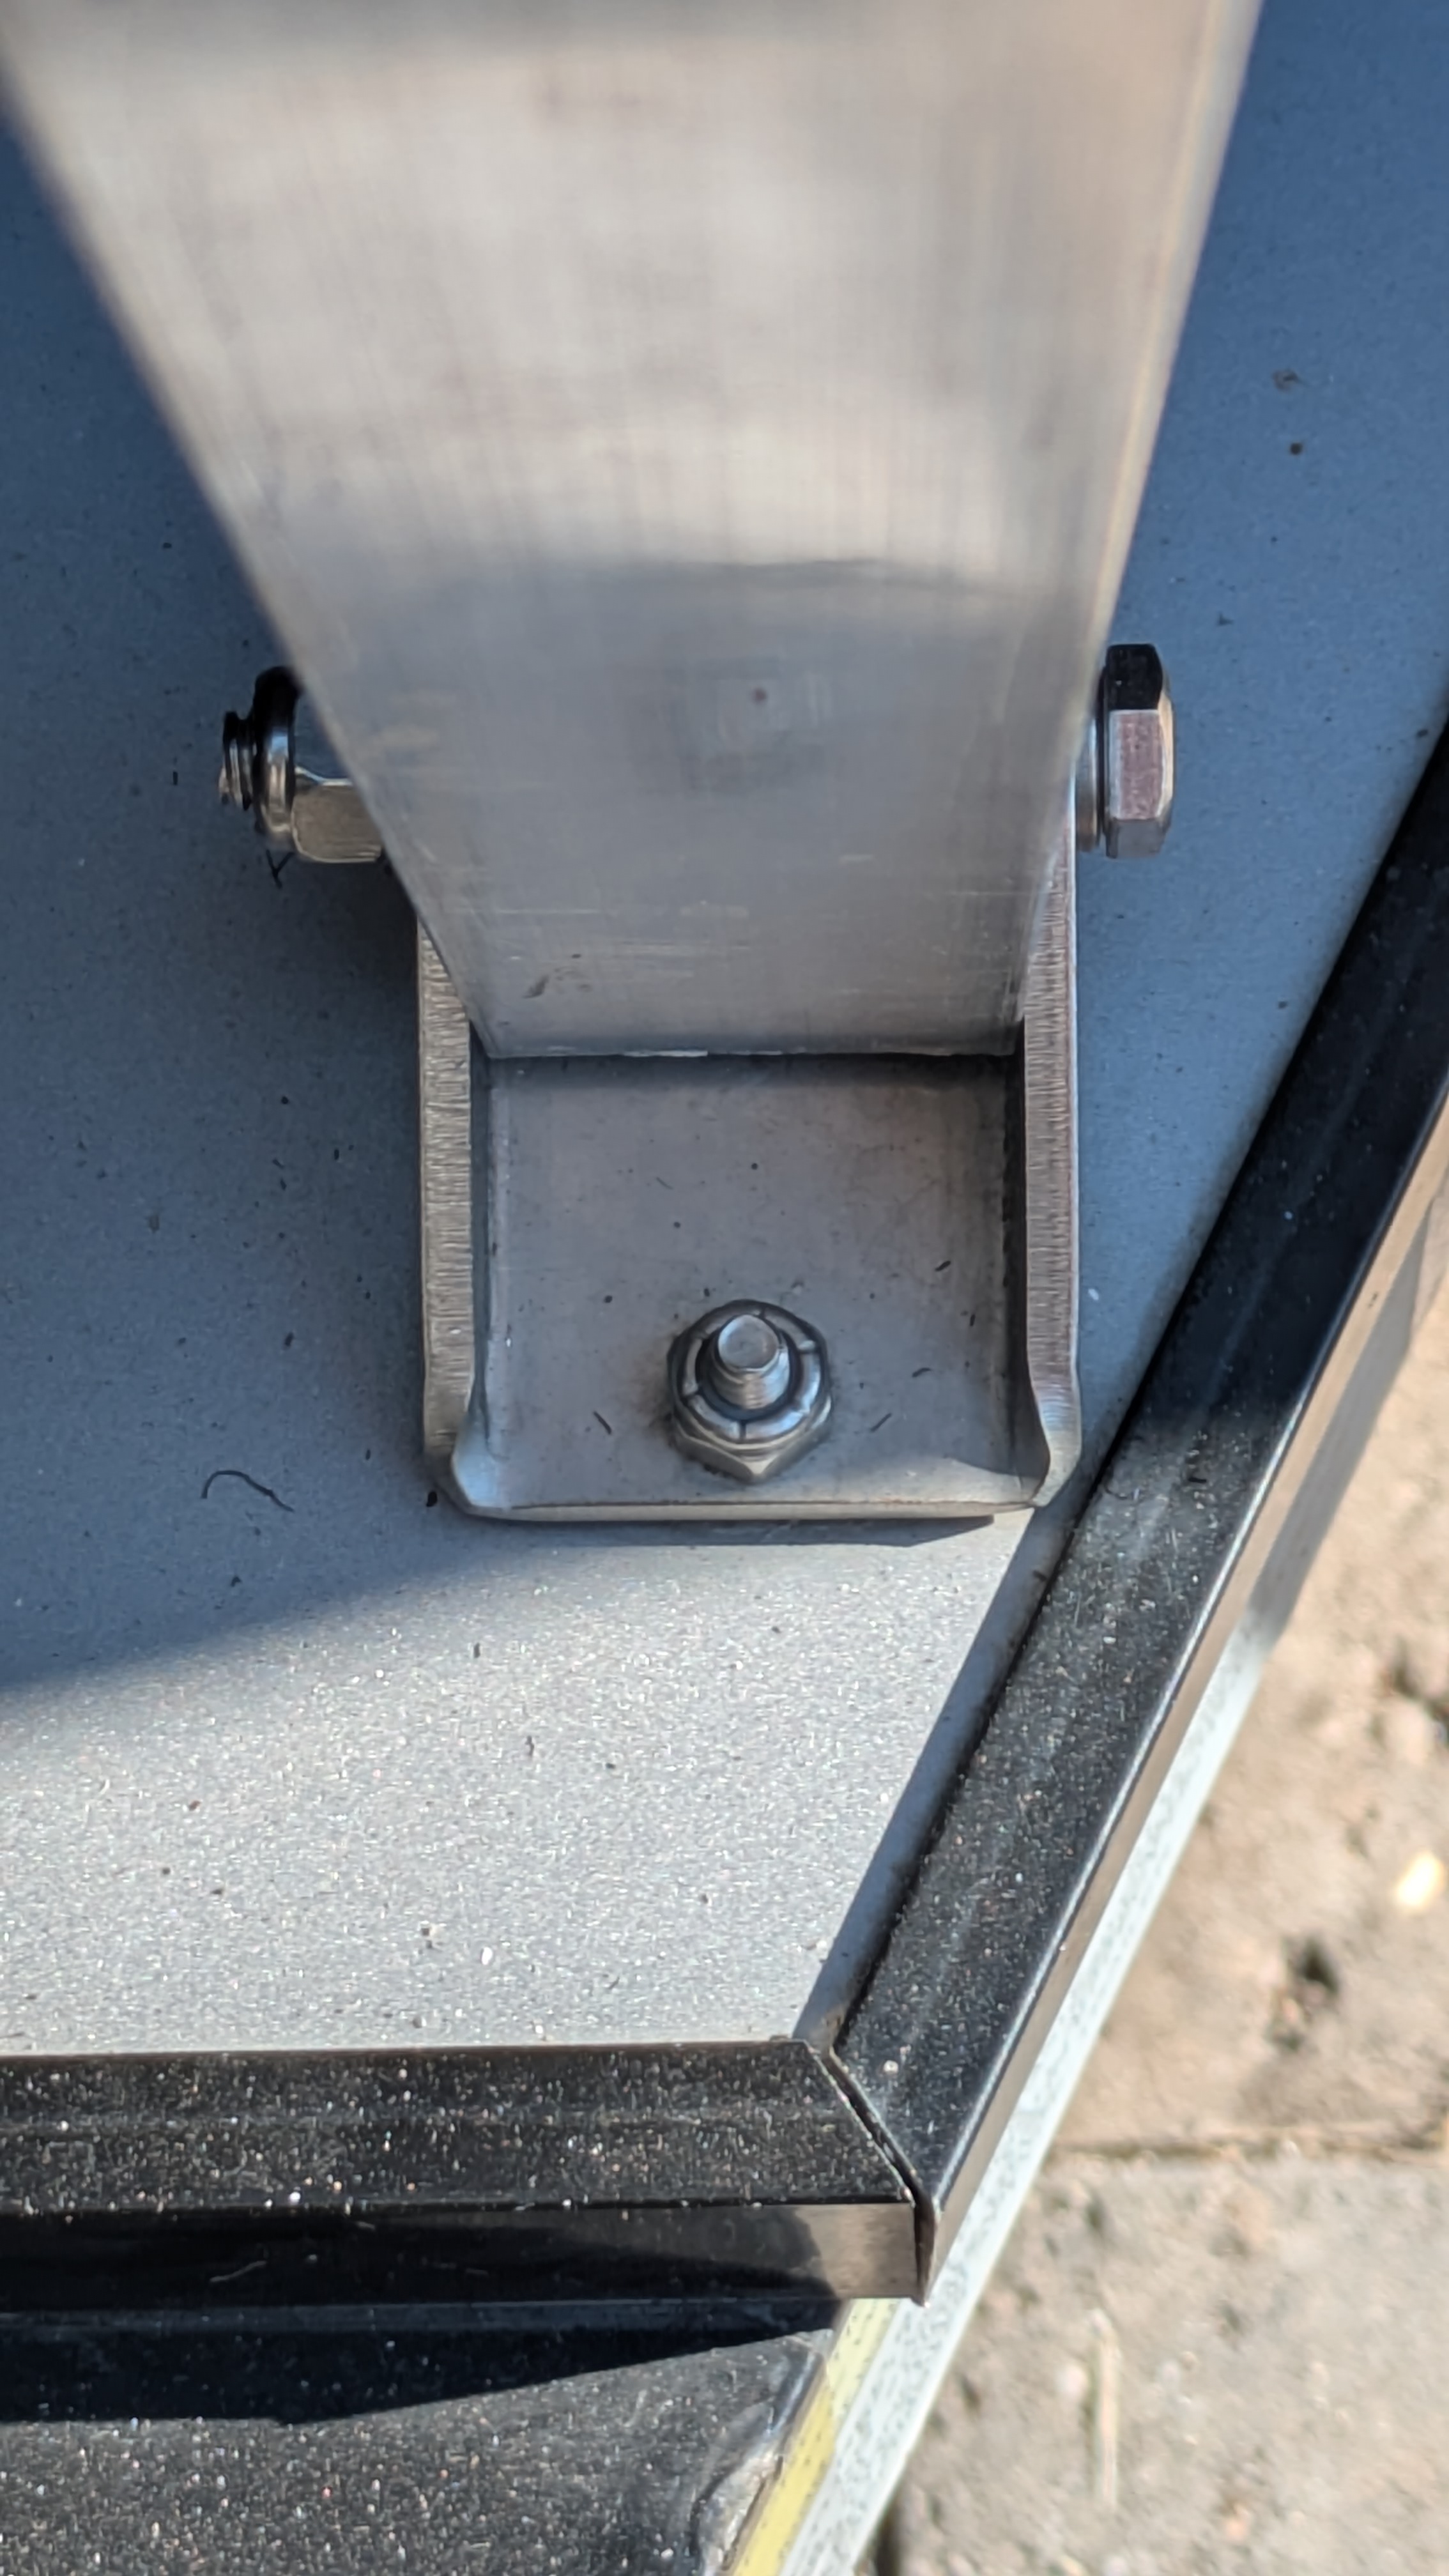

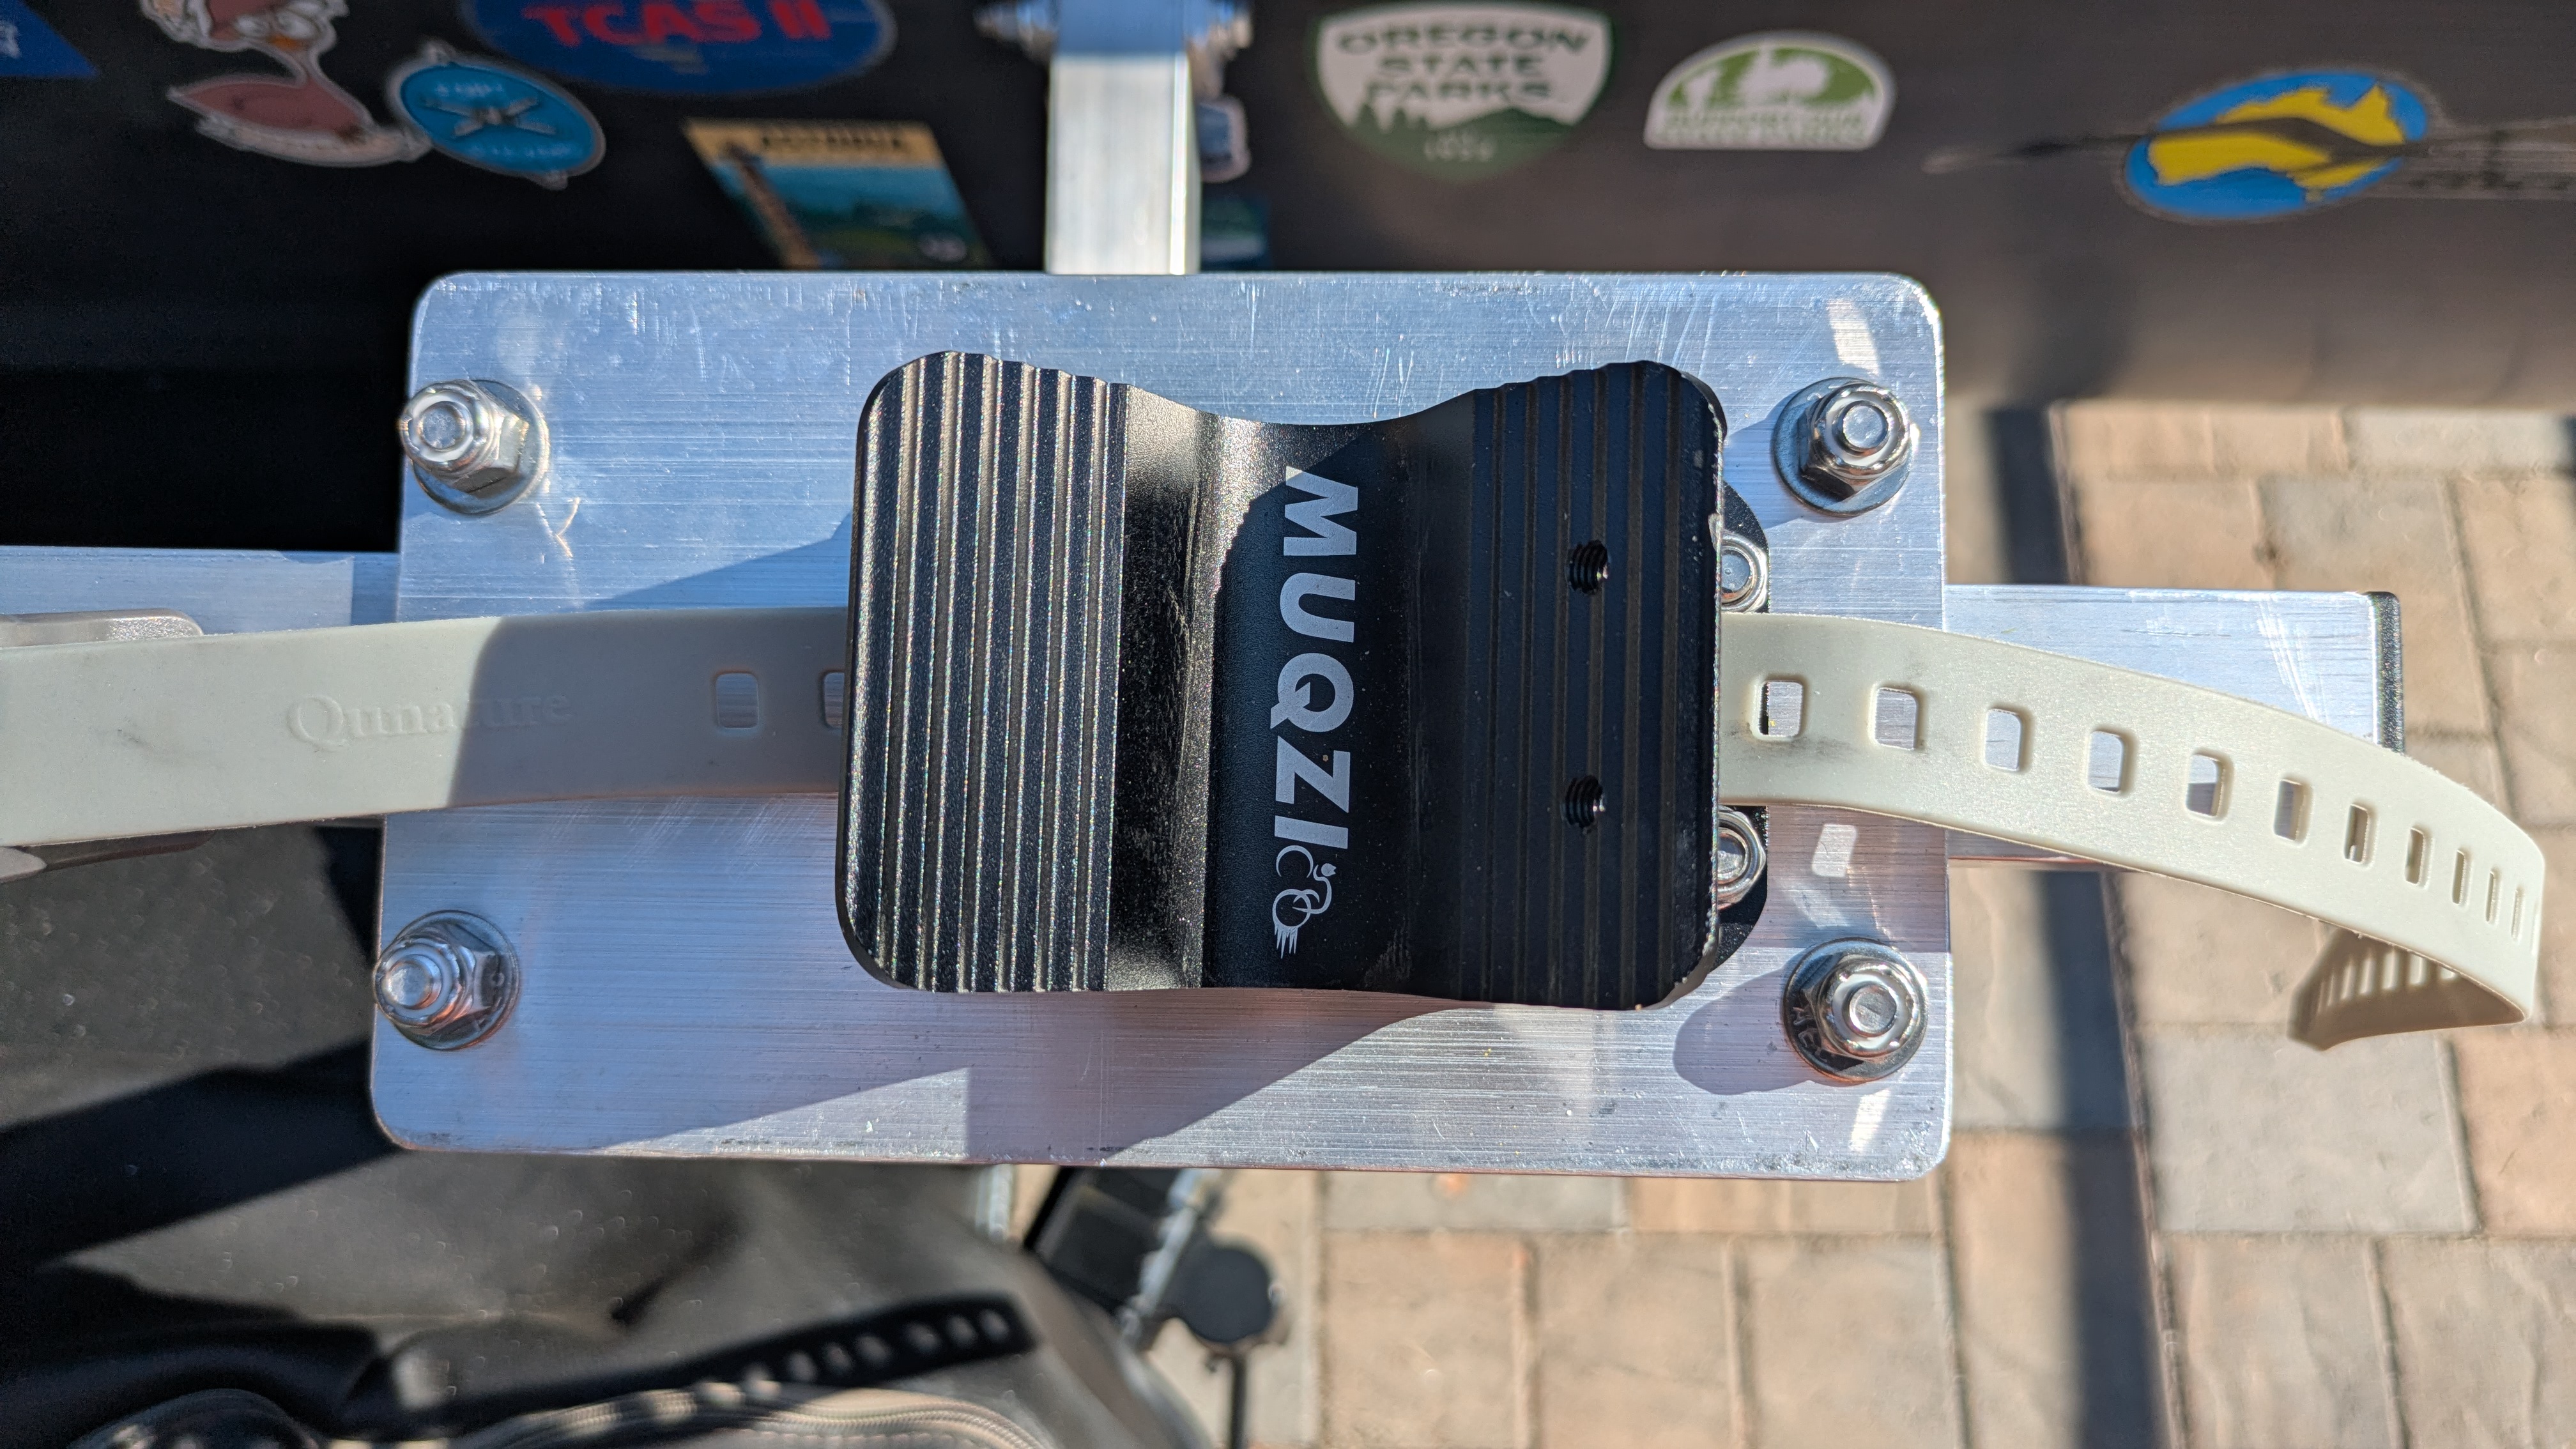
The wheels line up outside but near the junction between the tubes on each side so I extended the lateral tube beyond the supporting tubes. I mounted the aluminum wheel cradles to some 3/16″ aluminum plate using countersunk 1/4″ stainless steel bolts. I made this adapter plate long enough to span the supporting tubes, and attached it to the cross bar using square stainless steel brackets. I used some rubber spacers left over from past bicycle light mounts to take up space between the brackets and the cross tube and make a snug fit.
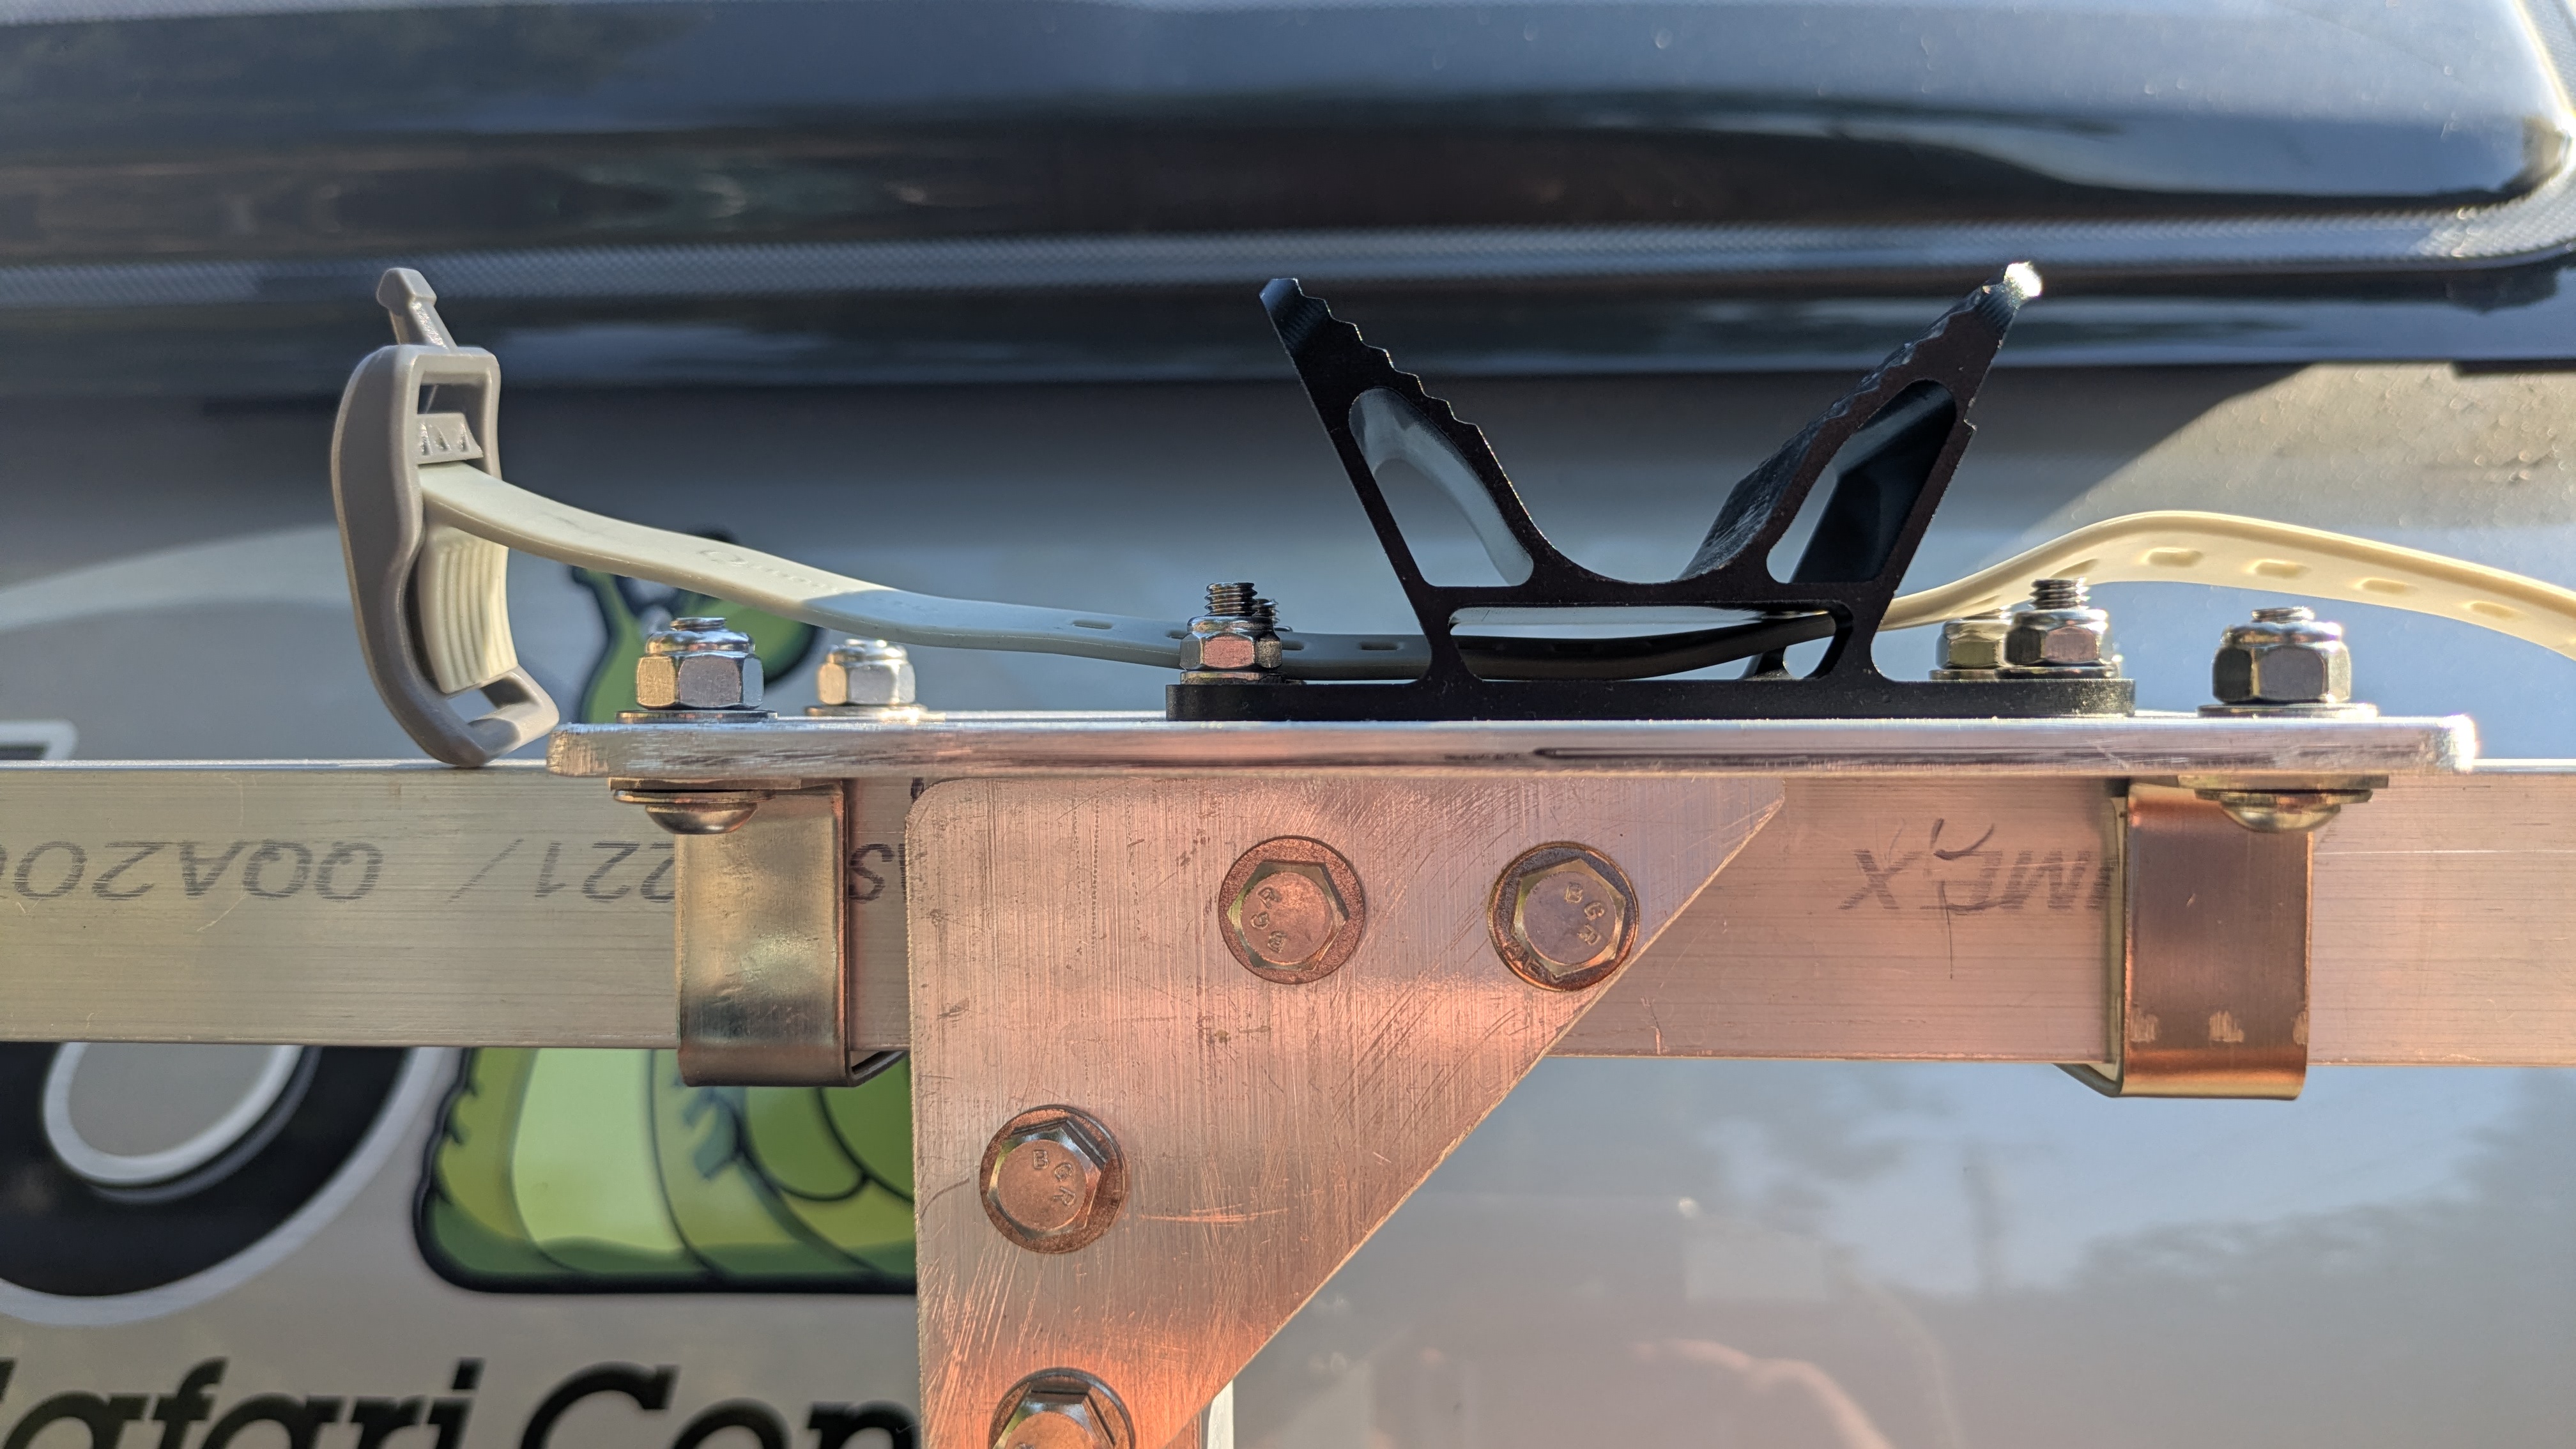
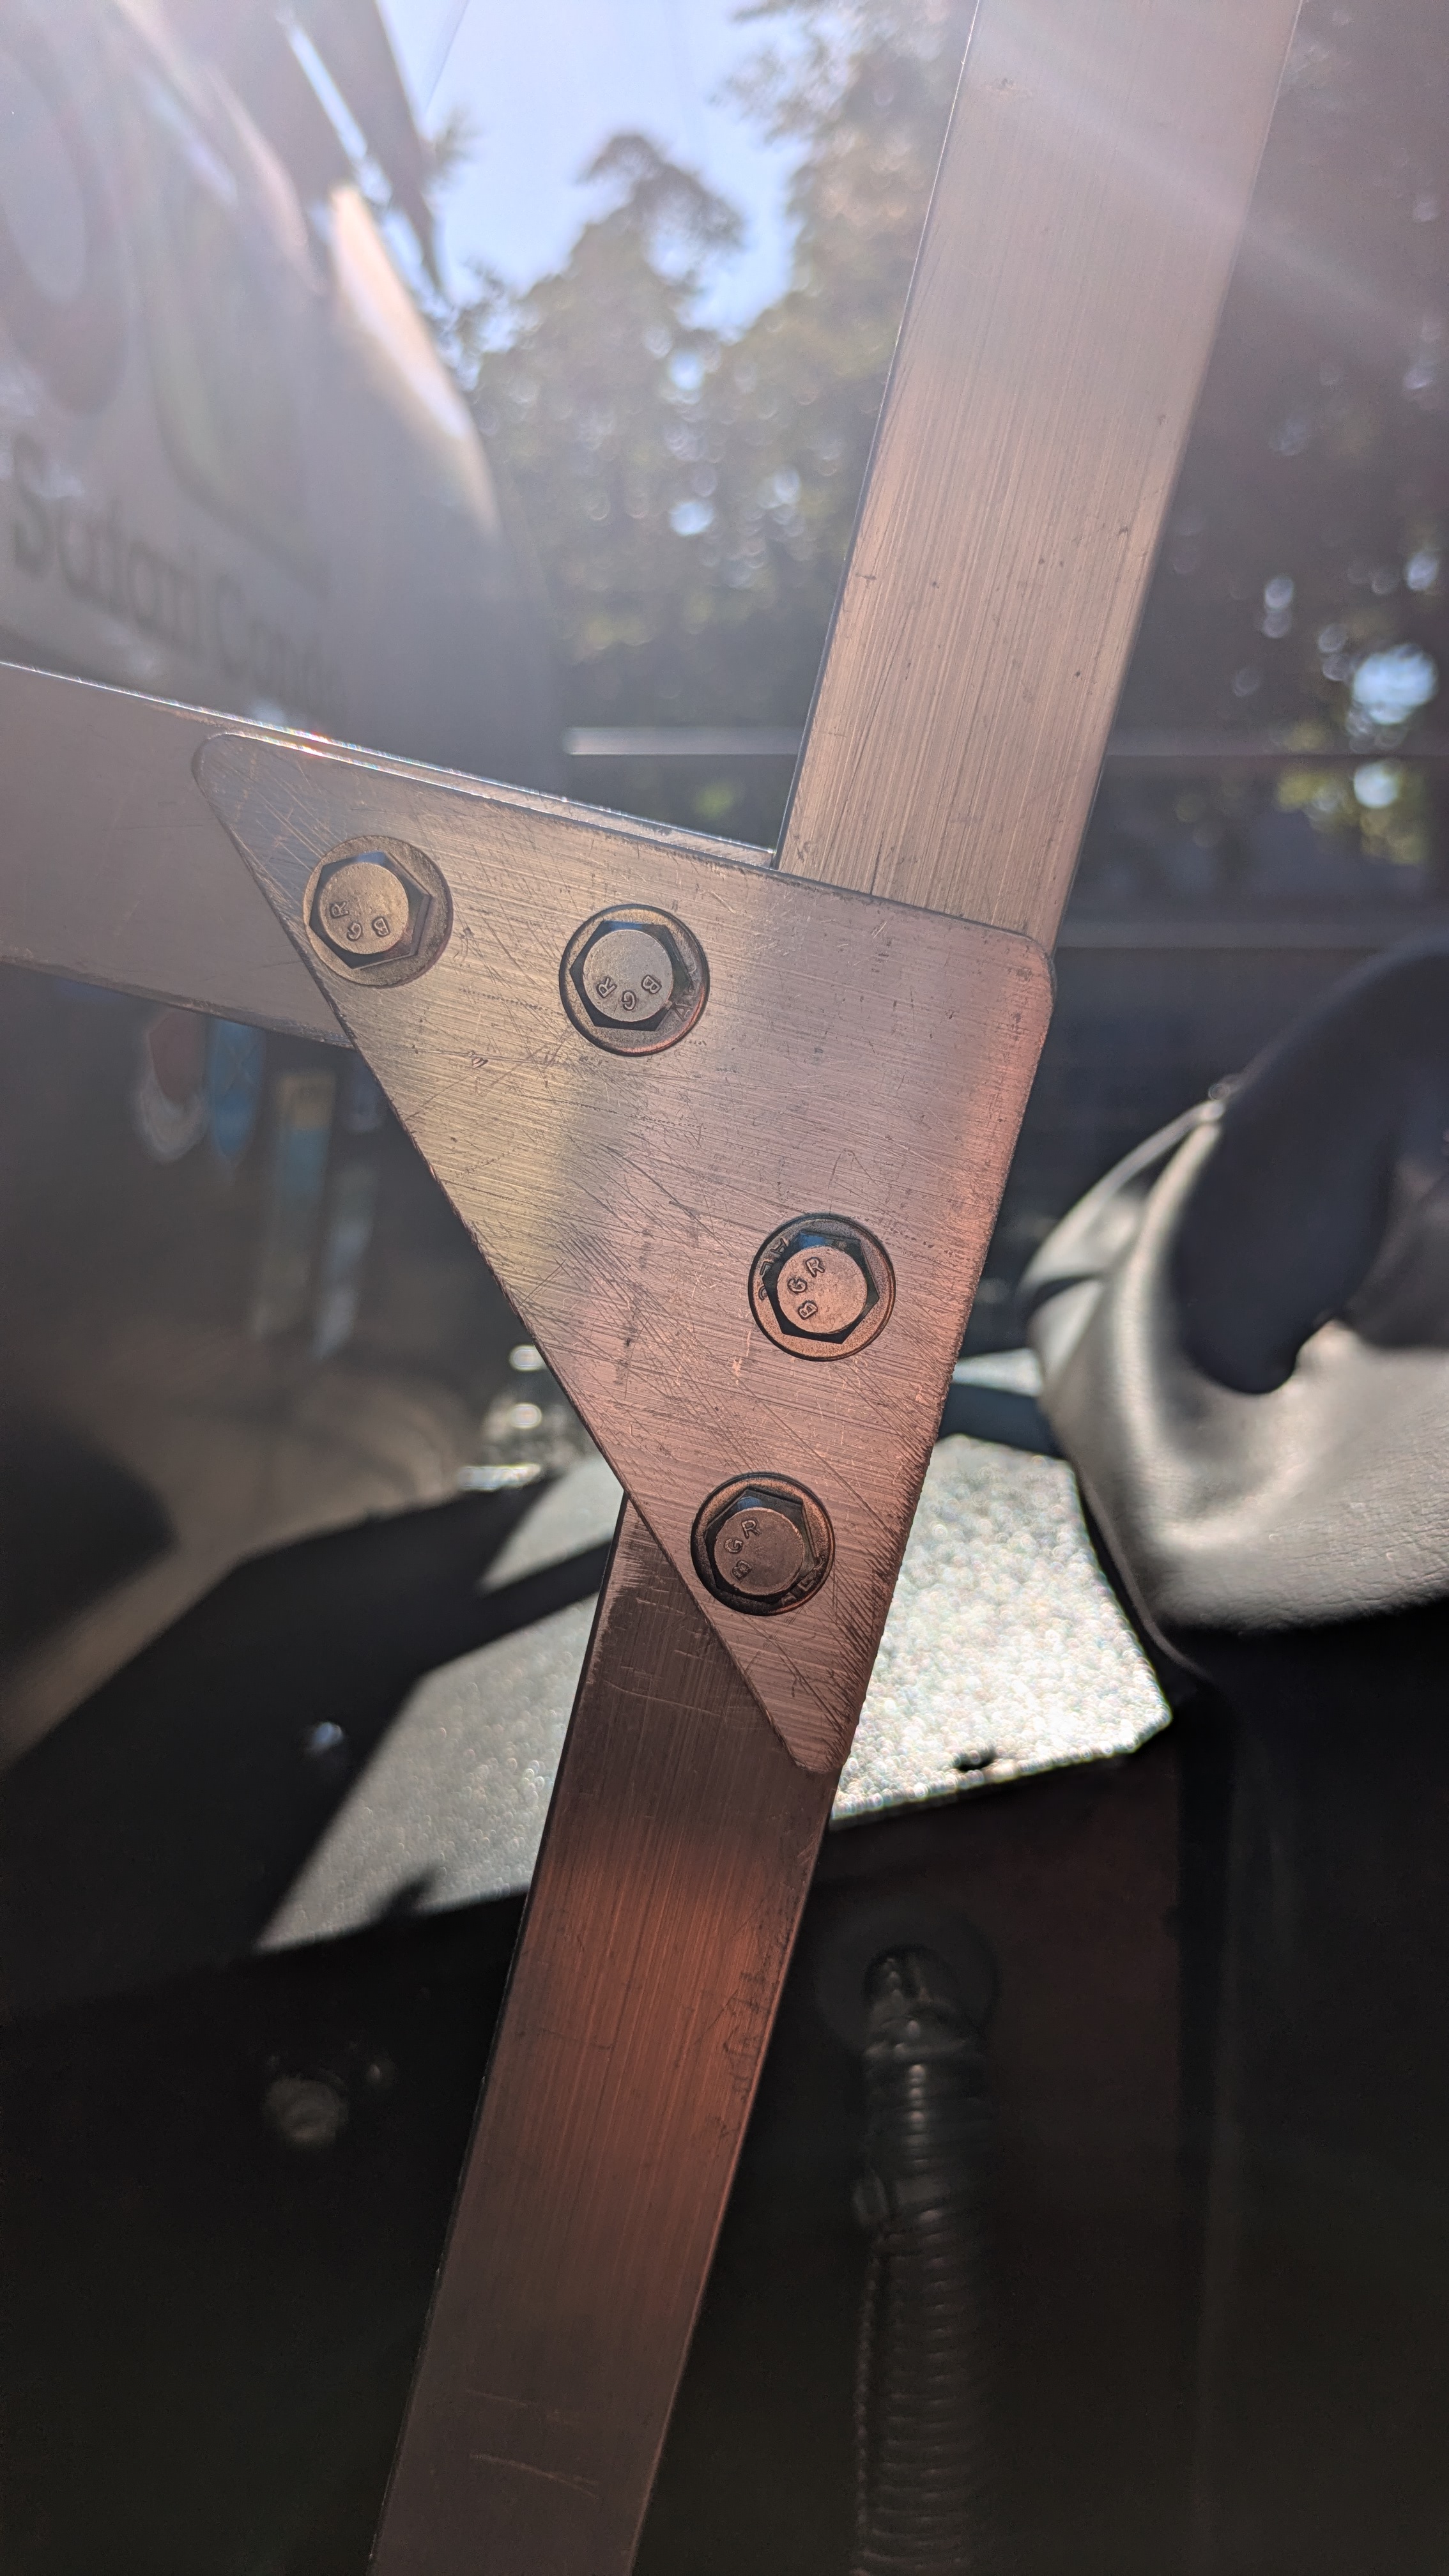
I attached the 1 1/4″ square tubes with triangular truss plates, 4″ on a side, using 3/16″ aluminum plate. 8 truss plates total. The plates were attached with 1/4″ stainless steel through-bolts and nylon locking nuts, two to a side. Once assembled and attached securely to the four mounting points on the trailer, there is zero movement between the rack and the trailer. They are essentially one unit.
The wheel cradles came with Velcro to secure the wheels. I’m not a fan and replaced the Velcro with some stretchy tiedown straps, I think this will be easier to use and allow a tighter grip on the wheels.
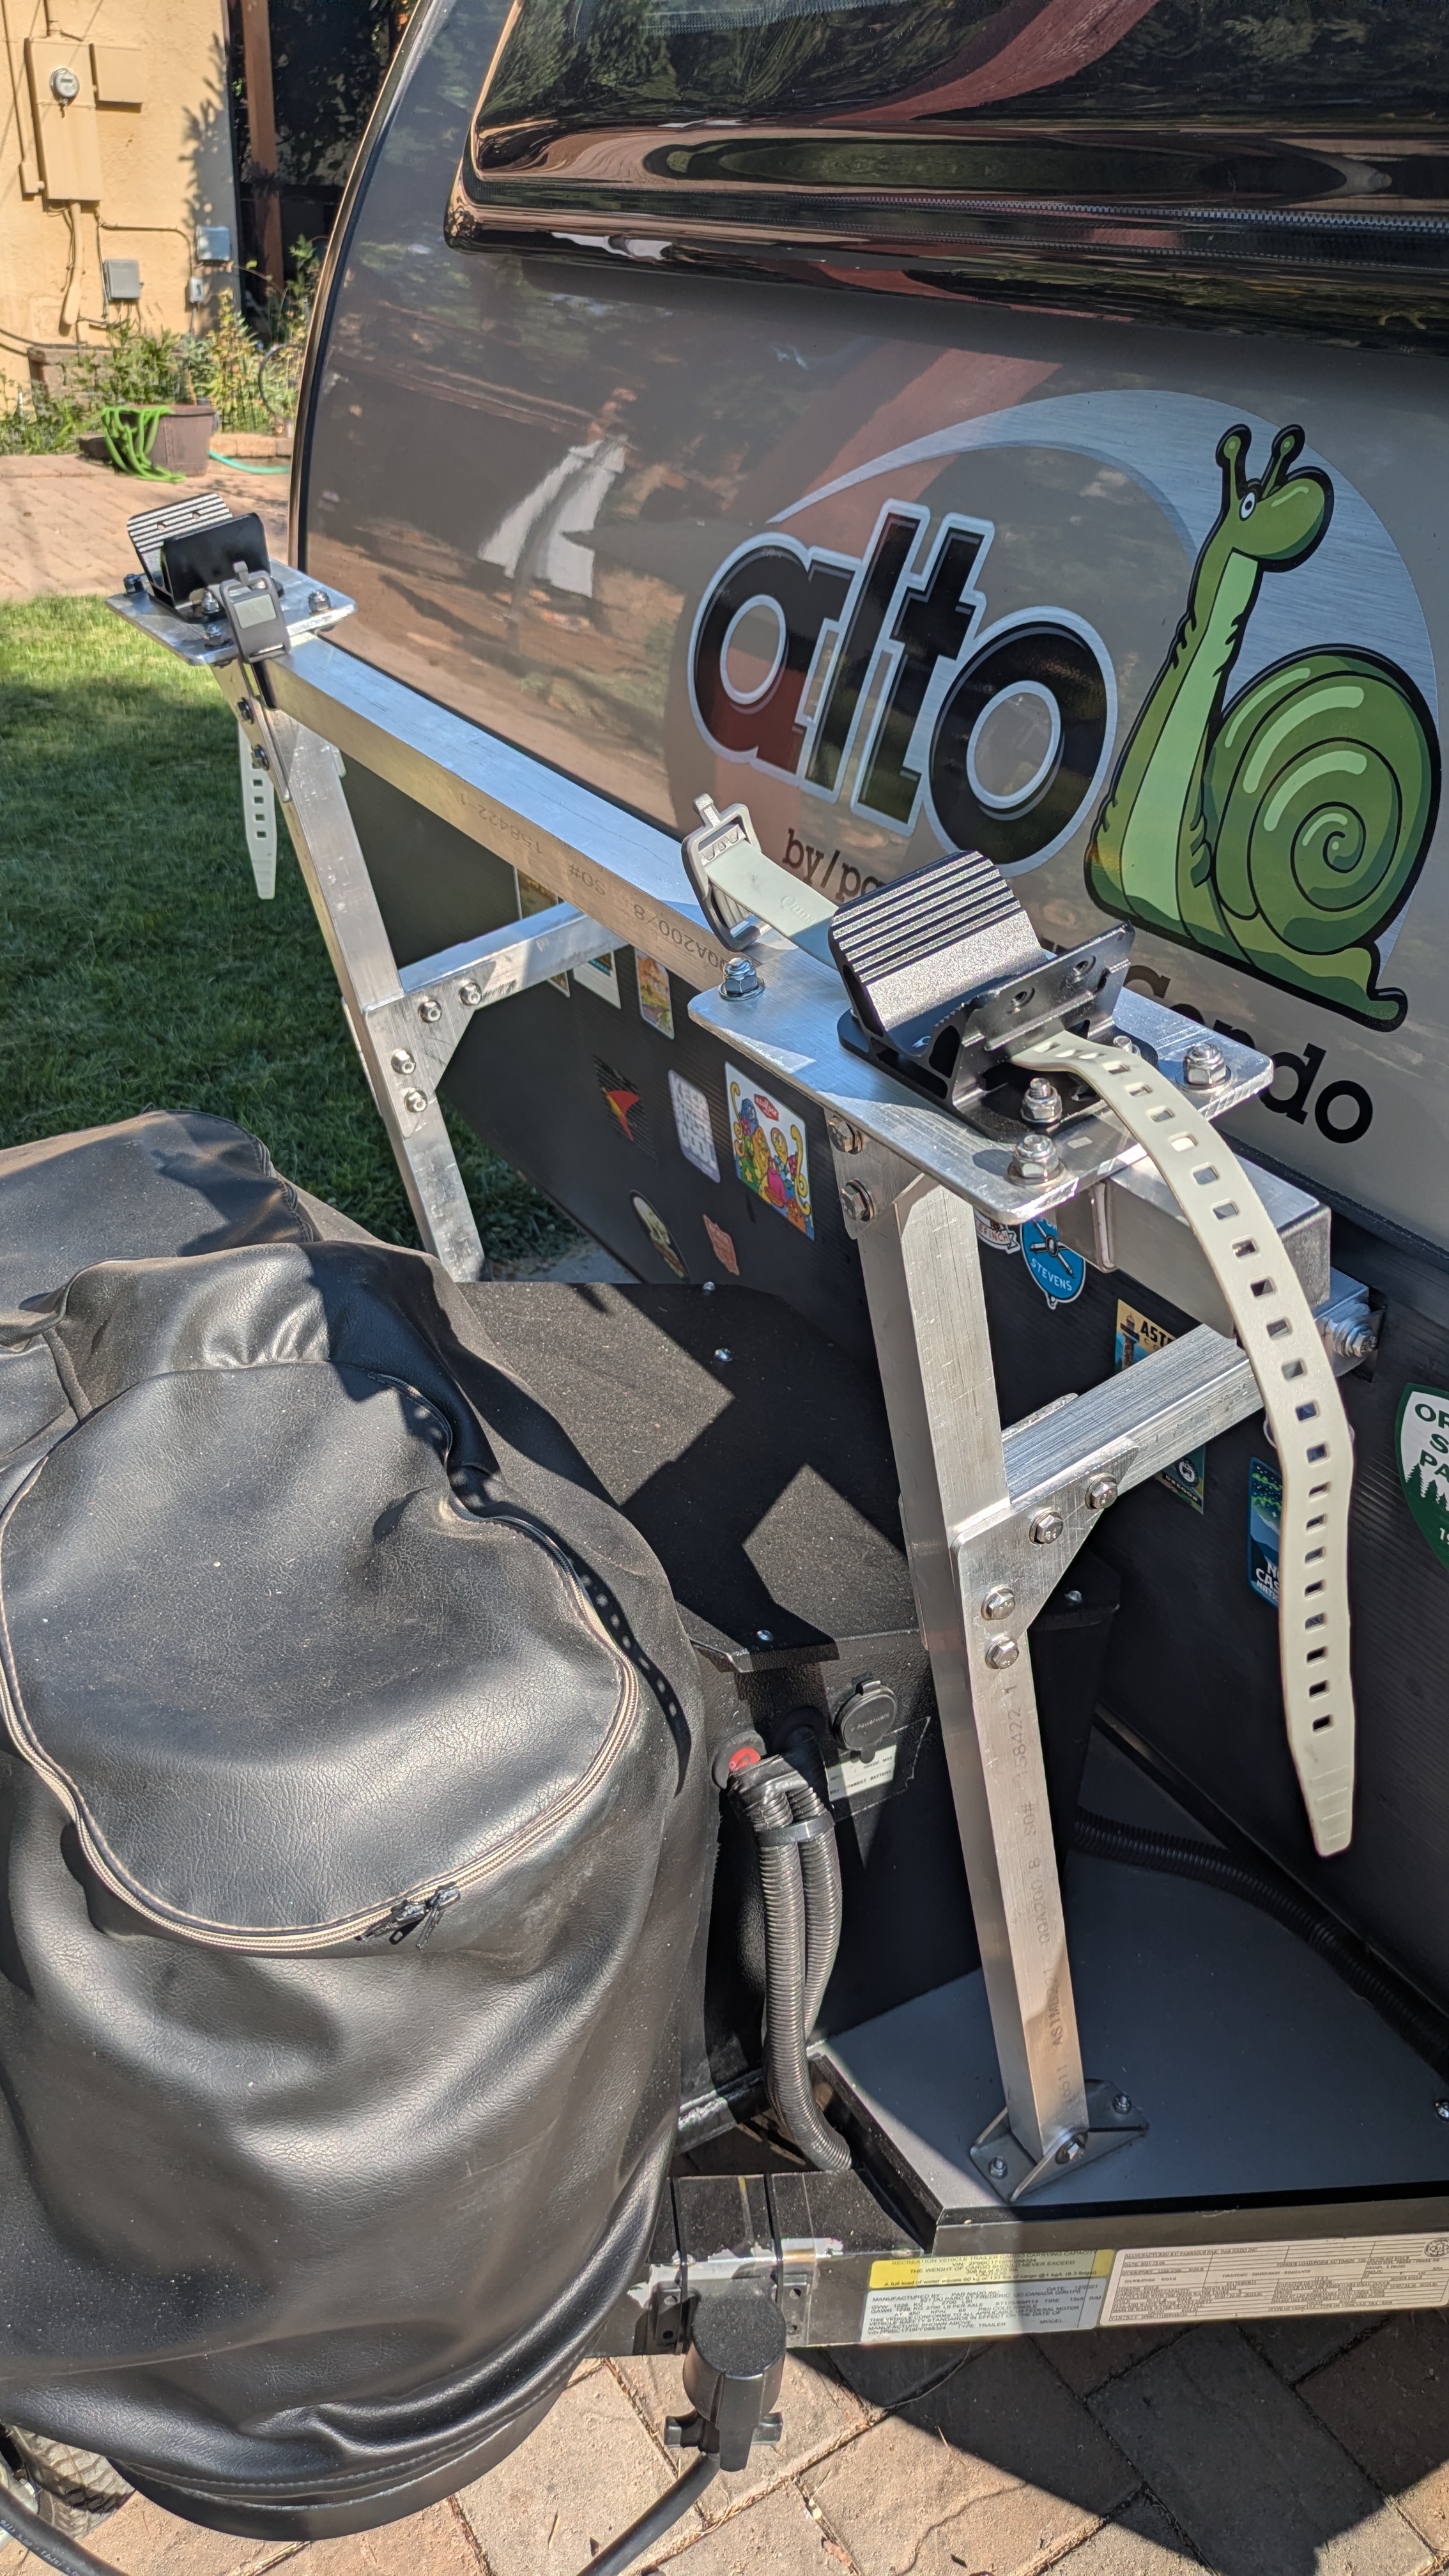
To support the pivot point of the frame, I made a cap that sits on top of the trailer’s 2″ OD diameter jack tube. I had some 2″ round aluminum tubing I had cut off the boom of the Sprint years ago (long story). The inner diameter was a bit too small but a bit of sanding with a drum sander on the end of a hand drill solved that problem. I used a 2″ hole saw to cut out a round piece of 1″ HDPE I had laying around from the composite tank project. I mounted the HDPE inside the aluminum tube and pinned it in place with a piece of brass rod. I used a rotary tool (like a Dremel) to cut grooves in the HDPE that roughly match the shape of the frames pivot point. The cap sits snugly over the end of the jack tube, supporting about 17 of the total 40 lb trike weight and fixing it so it can’t move laterally.
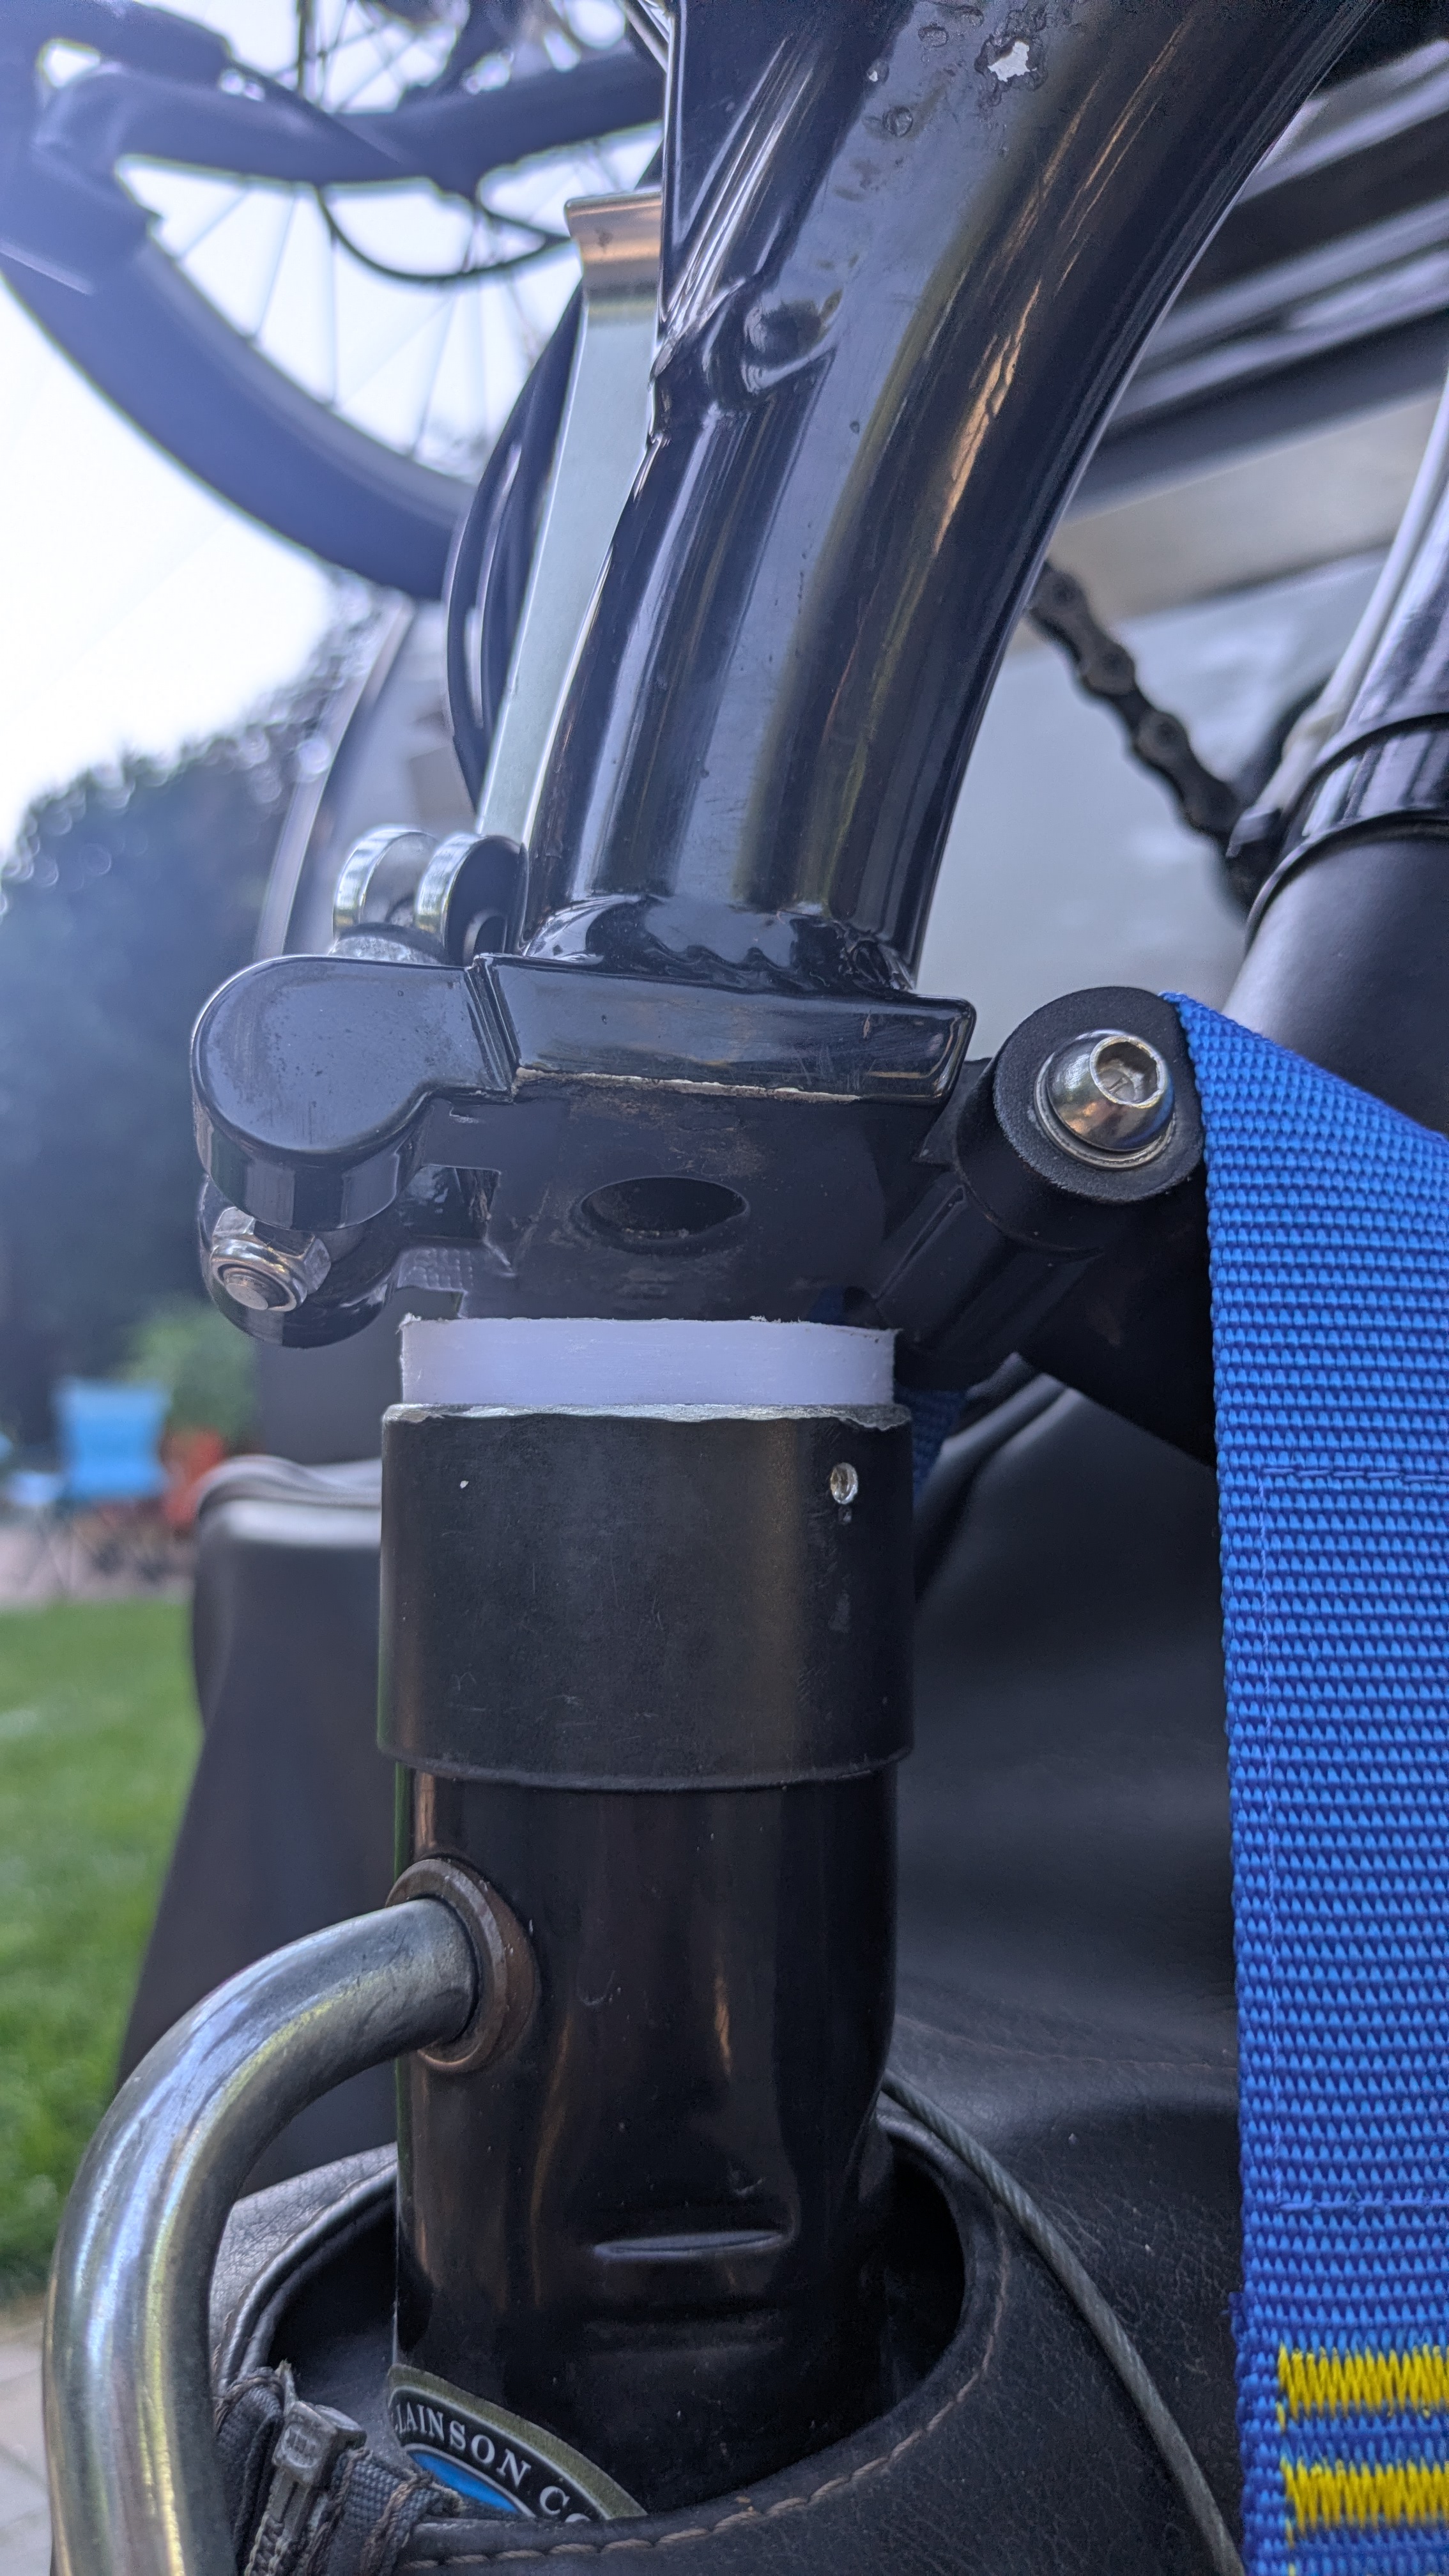
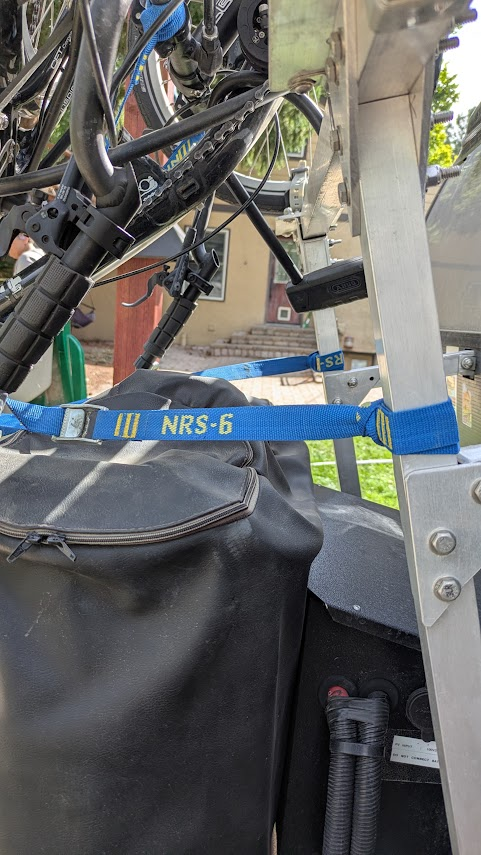
It’s fairly easy to lift the folded trike up, slide the wheels into the cradles, and lower the pivot point down onto the HDPE cap on the jack tube. At that point the trike will sit by itself on the rack, but needs to be secured for travel. This consists of two NRS straps for the frame and the two wheel straps. One NRS strap pulls the frame pivot down into the HDPE, keeping it solidly in the grooves. The other pulls the trike handlebars back toward the jack tube, preventing backward movement from pulling the frame pivot out of the HDPE and reducing the amount of play in the steering. The wheel straps keep the wheels in the cradles. When all the straps are cinched tight, the trike doesn’t move relative to the frame or the trailer. Again, one solid unit.
The total weight of the rack, including straps and jack cap, is 10.6 lb.
Surprise!
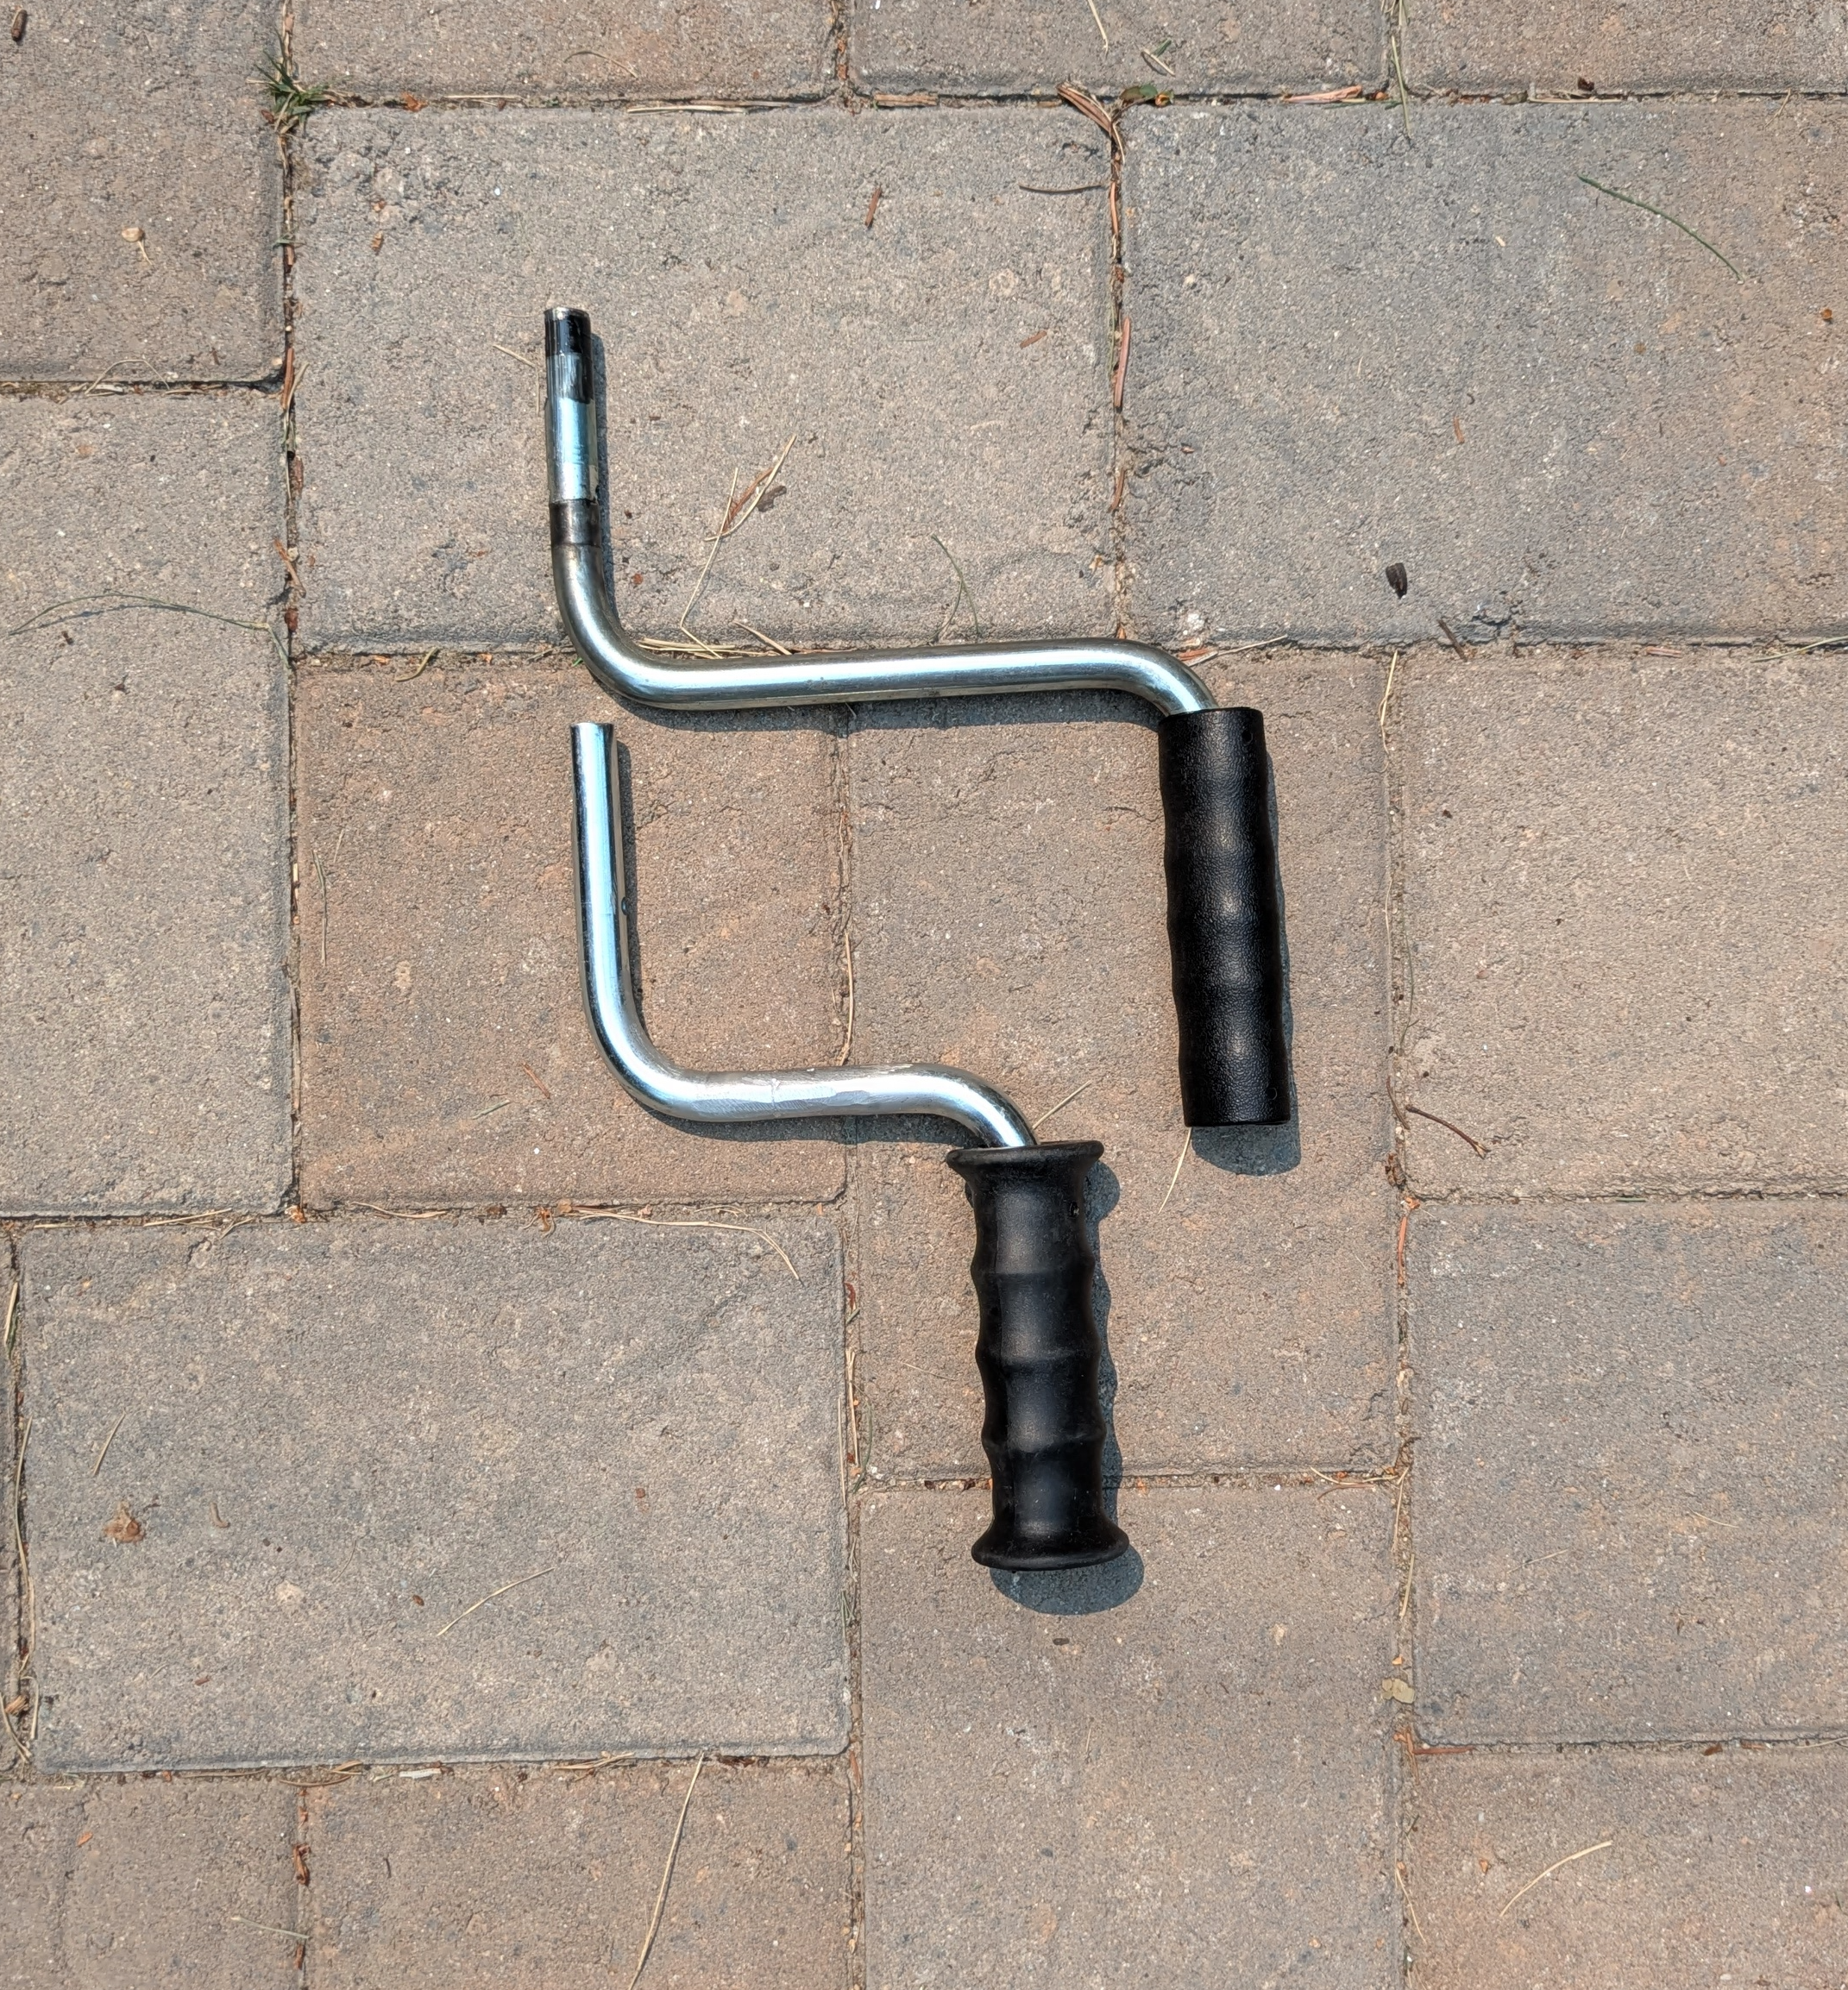
One thing I forgot to check in all the prototyping: Can I turn the jack handle with the trike loaded? Well, no. The handle hits the frame of the trike. To solve this problem I ordered a replacement handle from the jack manufacturer, Dutton-Lainson, and hired a local metal fabricator to cut out two inches and weld it back together. It was a 10 minute job and now I can raise and lower the tongue to my heart’s content. It’s only very slightly harder to turn, not a problem. And just think of the weight savings.
Road Test
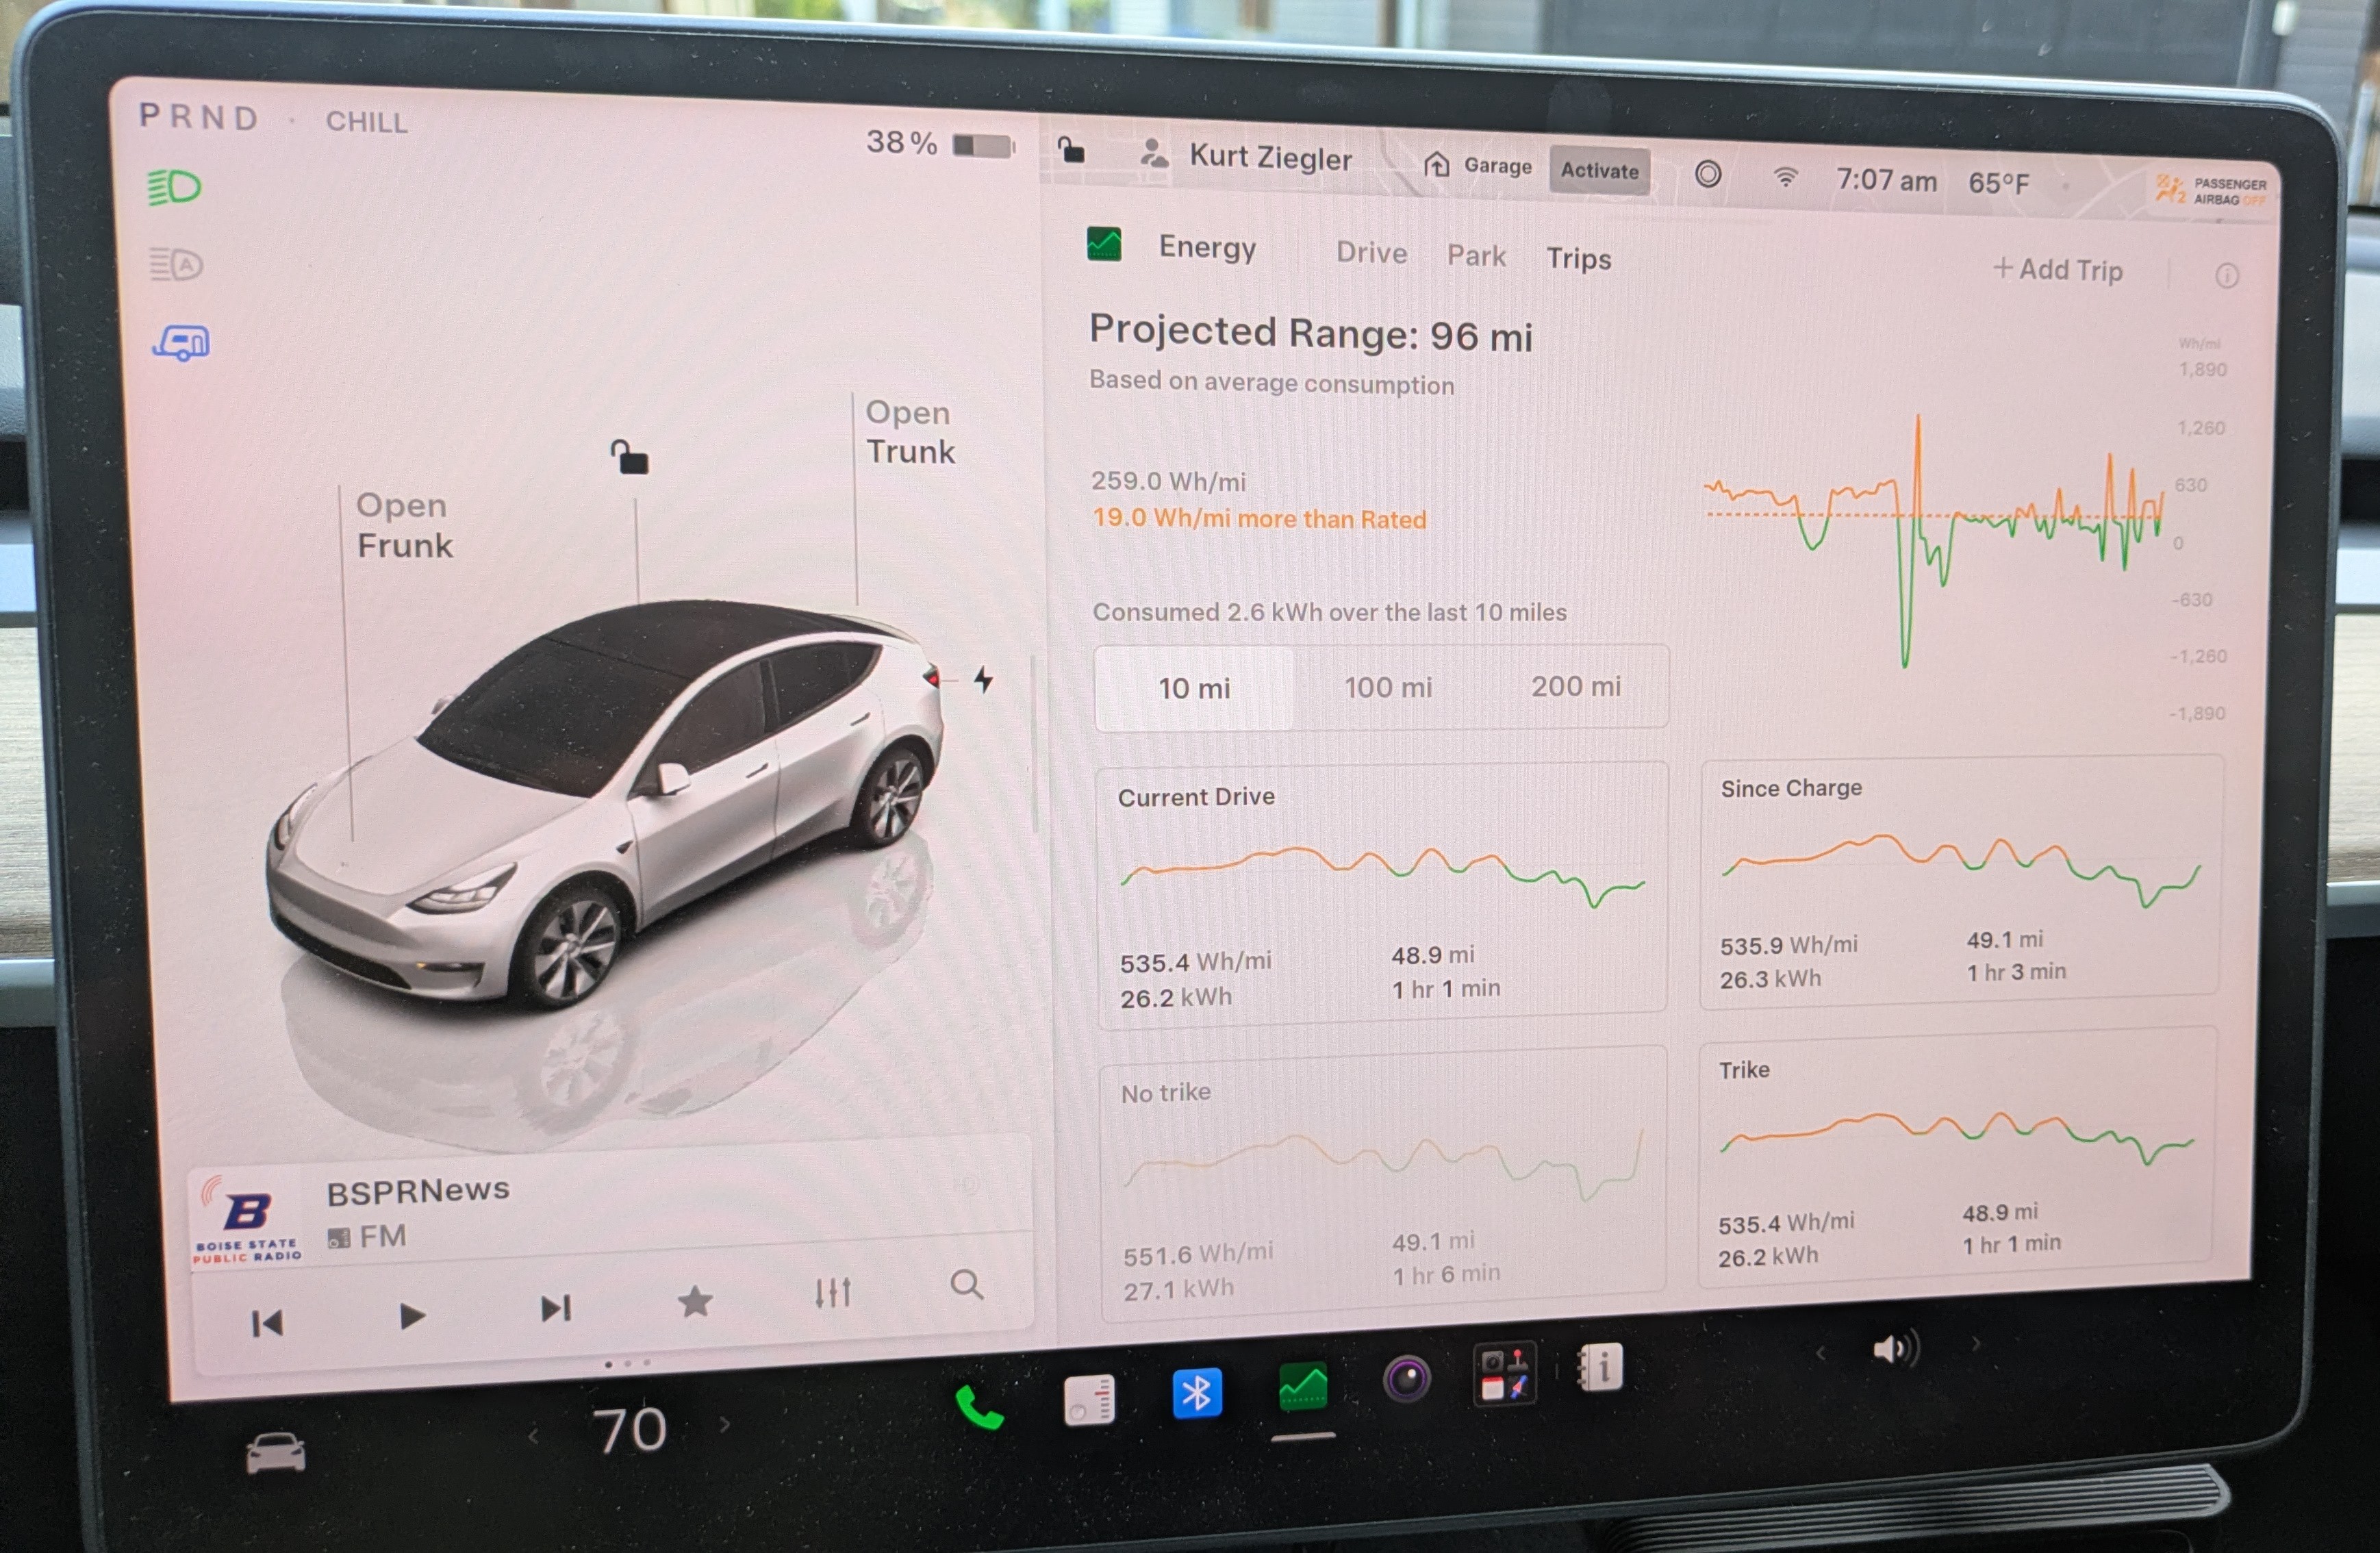
The rack seems solid enough and I can attach and drop the trailer with the trike mounted on it, now my concern turns to the impact on our range. My first pass at this was two 50 mile test runs on the interstate: one with rack and trike, one with neither. I controlled as many variables as I could: Started at sunrise when traffic and winds were minimal, same route, followed speed limits exactly but limited to 65 MPH (the interstate here top out at 80), 80% charge at the start of each run. The results were a bit of a surprise, efficiency was slightly better with the trike. I doubt the trike actually improves efficiency but it implies the impact is in the noise. I’ll take it. Next test will be on an upcoming month-long trip. We won’t be hauling the other trike on this trip so we’ll have enough room in the Tesla to stash the trike there if it becomes a problem.
| Configuration | Wh/mi |
| Without trike or rack | 551.6 |
| With trike | 535.4 |
Cover
The folded trike sits pretty low in the messy airflow behind the Tesla and for the most part stays within the triangular profile of the trailer tongue. This may explain the seemingly minimal effect on range. It could also support a fairly optimal faring that in theory could reduce aerodynamic load. More importantly, a cover over the trike would protect it from the elements. I’m pretty skeptical about the aerodynamic benefits but gave it a go anyway. And quickly ran into the meager limits of my sewing skills. I abandoned that project and purchased a 9′ x 9′ tarp from Home Depot that I can throw over it for extended stays. But the trike will be towed naked for now.
Working Prototype #2
I can’t open the Tesla’s rear hatch with the trike mounted and trailer attached. It hits the trike frame. This isn’t really a surprise, Tesla’s specs on the hitch keep the trailer very close to the car and the trike frame sticks out in front of the jack tube a bit. I could fix this by extending the receiver hitch out a few inches but I’m not inclined to do that. I could move the trike aft a bit but this would require redesigning the rack and coming up with a much more complicated attachment point to the trailer jack. That could be working prototype #2 but I’m not too inclined to do that either. It’s only an issue during charging stops and all we really need is access to the dogs which we can get from the side doors. Worst case we drop the trailer which we sometimes have to do anyway.
Other possibilities for further iterations: weld the frame instead of using truss plates to shave off maybe a pound or so. Meh. Paint it. Meh, aluminum doesn’t rust. The entire time we owned our Mooney M20F single-engine aircraft it had no discernable paint. It flew just fine. That emergency landing in Albuquerque had nothing to do with the paint.
Don’t hold your breath.
The Other Trike
The current plan is to stuff the Adventure inside the Tesla. Since we can’t open the hatch with the trailer attached and need to access the dogs from the rear doors, the trike lives in the rear of the cargo area. The spare tire sits in the front and the dog crate on top of that. This has a couple of advantages: 1) The dogs live under the sun shade for the moon roof, and far from the unprotected window in the rear hatch. 2) The dogs live right next to the rear air conditioning vent, for maximum benefit with dog mode. Dog Mode is one of the many benefits of EV’s: The A/C stays on indefinitely while we run errands, keeping the cabin at a cool 70 degrees.
One of the most annoying design decisions for the Model Y is the absence of any cargo tie downs. I can restrain things a bit using the child carrier attachments on the back of the folded rear seats, but it’s not great.
Cost
| Item | Qty | Cost |
| 1 1/4″ x 10′ square aluminum tubing 3/16″ aluminum plate | $175 | |
| Wheel cradles | 2 | $44 |
| Stretchy tiedown straps | 2 | $15 |
| 1 /14″ square stainless steel brackets | 4 | $12 |
| 1/4″ bolts, washers, nylon locknuts | $50 | |
| 1 1/4″ plastic square end caps | 2 | $8 |
| Jack handle w/ shipping | 1 | $28 |
| Labor to shorten jack handle | $35 | |
| Total | $376 |
Lessons Learned
- Two of these trikes adds too much tongue weight, but one is reasonable
- Folding the trike and supporting the wheels instead of hanging the unfolded frame was the key design decision
- Prototyping with truss plates yielded a very strong frame with the option to weld later
- Adapter plates avoided drilling the cross tube
- The jack handle modification was easier and cheaper than expected
- The hatch interference remains the primary compromise
- The upper and lower trailer brackets can move relative to each other while under tow!


Finally
This post finally reconciles the bifurcated nature of this site. Trike projects, trailer projects, and now the project that connects them.
UPDATE
Within moments of posting this on the Altoistes site, an astute member pointed out a serious flaw in my design. While under tow, the triangular hitch portion of the trailer that holds the lower brackets can move relative the upper brackets on the front of the trailer. Another Altoistes member measured the movement at about 3/16″” and figured 1/2″ might be a good guess at worst case. My rack creates a rigid connection between those points– if I the trailer sees relative movement anywhere close to this, something is going to eventually break.
What’s needed is a hinge that allows the angle between the vertical and horizontal rack tubes to change as the distance between the trailer brackets changes. To achieve this I simply removed the outside bolt on the truss plate that connects the horizontal tube. This turns the inner bolt into a crude hinge. I had to grind away the corners where the horizontal tube meets the vertical tube to allow about +/- 15 degrees of movement (way more than necessary). The attachments to the trailer brackets already had at least this much freedom of movement. I also added stainless steel washers between one of the truss plates and the vertical tube, for both tubes. This slightly widens the gap between the truss plates, preventing the horizontal tube from binding. It’s a little ugly but I didn’t clean up the unused hole in the truss plates, figuring I want as much material as possible to resist lateral rack movement.
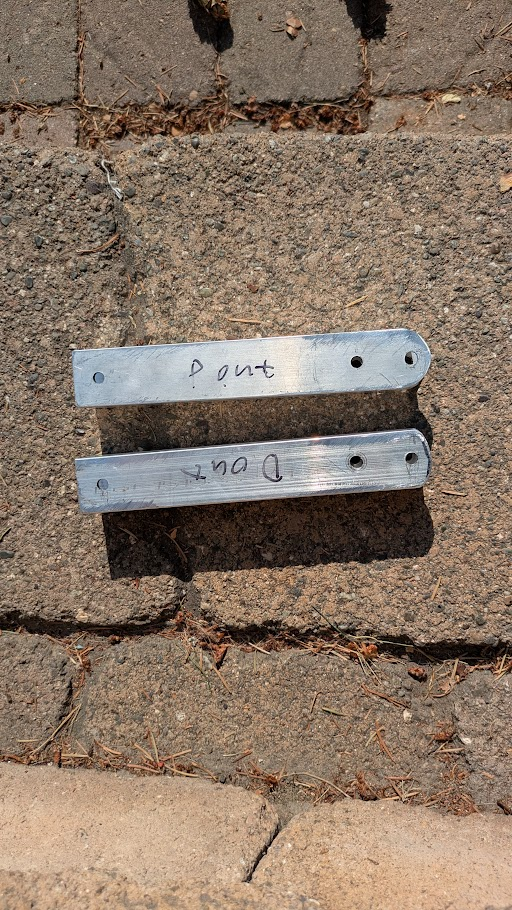
So absolute stiffness was the wrong design goal. Instead I need lateral stiffness with some compliance that allows for longitudinal movement. By tightening the brackets until just prior to the point where they begin binding the tubes, only very slight lateral movement is introduced. Solid but compliant where it needs to be.
When the trailer flexes, the position of the wheel cradles moves fore and aft. With the frame tied down tightly to the jack cap, compliance in the straps holding the wheels to the cradles should avoid pulling the frame out of its HDPE slot. It also avoids treating the trike frame as a rigid connection between the upper and lower frame brackets.
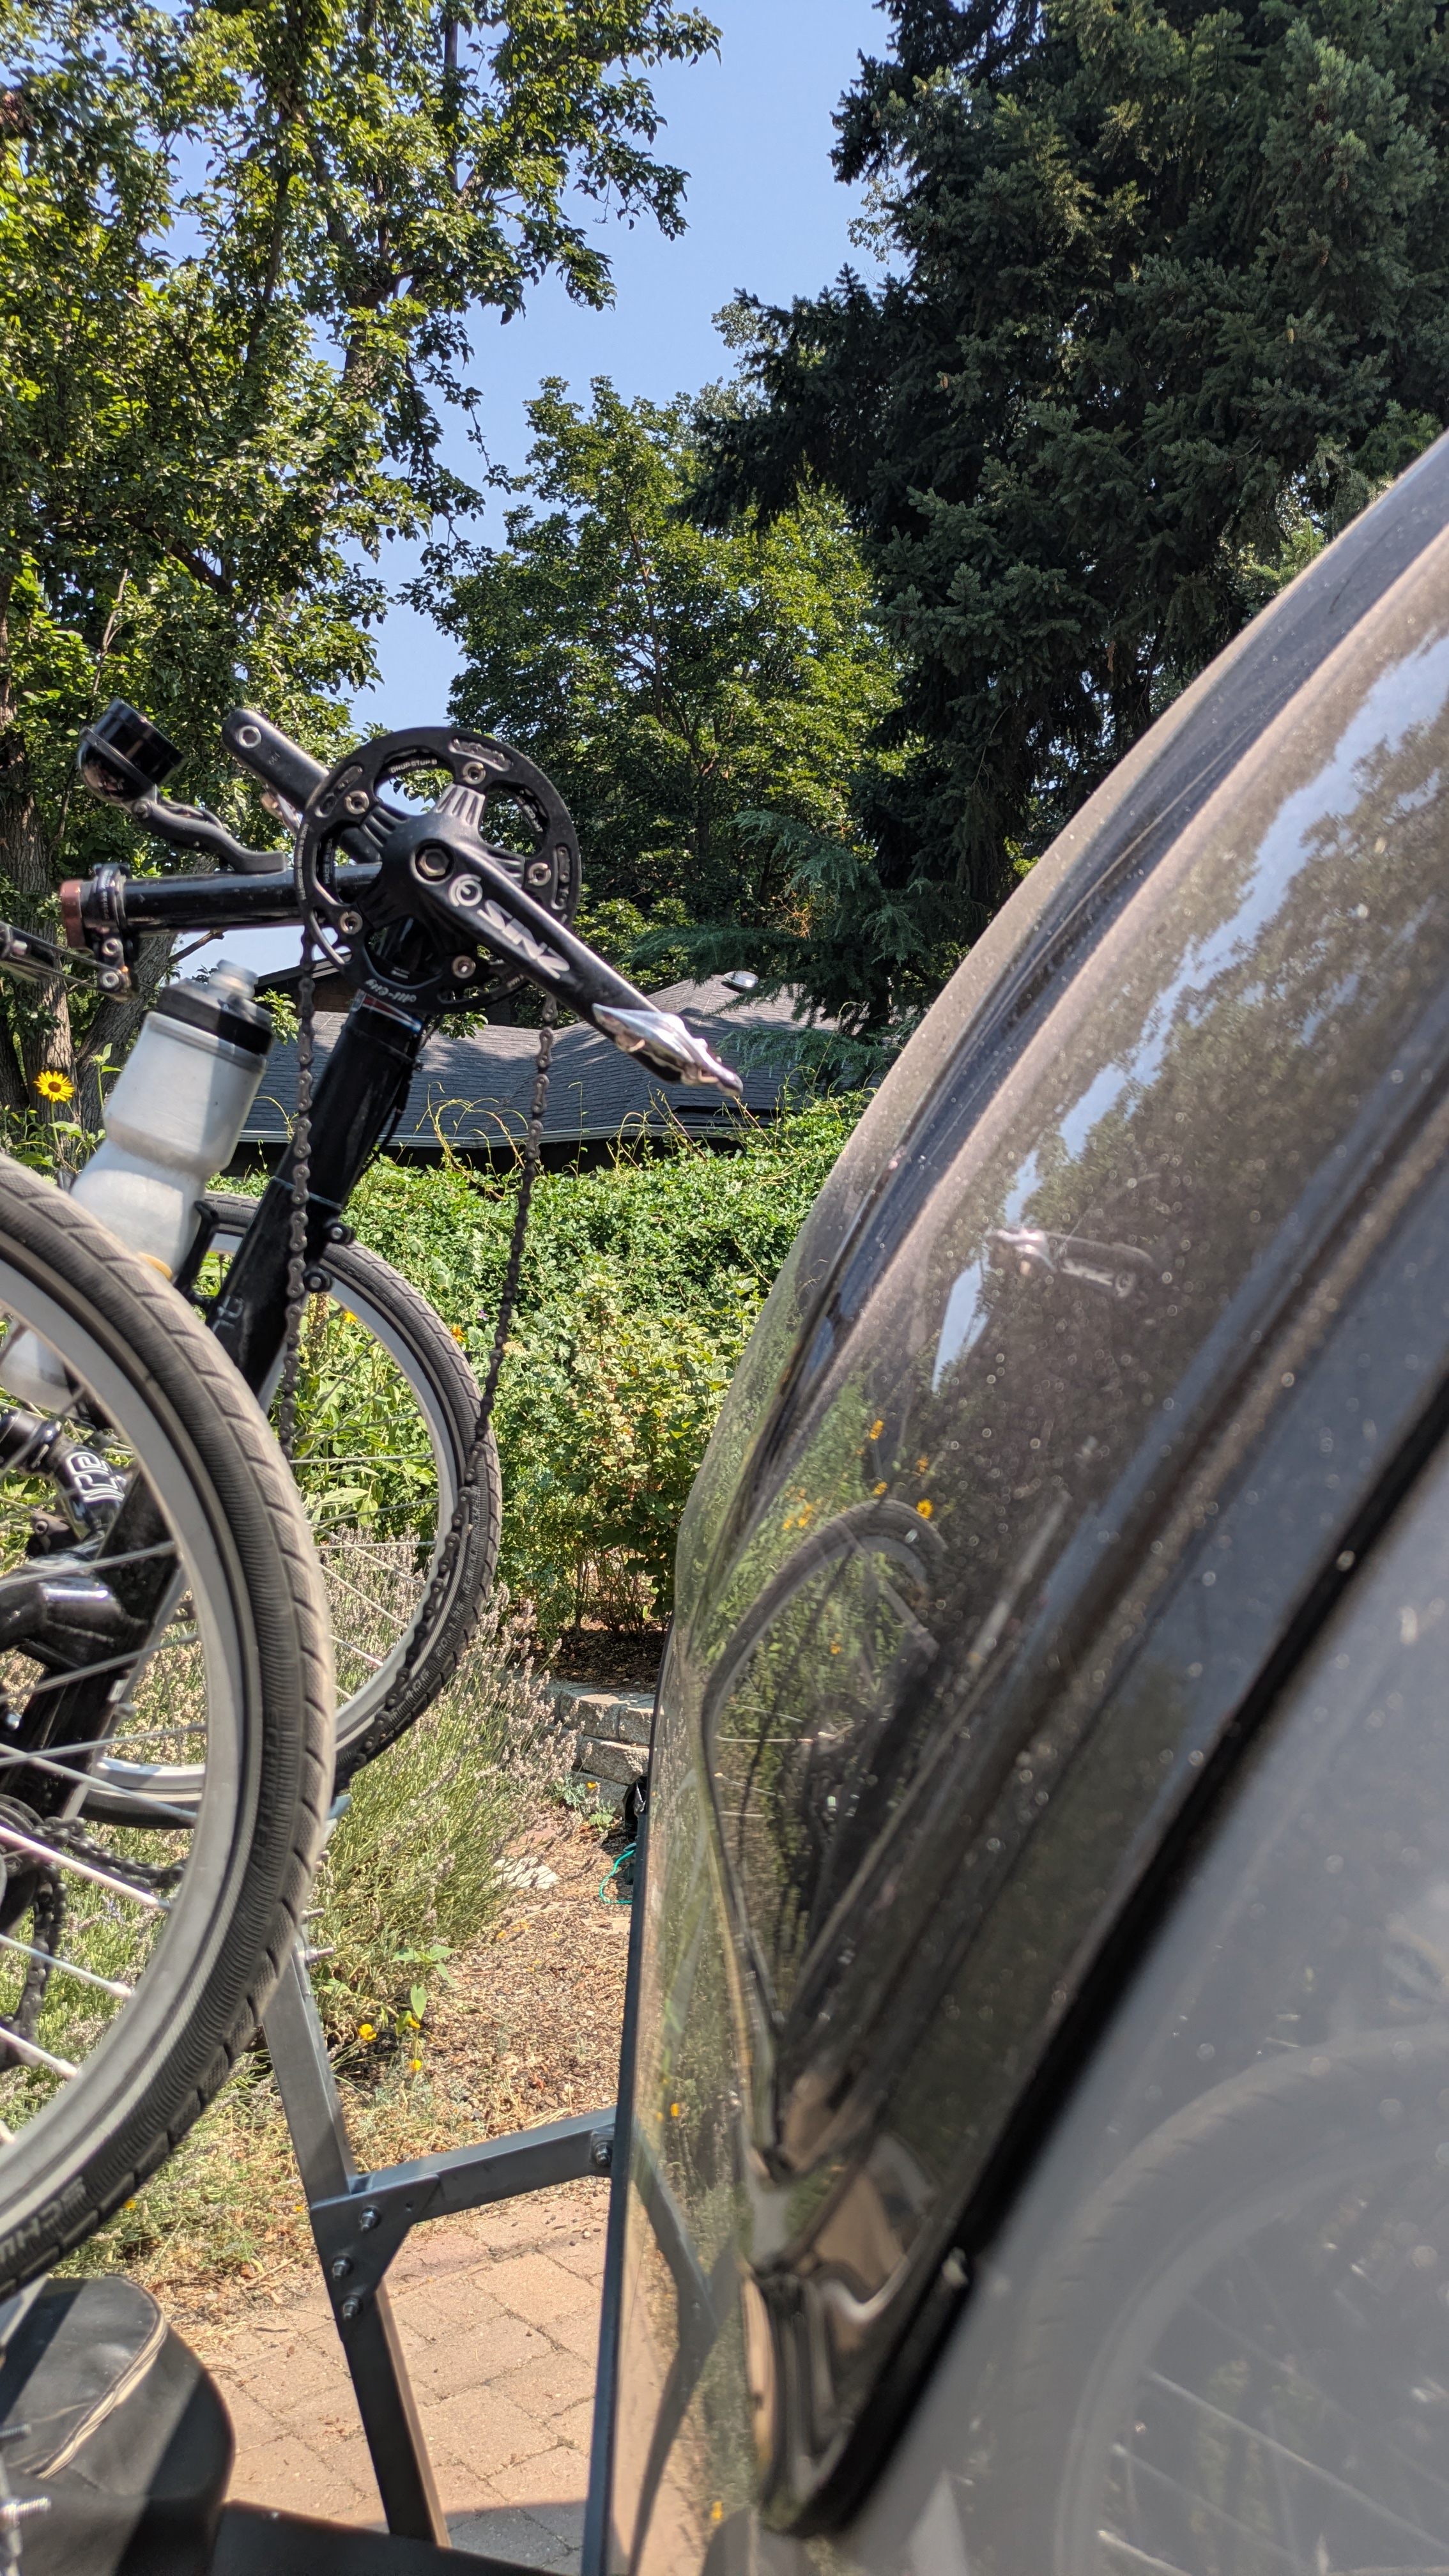
There’s a little more movement at the crank than I expected, the pedals might be a little close to the window. When I took the video, the window was cracked open a couple of inches. With the trailer resting and the window closed, the closest distance between pedal and window is 3″. Probably fine but I’ll strap the crank arm to the boom to keep it well out of the way. This will also prevent the chain from potentially slapping against the window.
The rack intentionally has a small amount of controlled compliance. The video below shows the motion while inducing movement between the trailer brackets.
Update #2
After schlepping the trike on this rack around the western US for a month (I forgot my cycling shoes), there is good news and bad news. The good: I detect no change in range. The bad: early in the trip, the trike tried to eject itself from the rack on an incredibly rough road between Logan and Garden City, UT. It slipped forward slightly and jammed itself on top of the propane tanks, where it stayed until I noticed it at our destination that day at Sunrise Campground above Bear Lake. It left a small ding in the back of the Tesla but otherwise no detectable damage.
To address this weakness, I added another strap around the trike hinge that rests on the jack cap and attached it to each vertical rack tube. This provides more resistance to the trike shifting forward (toward the tow vehicle). It’s not ideal because the rack is allowed to move as the trailer flexes, this could either nullify the restraint or cause it to pull the trike backward. And the combination of the forward and backward restraints constrains the rack motion more than I’d like. But this arrangement survived the remainder of the monthlong trip with no more ejections and no apparent damage to the trailer attachments.